Valentine brownies are the ultimate from-scratch chocolate treat that combines intensely fudgy texture with festive decorations perfect for celebrating love and friendship. These easy valentine’s day brownies use a simple one-bowl method that delivers bakery-quality results without any complicated techniques or specialized equipment. The secret to their incredible fudginess lies in melting butter and chocolate together first, creating a rich base that produces those coveted crackly tops and gooey centers everyone craves.
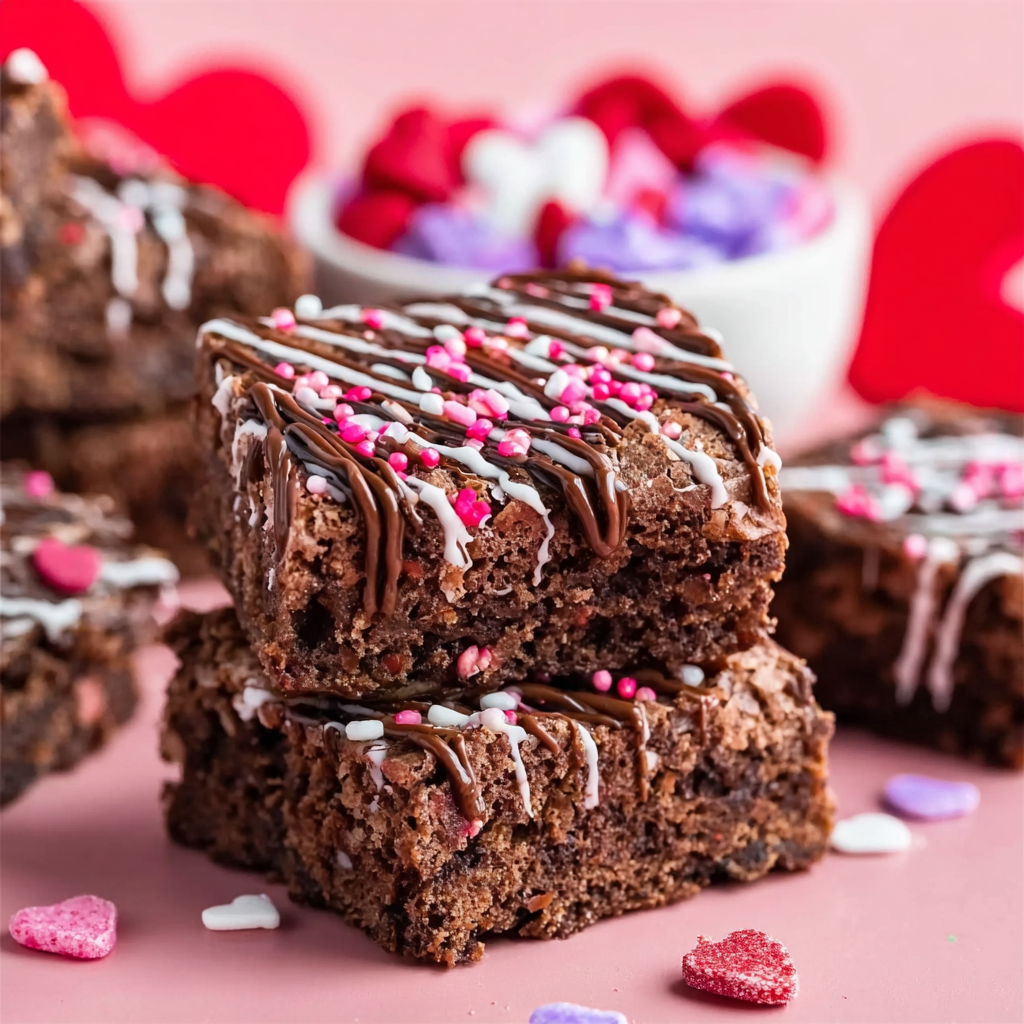
The decorative chocolate drizzle and Valentine sprinkles transform these brownies from everyday dessert into stunning celebration treats that look professionally crafted. Whether you’re baking for classroom parties, romantic dinners, Galentine’s gatherings, or simply treating yourself, these brownies deliver impressive results with minimal effort and maximum chocolate satisfaction.
Why You’ll Love This Valentine Brownies Recipe
This recipe takes the intimidation out of homemade brownies with a foolproof one-bowl method that works perfectly every time. By melting the butter and chocolate together on the stovetop, you create an emulsified base that guarantees fudgy texture without any risk of overbaking. The entire mixing process happens in one saucepan or bowl, making cleanup remarkably easy for such an impressive dessert.
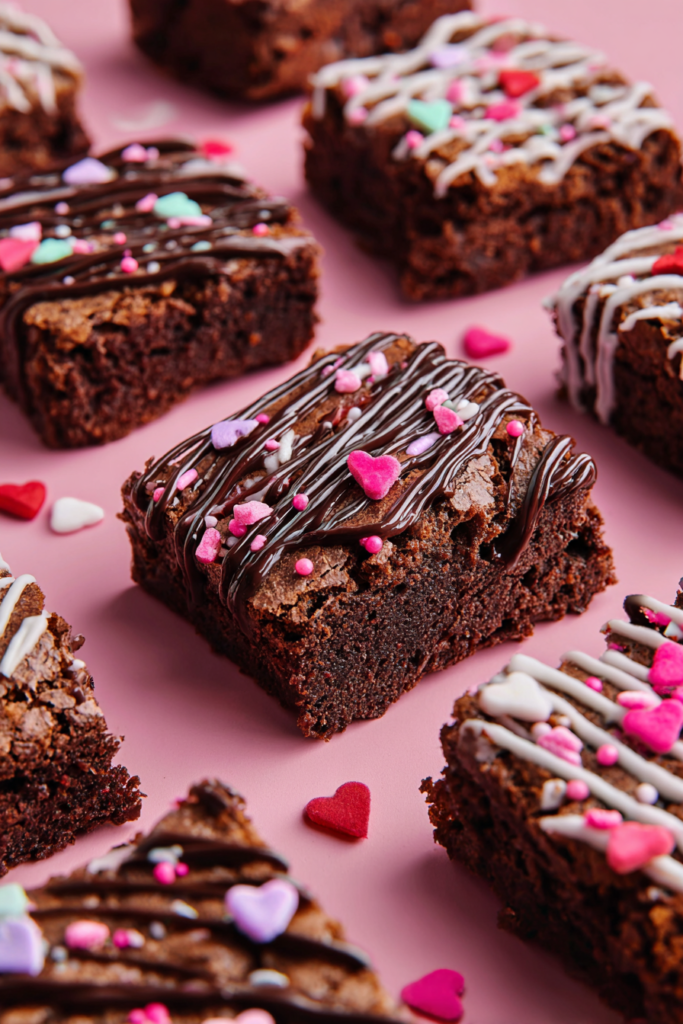
The decoration step is where these brownies truly shine for Valentine’s Day. The chocolate drizzle creates beautiful patterns across each square, while heart-shaped sprinkles and festive colors make them instantly recognizable as Valentine treats. You can customize the decoration colors to match your celebration theme—classic red and pink, elegant dark chocolate and white, or vibrant rainbow for friendship celebrations.
These brownies cut beautifully into 24 perfect squares, making them ideal for sharing at parties, packaging as gifts, or bringing to classroom celebrations. They stay fresh at room temperature for up to a week and freeze beautifully, so you can make them ahead without sacrificing quality or flavor.
Ingredients for Valentine Brownies
Brownie Base
- 1 cup unsalted butter – Creates rich, fudgy texture
- ½ cup semi-sweet chocolate morsels – Adds extra chocolate depth
- 2 cups granulated sugar – Provides sweetness and crackly top
- 4 large eggs – Binds ingredients and creates structure
- 1 teaspoon vanilla extract – Enhances chocolate flavor
- ¾ cup unsweetened cocoa powder – Delivers intense chocolate taste
- 1 cup all-purpose flour – Provides just enough structure
- ½ teaspoon kosher salt – Balances sweetness and enhances flavors
- ½ teaspoon baking powder – Creates slight lift without making them cakey
Festive Garnish
- 5 oz Ghirardelli dark or milk chocolate melting wafers – Creates smooth drizzle (about half a package)
- Red, pink, or white melting wafers (optional) – For colorful decorative drizzles
- Valentine’s sprinkles – Heart shapes, pink and red jimmies, or themed decorations
Ingredient Notes
Butter Quality: Use real unsalted butter rather than margarine for the best flavor and texture. The butter’s fat content is crucial for achieving that signature fudgy consistency.
Chocolate Options: Semi-sweet chocolate chips work perfectly, but you can substitute dark chocolate chips for deeper flavor or milk chocolate for sweeter brownies. Adding extra chocolate chips into the batter creates pockets of melted chocolate throughout.
Cocoa Powder: Use Dutch-process or natural unsweetened cocoa powder. Dutch-process creates darker color and mellower flavor, while natural cocoa provides more intense chocolate taste.
Eggs: Room-temperature eggs incorporate more smoothly into the batter. If your eggs are cold, place them in warm water for 5 minutes before using.
Melting Wafers: Ghirardelli melting wafers work beautifully for drizzling because they melt smoothly and set with a glossy finish. Candy melts or almond bark work as alternatives, though the flavor won’t be quite as rich.
Sprinkle Selection: Choose Valentine-themed sprinkles like hearts, conversation hearts, red and pink jimmies, or sugar pearls. Apply them immediately after drizzling while the chocolate is still wet so they adhere properly.
Step-by-Step Instructions
Step 1 – Prepare Your Pan
Preheat your oven to 350°F. Line a 13×9-inch baking dish with parchment paper, leaving overhang on two sides for easy removal later. This step is essential for lifting the brownies out cleanly and cutting perfect squares. Set the prepared pan aside.
Step 2 – Create the Chocolate Base
In a medium saucepan, melt the butter over medium heat until completely liquid. Remove the pan from heat immediately and add the semi-sweet chocolate morsels and granulated sugar. Stir continuously until the chocolate melts completely into the butter and sugar, creating a smooth, glossy mixture. This takes about 2-3 minutes of stirring as the residual heat melts the chocolate.
Step 3 – Add Eggs and Vanilla
Add the eggs one at a time to the chocolate mixture, stirring thoroughly after each addition until fully incorporated. This gradual addition creates a smooth, emulsified batter. After all eggs are mixed in, stir in the vanilla extract until evenly distributed throughout the mixture.
Step 4 – Fold in Dry Ingredients
Add the cocoa powder, all-purpose flour, salt, and baking powder directly to the saucepan. Using slow, deliberate strokes with a wooden spoon or spatula, fold the dry ingredients into the wet mixture. Stir just until you no longer see dry ingredients—this is crucial. Overmixing develops gluten and creates cakey rather than fudgy brownies. Stop stirring the moment the batter looks uniform.
Step 5 – Bake to Perfection
Pour the brownie batter into your prepared pan, using a spatula to spread it evenly into the corners. Bake for 22-24 minutes. The brownies are done when the edges look set and the center appears slightly underdone with a few moist crumbs on a toothpick. Do not overbake—they’ll continue cooking as they cool. Remove from the oven and let cool completely in the pan, at least 15 minutes or up to several hours.
Step 6 – Cut into Squares
Once completely cool, use the parchment overhang to lift the entire brownie slab from the pan. Place it on a cutting board and use a sharp knife to cut into 24 squares (6 rows by 4 rows). For the cleanest cuts, wipe your knife between each cut.
Step 7 – Decorate with Chocolate Drizzle
Melt the chocolate wafers according to package directions—typically 30-second microwave intervals, stirring between each, until smooth. Transfer the melted chocolate to a ziplock bag and snip off a small corner. Line a cookie sheet with fresh parchment paper. Drizzle the chocolate over each brownie square in your desired pattern—zigzags, parallel lines, or random swirls all look beautiful. If using colored melting wafers, repeat the process with pink, red, or white chocolate for festive contrast.
Step 8 – Add Sprinkles and Set
Immediately after drizzling, sprinkle Valentine decorations over the wet chocolate so they adhere properly. Transfer decorated brownies to a clean sheet of parchment paper and let them sit at room temperature until the chocolate hardens completely, about 30 minutes. For faster setting, refrigerate for 10-15 minutes.
Pro Tips for Success
Don’t Overstir: The biggest mistake in brownie-making is overmixing after adding flour. Use gentle folding motions and stop the moment you don’t see dry streaks. This preserves the fudgy texture.
Use Parchment Paper: Lining your pan makes removal foolproof and cleanup effortless. You can also use aluminum foil sprayed with cooking spray if you don’t have parchment.
Check Early: Start checking your brownies at 22 minutes. Oven temperatures vary, and it’s better to slightly underbake than overbake. The center should look barely set.
Cool Completely Before Cutting: Warm brownies are too soft to cut cleanly. For the neatest squares, let them cool completely or even chill them in the refrigerator for 30 minutes before cutting.
Ziplock Bag Drizzling: Transferring melted chocolate to a ziplock bag with the corner snipped gives you perfect control over drizzle patterns. It prevents clumpy, uneven chocolate application.
Make Thicker Brownies: For extra-thick brownies, use a 9-inch square pan instead of 13×9 and increase baking time to 35 minutes. Check out our stuffed red velvet cookies for more indulgent dessert ideas.
Flavor Variations
Peppermint Valentine Brownies: Add ½ teaspoon peppermint extract to the batter and top with crushed candy canes or peppermint candies along with the sprinkles for a refreshing twist.
Raspberry Swirl Brownies: Swirl 3-4 tablespoons of raspberry jam into the batter before baking, then drizzle with white chocolate and fresh raspberries on top.
Salted Caramel Valentine Brownies: Drizzle with caramel sauce along with the chocolate and sprinkle with flaky sea salt for sweet-salty perfection.
Nutella Stuffed Brownies: Drop spoonfuls of Nutella on top of the batter and swirl gently before baking. Pair with our peanut butter Nutella cookies for a chocolate-hazelnut dessert spread.
White Chocolate Valentine Brownies: Use white chocolate chips in the batter and drizzle with pink and red melting wafers for an elegant presentation similar to our white chocolate stuffed cookies.
Serving Suggestions
Serve Valentine brownies at room temperature for the fudgiest texture and fullest chocolate flavor. Arrange them on a heart-shaped platter or tiered serving stand for Valentine’s Day parties. They pair beautifully with vanilla ice cream, fresh strawberries, or a glass of cold milk.
For romantic presentations, plate individual brownies with a dusting of powdered sugar and fresh raspberry sauce. Package them in clear cellophane bags tied with red ribbon for classroom valentines or teacher appreciation gifts. They also make impressive additions to dessert charcuterie boards alongside fresh fruit, chocolate-covered strawberries, and other sweet treats.
Storage and Freezing Instructions
Room Temperature: Store brownies in an airtight container at room temperature for up to one week. Layer parchment paper between stacks to prevent the decorated tops from smudging.
Refrigerator: Refrigerated brownies stay fresh for up to two weeks in an airtight container. Let them come to room temperature for 15 minutes before serving for the best fudgy texture.
Freezing: Freeze undecorated brownies wrapped tightly in plastic wrap, then placed in freezer bags for up to three months. Thaw at room temperature and add decorations just before serving. You can also freeze decorated brownies, though the sprinkles may lose some color intensity.
Nutrition Facts (Per Serving)
| Nutrient | Amount |
|---|---|
| Calories | 185 |
| Protein | 2.5g |
| Carbohydrates | 26g |
| Fat | 9g |
| Fiber | 1.5g |
| Sodium | 65mg |
Based on 24 servings. Nutritional values are approximate.
FAQ About Valentine Brownies
How do I know when valentine brownies are done baking?
Valentine brownies are done when the edges look set and pull slightly away from the pan, while the center still appears slightly underdone and jiggly. A toothpick inserted in the center should have moist crumbs clinging to it, not wet batter but definitely not clean. Remember that brownies continue cooking from residual heat after leaving the oven, so pulling them when they look barely done ensures fudgy rather than cakey texture.
Can I make these brownies ahead of time?
Absolutely! These brownies actually taste better the day after baking as the flavors develop and meld together. Make them up to three days ahead and store at room temperature, adding the decorative chocolate drizzle and sprinkles on the day you plan to serve them for the freshest appearance. For longer advance preparation, freeze undecorated brownies and decorate after thawing.
Why are my brownies cakey instead of fudgy?
Cakey brownies usually result from overmixing the batter after adding flour, which develops gluten and creates cake-like texture. Another common cause is overbaking—even one or two extra minutes can transform fudgy brownies into dry, cakey ones. Finally, measuring flour incorrectly by packing it into the measuring cup adds too much flour, so spoon flour into the cup and level it off for accurate measurement.
Can I use different decorations besides chocolate drizzle?
Yes! Try cream cheese frosting tinted pink or red, buttercream piped into heart shapes, royal icing designs, or simply dust with powdered sugar and add fresh berries. Edible glitter, gold leaf, or heart-shaped candies also create beautiful Valentine presentations without chocolate drizzle.
These Valentine brownies prove that homemade treats don’t require professional baking skills or complicated techniques to look and taste absolutely incredible. The simple one-bowl method delivers consistently fudgy results, while the festive decorations transform ordinary brownies into celebration-worthy desserts that impress everyone who sees and tastes them. Whether you’re celebrating romantic love, friendship, or simply enjoying chocolate on a Tuesday, these brownies deliver pure joy in every bite.


