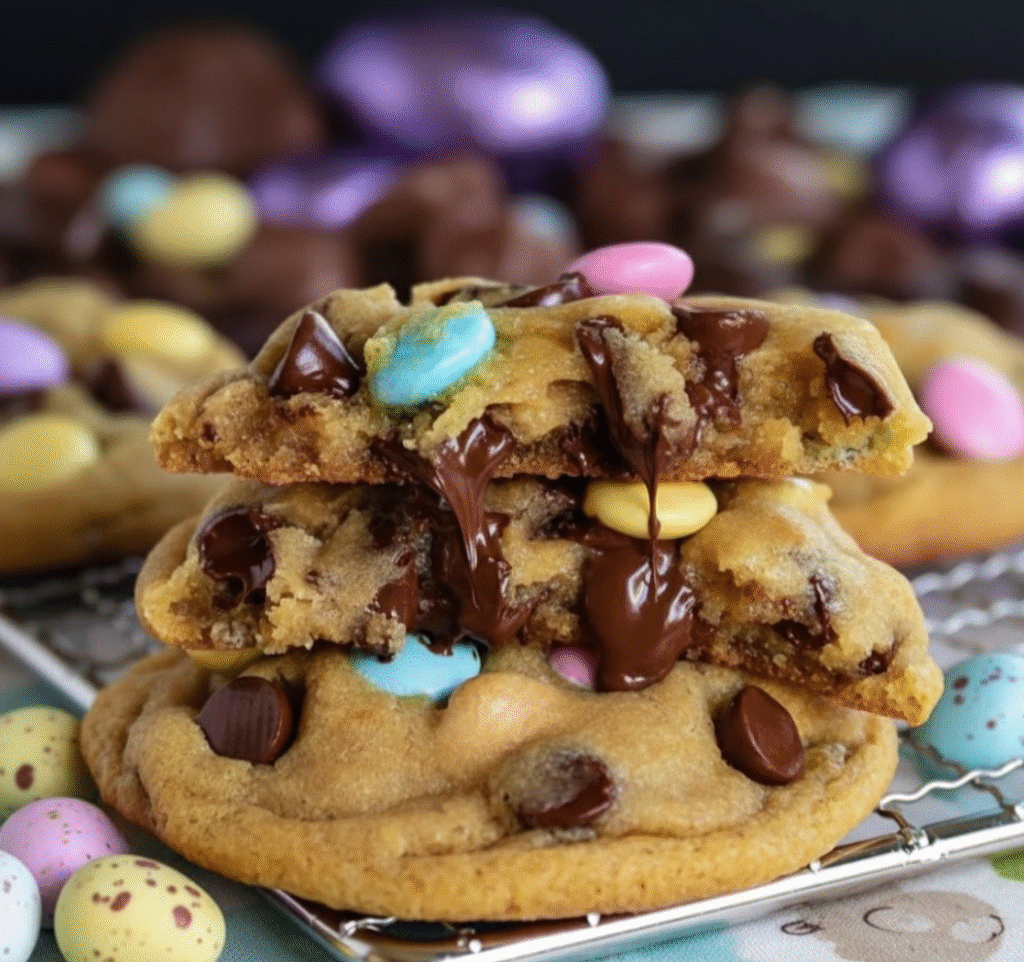
There’s something truly special about a warm, gooey chocolate chip cookie, and when Easter rolls around, I always find myself wanting to add a little festive magic to this classic comfort food. For years, I was on a quest for the perfect Easter cookie—one that wasn’t just a regular cookie with pastel candies thrown in. I wanted a cookie that was thick, incredibly chewy, loaded with flavor, and beautiful enough to be the centerpiece of our family’s dessert table.
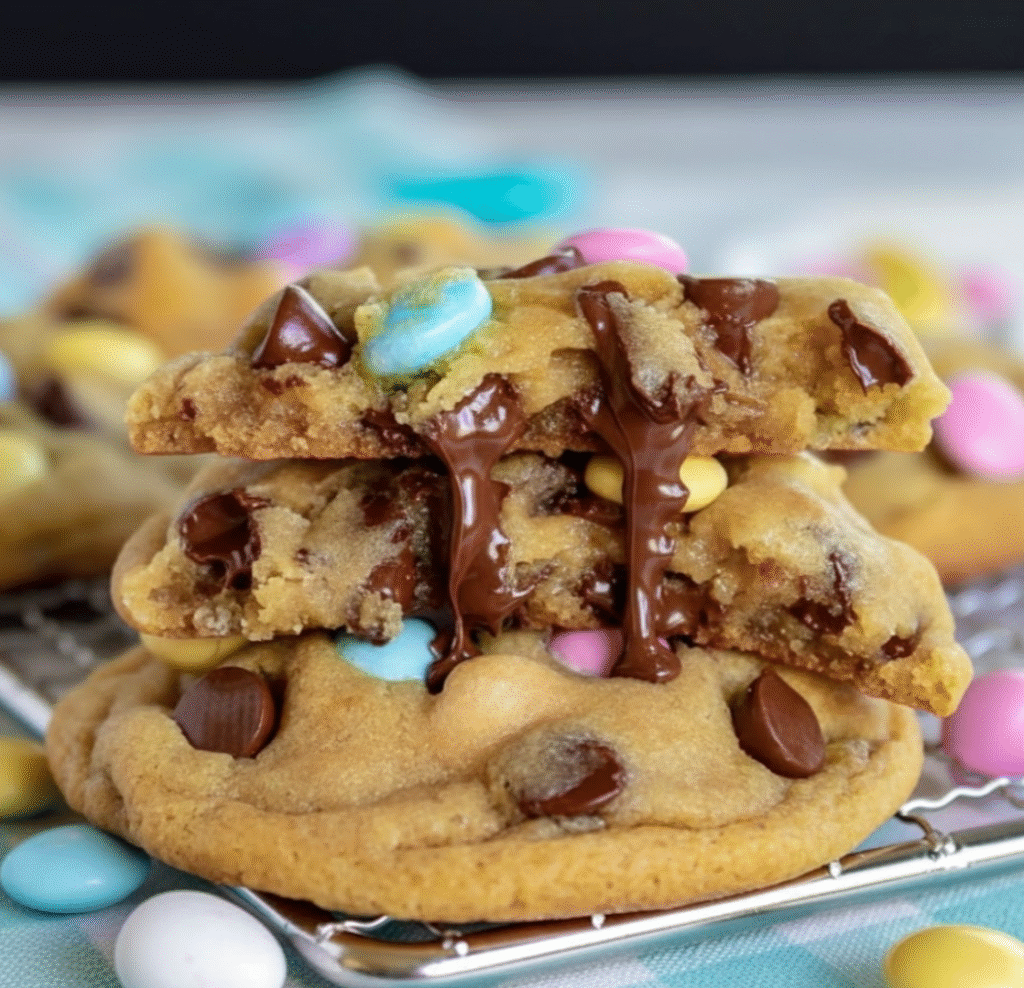
After more than nine dedicated attempts—adjusting flour, tweaking sugar ratios, and testing chill times—I finally landed on this recipe. This is it. This is the one my family now begs for every single spring. These Easter Chocolate Chip Cookies are everything you could dream of: a rich, buttery dough, pools of melted semi-sweet chocolate, and that satisfying crunch from the colorful M&M shells.
They are, without a doubt, the best I’ve ever made, and I’m so excited to share my tried-and-true method with you.
Why This is The BEST Easter Cookie Recipe
This isn’t just another cookie recipe; it’s a carefully crafted formula for success. Here’s what makes it stand out from the rest:
- Perfectly Chewy Texture: The secret combination of brown sugar, a touch of cornstarch, and a crucial chilling period guarantees a soft, chewy center that stays soft for days.
- Thick & Puffy (No Flat Cookies!): By freezing the dough balls before baking, we prevent the dreaded spread, ensuring every cookie is delightfully thick and substantial.
- Rich, Balanced Flavor: Using more brown sugar than white gives these cookies a deeper, more caramel-like flavor that perfectly complements the semi-sweet chocolate and candy shells.
- Festive and Fun: The bright, pastel Easter M&Ms make these cookies a joy to look at and even more fun to eat. They’re perfect for class parties, family gatherings, or just a special treat for your loved ones.
- Make-Ahead Friendly: You can prep the dough weeks in advance and keep it in the freezer, meaning fresh-baked cookies are just 12 minutes away at any time!
Key Ingredients Explained
The magic of these cookies lies in a few key ingredients working in perfect harmony. Understanding their role is the first step to becoming a cookie-baking expert!
- Unsalted Butter: This is the foundation of our flavor. Using unsalted butter allows you to control the salt content precisely. Make sure it’s properly softened to room temperature—not melted!
- Brown & Granulated Sugar: We use a higher ratio of brown sugar for moisture and chewiness, which creates that delicious soft texture and caramel flavor. The granulated sugar helps the edges get that classic, slightly crisp cookie texture.
- Cornstarch: This is my secret weapon! Just two teaspoons of cornstarch make the cookies incredibly tender and helps keep them thick and soft.
- Baking Soda: This is our leavening agent. It reacts with the brown sugar to give the cookies a gentle lift and spread.
- All-Purpose Flour: Provides the structure for the cookie. Remember to measure your flour correctly (spoon and level, don’t scoop!) to avoid dense, dry cookies.
- Semi-Sweet Chocolate Chips: The classic choice for a reason! They provide a rich chocolate flavor that isn’t overly sweet, balancing the M&Ms perfectly.
- Easter M&Ms: The star of the show! They add a beautiful pop of pastel color and a delightful candy crunch.
Step-by-Step Instructions (With Photos)
Ready to create some Easter magic? Let’s walk through the process together. It’s easier than you think!
Step 1: Combine the Wet Ingredients
First, line a small baking sheet with parchment paper—this will be for chilling your dough balls later. In a large mixing bowl (or the bowl of a stand mixer), cream together your softened butter, brown sugar, and granulated sugar. Beat them on medium speed for about 2-3 minutes until the mixture is light, fluffy, and pale in color. This step incorporates air, which is crucial for texture.
Next, beat in the egg and vanilla extract until everything is thoroughly combined and smooth.
Step 2: Mix the Dry Ingredients & Combine
In a separate, smaller bowl, whisk together the all-purpose flour, cornstarch, baking soda, and salt. Whisking ensures that the leavening and salt are evenly distributed, so you don’t get a salty bite!
Gradually add this dry mixture to your wet ingredients, mixing on low speed. Important: Mix only until the last streaks of flour have disappeared. Overmixing at this stage can make your cookies tough.
Gently fold in your chocolate chips and Easter M&Ms with a spatula until they are just distributed throughout the dough.
Step 3: Scoop and CHILL!
This is the most important step! Using a medium cookie scoop (about 2 tablespoons), scoop the dough and roll it into uniform balls. Place the dough balls onto the parchment-lined baking sheet you prepared earlier. For that extra “wow” factor, you can press a few more M&Ms onto the tops of the dough balls.
Cover the baking sheet with plastic wrap and place it in the freezer for at least one hour. You can even freeze them overnight. Do not skip this step! It’s the secret to thick, non-spreading cookies.
Step 4: Bake to Perfection
When you’re ready to bake, preheat your oven to 350°F (175°C). Line a separate, large baking sheet with parchment paper.
Place the frozen cookie dough balls about 2-3 inches apart on the baking sheet. If they were frozen for more than a few hours, let them sit at room temperature for about 10-15 minutes while the oven preheats.
Bake for 10-12 minutes. The edges should be set and lightly golden, but the centers will look slightly soft and underdone. This is exactly what you want! Pull them from the oven. If you’d like, you can press a few more chocolate chips or M&Ms on top while they’re hot for that perfect bakery look.
Let the cookies cool on the baking sheet for 5-10 minutes. This allows them to set up before you move them. Finally, transfer them to a wire rack to cool completely.
Sofie’s Pro Tips for Perfect Cookies
Over my many test batches, I’ve learned a few tricks that make all the difference.
- Don’t Melt the Butter: Your butter should be softened, meaning you can press a finger into it and it leaves an indent. If it’s greasy or melted, your cookies will spread too much.
- Use a Cookie Scoop: This is the key to getting cookies that are all the same size and bake evenly.
- The “Scoot” Trick: If your cookies come out of the oven a little misshapen, take a round glass or cookie cutter that’s slightly larger than the cookie and “scoot” it around the edges to make it perfectly circular. Do this immediately after they come out of the oven.
- Don’t Overcrowd the Pan: Give your cookies space to spread a little. Baking in batches is always better than cramming them onto one sheet.
More Festive Treats You’ll Love
If you’re in a baking mood and love creating special, stuffed cookies, you’re in the right place! The decadent, chocolatey richness of these Easter cookies reminds me of my fan-favorite Stuffed Red Velvet Cookies, which are perfect for any celebration.
For those who love unique flavor combinations, my Pistachio NYC Cookies are a must-try. And if you have other Easter candy on hand, why not try making my incredible Creme Egg Stuffed Cookies?
And for the ultimate cookie connoisseurs, you can’t go wrong with these two classics:
Storing and Freezing Instructions
One of the best parts about this recipe is how well it stores.
- To Store Baked Cookies: Keep them in an airtight container at room temperature for up to a week. To keep them extra soft, you can add a slice of sandwich bread to the container.
- To Freeze Cookie Dough: Place the scooped dough balls on a parchment-lined sheet and “flash freeze” for an hour. Once solid, transfer them to a freezer-safe zip-top bag. They will keep for up to 3 months. You can bake them straight from frozen; just add 1-2 minutes to the baking time.
Frequently Asked Questions (FAQ)
Do I really need to chill the cookie dough?
Absolutely! Chilling the dough for at least one hour (or freezing it) is the most important step for this recipe. It solidifies the butter, which prevents the cookies from spreading too much in the oven. This results in thicker, chewier cookies. It also allows the flavors to meld together for a richer taste.
Why are my cookies flat?
Flat cookies are usually caused by two things: not chilling the dough long enough, or using butter that is too soft or melted. Make sure your butter is softened to room temperature but not greasy or melted. Chilling the dough balls until they are firm is the best way to prevent spreading.
How do I store these Easter cookies?
Store the cooled cookies in an airtight container at room temperature for up to one week. For extra softness, you can place a slice of bread in the container with them.
Can I make the cookie dough ahead of time?
Yes, this recipe is perfect for making ahead! You can prepare the dough balls and store them in an airtight container in the refrigerator for up to 3 days or in the freezer for up to 3 months. When you’re ready to bake, just place the frozen dough balls on a baking sheet and bake as directed, adding 1-2 extra minutes to the baking time.
I can’t wait for you to try this recipe and share these incredible Easter Chocolate Chip Cookies with your family and friends. They are a true labor of love, and I know they’ll bring a little extra sweetness and joy to your celebration. Happy baking!


