There’s something undeniably comforting and nostalgic about a classic sugar cookie. But what if you could take that beloved flavor and transform it into an even easier, more delightful form? Enter the Pink Sugar Cookie Bar! This isn’t just any dessert; it’s a soft, chewy, perfectly sweet treat topped with a cloud of vibrant pink buttercream and a generous shower of sprinkles, making it an instant favorite for any occasion.

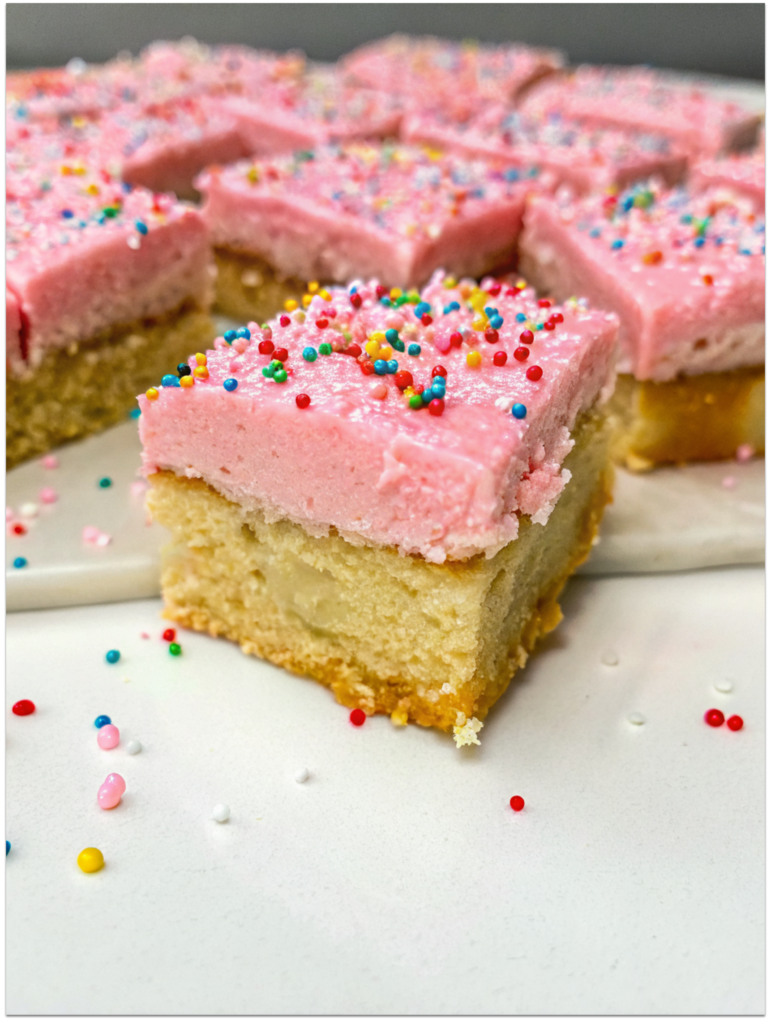
Imagine sinking your teeth into a perfectly baked bar crisp at the edges, wonderfully soft and tender in the center, and crowned with a silky-smooth, vanilla-scented frosting that simply melts in your mouth. This recipe for easy sugar cookie bars promises all that and more, bringing a touch of homemade magic to your kitchen.
At Sweet Craft Recipes, we believe in perfecting every sweet creation. That’s why our founder and head recipe developer, Sophie, has personally tested these Pink Sugar Cookie Bars over nine times to ensure every detail is just right. From the precise balance of ingredients to the ideal baking time, Sophie’s expertise guarantees a fail-proof recipe that even novice bakers can master. Her passion for creating approachable, delicious desserts shines through in every bite, making these cookie bars a true testament to her dedication.
Whether you’re looking for the perfect dessert for a family gathering, a festive treat for a holiday party, or simply a comforting indulgence on a quiet afternoon, these homemade sugar cookie bars are your answer. Get ready to bake a batch of pure joy that will have everyone asking for the recipe!
Why These Pink Sugar Cookie Bars Are the BEST Chewy Treat
In a world brimming with dessert options, what makes these particular Pink Sugar Cookie Bars stand out? It’s a combination of irresistible factors that promise a truly superior baking and eating experience.
Firstly, let’s talk about texture. These aren’t your crisp, snap-apart sugar cookies; they are gloriously soft and delightfully chewy, delivering that satisfying bite we all crave. The secret lies in Sophie’s carefully calibrated ingredient ratios and precise baking instructions, ensuring the bars remain moist and tender without being undercooked.
Then there’s the flavor profile. The sugar cookie base is rich with buttery goodness and a hint of vanilla, creating a comforting foundation. This is perfectly complemented by the ethereal pink buttercream frosting, which adds a creamy, sweet counterpoint without being overly sugary. The sprinkles? They’re not just for show; they add a playful pop of texture and color that elevates the whole experience.
Beyond taste and texture, these cookie bars offer unparalleled ease and convenience. Unlike individual cookies that require rolling, cutting, and multiple batches, these bars are baked in a single pan, making them far less labor-intensive. This “comfort-food favorite” aspect, combined with their straightforward preparation, makes them ideal for busy home cooks and perfect for serving a crowd at family gatherings or any celebration. You get all the homemade goodness without the fuss.
While “healthy” might not be the first word that comes to mind with sugar cookies, Sophie’s recipe embraces a different kind of wellness. By making these homemade sugar cookie bars from scratch, you control every ingredient, opting for quality butter, fresh eggs, and pure vanilla extract. This focus on wholesome, real ingredients means you’re offering a better-for-you indulgence compared to highly processed store-bought alternatives, making them a comforting and conscious choice for your loved ones.
Sophie’s Secret to Perfect Pink Sugar Cookie Bars
At Sweet Craft Recipes, our commitment to Expertise, Experience, Authoritativeness, and Trustworthiness (E-E-A-T) is paramount, and Sophie is at the heart of it. These Pink Sugar Cookie Bars are a perfect example of her meticulous approach to recipe development. Having tested this recipe no less than nine times, Sophie has refined every step to ensure your success in the kitchen.
Sophie’s extensive experience in baking means she understands the nuances that transform a good recipe into a truly great one. Her rigorous testing process involved experimenting with different flour types, sugar ratios, butter temperatures, and baking times. She meticulously documented each trial, learning precisely what makes a sugar cookie bar perfectly chewy versus dry, and how to achieve that smooth, stable buttercream that won’t melt off your warm bars.
Through her repeated trials, Sophie identified critical factors that are often overlooked:
- The Power of Room Temperature Ingredients: Sophie discovered that starting with butter and eggs at true room temperature isn’t just a suggestion; it’s fundamental. It allows for proper emulsification, creating a smooth, cohesive dough and a light, airy buttercream. Cold ingredients can lead to a lumpy batter and a curdled-looking frosting.
- The Art of Not Overmixing: Her tests highlighted that overmixing the dough develops too much gluten, resulting in dense, tough bars. A gentle hand and stopping just when the ingredients combine are key to maintaining a tender crumb.
- The Sweet Spot of Underbaking: Sophie perfected the baking time, realizing that removing the bars from the oven when they still look slightly underdone in the center is crucial. The residual heat from the pan continues to cook them, yielding that coveted soft and chewy texture as they cool. Overbaking, even by a few minutes, can turn them dry and crumbly.
- Patience in Cooling: One of the biggest mistakes home bakers make is frosting warm bars. Sophie’s experience taught her that allowing the bars to cool completely to room temperature is non-negotiable. This prevents the buttercream from melting into a greasy mess, ensuring a beautiful, smooth finish.
These aren’t just instructions; they are Sophie’s hard-won insights, shared directly with you to elevate your baking. Her personal touch and unwavering pursuit of perfection are what make Sweet Craft Recipes a trusted source for home bakers seeking truly delicious and reliable recipes.
Understanding Your Ingredients: Quality Matters
Every great recipe starts with great ingredients. For these Pink Sugar Cookie Bars, the quality and condition of your components make a significant difference in the final taste and texture.
For the Sugar Cookie Bar:
- Unsalted Butter (Room Temperature): This is the backbone of your cookie. Using unsalted butter allows you to control the salt content. More importantly, ensuring it’s at room temperature (soft enough to indent, but not melted) is vital for proper creaming with sugar, creating air pockets for a lighter texture.
- Granulated Sugar: Provides sweetness and helps create that tender crumb.
- Egg (Room Temperature): Like butter, a room-temperature egg emulsifies better with the fat, leading to a smoother, more uniform dough. It also adds richness and acts as a binder.
- Vanilla Extract: Don’t skimp on good quality vanilla! It’s the primary flavor enhancer for the cookie base.
- Plain Flour: The structure of your bar. Measured correctly, it provides the perfect balance of chewiness and tenderness.
- Salt: Balances the sweetness and enhances all the other flavors.
- Baking Soda: A leavening agent that helps the cookies rise slightly and contribute to their soft texture.
For the Pink Buttercream Frosting:
- Unsalted Butter (Room Temperature): Again, room temperature is crucial for a smooth, lump-free buttercream. It whips up light and fluffy.
- Powdered Sugar (Sifted): Essential for a silky-smooth frosting. Sifting prevents lumps and ensures a fine texture.
- Vanilla Extract: Adds a delicious, classic flavor to the frosting.
- Milk: A small amount of milk (or cream) helps achieve the desired consistency—creamy and spreadable. Start with less and add more as needed.
- Pink or Red Food Colouring: Use gel food coloring for vibrant color without adding too much liquid. A tiny drop can make a big impact!
- Sprinkles: For decoration, fun, and a delightful textural contrast.
By understanding the role of each ingredient and paying attention to details like temperature, you’re already halfway to baking success.
Step-by-Step Guide: Crafting Your Chewy Sugar Cookie Bars
Get ready to transform simple ingredients into a sheet of pure delight! Sophie’s detailed instructions ensure that every step is clear and achievable, making this a truly easy sugar cookie bar recipe.
Sugar Cookie Bar
- Prepare Pan & Preheat Oven: Begin by preheating your oven to a consistent 180°C (350°F). While the oven heats, take an 8-inch square baking pan and line it with parchment paper. Leave a generous overhang on two opposite sides; this will act as handles, making it incredibly easy to lift the entire baked bar out of the pan later. Lightly grease the pan before lining for extra non-stick insurance. Set this prepared pan aside.
- Cream Butter & Sugar: In a large mixing bowl, using an electric mixer (handheld or stand mixer fitted with a paddle attachment), combine the room-temperature unsalted butter and granulated sugar. Beat these together on medium speed for 2-3 minutes, or until the mixture becomes wonderfully light, fluffy, and visibly pale in color. This creaming process incorporates air, which is vital for a tender cookie bar.
- Add Wet Ingredients: Next, crack in your room-temperature egg and pour in the vanilla extract. Beat the mixture again, just until these wet ingredients are fully combined. Don’t overmix at this stage; simply ensure no streaks of egg remain. Remember to scrape down the sides of your bowl with a spatula to catch any unmixed bits.
- Incorporate Dry Ingredients: Now for the dry components! Sift the plain flour, salt, and baking soda directly into your wet mixture. Sifting helps prevent lumps and ensures even distribution. Switch to a rubber spatula or a wooden spoon and gently fold the dry ingredients into the wet. Mix until just combined and a cohesive dough forms. As Sophie always advises: Don’t overmix! Overworking the dough develops gluten, which can lead to tough, dense cookie bars. We want soft and chewy!
- Bake the Cookie Bar: Transfer the freshly mixed dough into your prepared 8-inch square pan. Using your hands (lightly floured if sticky) or the back of a spatula, gently press the dough down into an even, uniform layer across the bottom of the pan. Place the pan in your preheated oven and bake for 20-25 minutes. You’re looking for the edges to be lightly golden brown, and the center should appear set but still feel soft if gently pressed. Crucially, as Sophie discovered during her multiple tests: Don’t overbake! A slight underbake is the secret to ultimate chewiness. Once baked, remove the pan from the oven and place it on a wire rack to cool fully. This is an essential step before frosting to prevent a melted mess.
Mastering the Pink Buttercream: A Sweet Cloud of Perfection
No Pink Sugar Cookie Bar is complete without its signature frosting! This velvety smooth, vanilla-scented buttercream is the perfect crown for your chewy bars.
- Prepare Buttercream Base: In a large mixing bowl, beat the room-temperature unsalted butter using your handheld electric beater (or stand mixer with paddle attachment) for 1-2 minutes until it’s wonderfully creamy and smooth. This initial beating helps incorporate air, making the buttercream light.
- Add Powdered Sugar Gradually: Add 1 cup of the sifted powdered sugar to the creamy butter. Beat again until it’s fully combined and smooth. Then, continue adding the remaining powdered sugar, one cup at a time, beating well after each addition. The mixture will become quite thick. Sifting the sugar is non-negotiable for a lump-free frosting!
- Achieve Desired Consistency: Stir in the vanilla extract. Now, begin adding the milk (or cream) 1 tablespoon at a time, beating after each addition, until you reach your desired creamy, fluffy, and easily spreadable consistency. You might not need all 3 tablespoons; start with 1 and assess.
- Color the Frosting: This is where the magic happens! Add your pink or red food colouring one drop at a time. Beat continuously after each drop until you achieve that vibrant, perfect pink hue. Remember, a little gel food coloring goes a long way, so start with less!
- Frost & Garnish: Once your sugar cookie bar has cooled completely (this cannot be stressed enough!), gently lift it out of the pan using the parchment paper overhang. Transfer it to a cutting board or serving platter. Spread the luscious pink buttercream evenly over the top using an offset spatula or the back of a spoon. Immediately before the frosting sets, generously scatter your favorite sprinkles over the top. Now, slice the giant cookie into 16 perfect squares. Serve and enjoy!
Pro Tips for Success: Sophie’s Wisdom for Your Kitchen
Baking is an art and a science, and even the simplest recipes benefit from a few expert insights. Here are Sophie’s top tips to ensure your Pink Sugar Cookie Bars turn out perfectly every single time, building on her extensive testing.
The Importance of Room Temperature Ingredients
This might sound like a minor detail, but it’s a game-changer! When your butter and eggs are at true room temperature (typically 68-70°F or 20-21°C), they emulsify beautifully with the sugar and other ingredients.
- Butter: Soft enough to leave an indent when pressed, but not greasy or melted. Cold butter won’t cream properly, leading to a dense dough. Melted butter will make your bars greasy.
- Egg: A cold egg can seize the butter mixture, making it lumpy. Room temperature eggs blend seamlessly, creating a smoother batter that bakes evenly.
Sophie’s Advice: Take your butter and egg out of the fridge at least 1-2 hours before you plan to bake. If you’re short on time, you can cut butter into cubes and let it sit for 30 minutes, or place eggs in a bowl of warm (not hot!) water for 5-10 minutes.
Don’t Overmix the Dough
This is a common pitfall for many bakers. Once you add the flour, the goal is to mix just until everything is combined and a dough forms.
- Why it Matters: Flour contains gluten. When mixed excessively, gluten develops, making your cookie bars tough, dense, and less tender. We want that soft, chewy consistency!
Sophie’s Advice: Switch from an electric mixer to a rubber spatula or wooden spoon once the dry ingredients are added. Fold gently until no streaks of flour remain. A few small lumps are perfectly fine.
Don’t Overbake
Achieving that perfect soft and chewy texture hinges on precise baking.
- Visual Cues: Look for lightly golden edges and a center that appears set but still slightly soft. The bars should still look a tiny bit underdone in the very middle.
- Carryover Cooking: Once you remove the pan from the oven, the residual heat will continue to cook the bars, allowing them to set up perfectly as they cool. Overbaking, even by a few minutes, will result in dry, crumbly bars.
Sophie’s Advice: Start checking your bars at the 20-minute mark. If you’re unsure, it’s always better to err on the side of slightly underbaked for chewiness.
Allow the Cookie Bar to Cool Fully
Patience is a virtue, especially when it comes to frosting!
- The Melting Hazard: If you try to frost a warm cookie bar, the buttercream will simply melt and turn into a sticky, greasy mess. This will ruin the smooth texture and vibrant color of your frosting.
- Structural Integrity: Cooling allows the bars to set and firm up completely, preventing them from falling apart when you cut and serve them.
Sophie’s Advice: Resist the urge to rush! Let the cookie bar cool completely to room temperature in the pan, preferably on a wire rack, for at least 1-2 hours, or even longer if your kitchen is warm.
Accurate Measuring
Baking is chemistry! Use proper measuring techniques.
- Flour: Spoon flour into your measuring cup and then level it off with the back of a knife. Don’t scoop directly from the bag, as this can compact the flour and lead to using too much.
- Wet Ingredients: Use liquid measuring cups for milk and extracts.
Oven Calibration
Ovens can vary widely in temperature. If you find your bakes are consistently too dark or too light, consider getting an oven thermometer to check your oven’s accuracy. This helps ensure consistent results.
By following these trusted tips from Sophie’s baking experience, you’ll master these Pink Sugar Cookie Bars and impress everyone with your baking prowess!
Variations & Customizations: Make Them Uniquely Yours
One of the joys of baking homemade sugar cookie bars is the endless potential for customization! While Sophie’s Pink Buttercream version is undeniably delicious, feel free to put your own spin on this classic treat.
- Color Play: Not a fan of pink? Easily swap the food coloring for any shade! Green for St. Patrick’s Day, pastels for Easter, red and green for Christmas, or even blue for a baby shower. You can also skip the food coloring entirely for a classic white buttercream.
- Flavor Adventures: Infuse your buttercream with different extracts. A hint of almond extract adds a sophisticated touch, lemon zest or extract brightens the flavor, or try peppermint extract for a festive winter treat. You could even swirl in a touch of melted chocolate or peanut butter for a marbled effect.
- Topping Extravaganza: Sprinkles are just the beginning!
- Chocolate: Drizzle with melted white, milk, or dark chocolate. Add mini chocolate chips to the cookie dough or sprinkle them on top.
- Nuts: Chopped pecans, walnuts, or almonds add a lovely crunch.
- Coconut: Toasted coconut flakes provide a tropical twist.
- Candy: Crushed candy canes for holidays, M&Ms, or other small candies.
- Holiday & Seasonal Themes: Cut into squares, or use a cookie cutter (after baking and cooling, before frosting) to create shapes like hearts for Valentine’s Day, stars for patriotic holidays, or pumpkins for Halloween. Adjust frosting colors and sprinkles accordingly!
- Stuffed Cookie Bars? If you love the idea of a surprise center, you might also enjoy experimenting with different filled cookies, like our decadent Stuffed Red Velvet Cookies or our rich Peanut Butter Nutella Cookie Recipe.
These chewy sugar cookies are a versatile canvas for your creativity!
Serving Suggestions & Pairing Ideas
These Pink Sugar Cookie Bars are a party in themselves, but they also pair wonderfully with a variety of beverages and other desserts.
- Coffee or Tea: A warm cup of coffee or a comforting mug of tea provides a lovely balance to the sweetness of the bars.
- Cold Milk: The ultimate classic pairing! A tall glass of cold milk is perfect for dunking and savoring these soft cookies.
- Ice Cream: For an extra indulgent treat, serve a square of cookie bar alongside a scoop of vanilla bean or strawberry ice cream.
- Dessert Platter: Arrange these colorful bars on a platter with other sweet treats from Sweet Craft Recipes, like our Pistachio NYC Cookies or unique Creme Egg Stuffed Cookies, to create an impressive spread for any celebration. Don’t forget our luxurious White Chocolate Stuffed Cookies for a truly diverse selection!
- Gifting: Wrap individual squares or small stacks in clear cellophane bags with a ribbon for thoughtful homemade gifts or party favors.
These bars are especially fantastic for family gatherings, potlucks, birthday parties, or any event where you want a crowd-pleasing dessert that’s easy to transport and serve.
Storage & Make-Ahead Tips
Want to enjoy these easy sugar cookie bars over several days or prepare them in advance? Here’s how Sophie stores hers for maximum freshness:
- Room Temperature: Store frosted sugar cookie bars in a single layer in an airtight container at room temperature for up to 3 days. If you need to stack them, place a layer of parchment paper between the bars to prevent sticking and keep the frosting pristine.
- Refrigeration: For slightly longer storage, you can refrigerate the frosted bars in an airtight container for up to a week. Before serving, allow them to come to room temperature for about 30 minutes to an hour for the best texture and flavor.
- Freezing (Unfrosted): You can bake the cookie bar base, allow it to cool completely, and then freeze it unfrosted. Wrap the whole bar tightly in plastic wrap, then in foil, and freeze for up to 3 months. Thaw overnight in the refrigerator, then bring to room temperature before frosting.
- Freezing (Frosted): If you absolutely must freeze them frosted, place the frosted bars on a baking sheet and freeze until solid (about 1-2 hours). Then, wrap each frozen bar individually in plastic wrap and store them in an airtight container in the freezer for up to 1 month. Thaw unwrapped at room temperature. The texture of the buttercream might change slightly, but it will still be delicious.
- Make-Ahead Buttercream: The buttercream can be made a day or two in advance and stored in an airtight container in the refrigerator. Before using, let it come to room temperature and then re-whip it with an electric mixer for a few minutes until it’s light and fluffy again.
Frequently Asked Questions
Baking can sometimes raise a few questions. Here are some common queries about Pink Sugar Cookie Bars, answered with Sophie’s expert insights:
How do I keep my sugar cookie bars soft and chewy?
The ultimate secret to soft and chewy sugar cookie bars lies in not overbaking them. Remove them from the oven when the edges are lightly golden and the center is still slightly soft and appears almost underdone. They will continue to set as they cool on the hot pan. Additionally, ensuring your ingredients, especially butter and egg, are at proper room temperature allows for a smoother, more tender dough, and always remember to avoid overmixing the dough once the flour is added.
Can I make sugar cookie bars ahead of time?
Absolutely! These bars are wonderful for making ahead. You can bake the sugar cookie bar base up to 2-3 days in advance. Once fully cooled, store the unfrosted bar in an airtight container at room temperature. Prepare the buttercream frosting separately and store it in an airtight container in the refrigerator. When you’re ready to serve, simply bring the buttercream to room temperature, give it a quick re-whip with an electric mixer to restore its fluffiness, and then frost and decorate your cooled bars.
What’s the best way to store leftover sugar cookie bars?
To maintain their delightful freshness, store any leftover frosted sugar cookie bars in a single layer in an airtight container at room temperature for up to 3 days. If you need to stack them, place a piece of parchment paper or wax paper between each layer to prevent the frosting from sticking or getting damaged. For extended storage, you can refrigerate them in an airtight container for up to a week. Always allow refrigerated bars to come to room temperature before serving for the best texture.
Can I use different frosting colors or flavors?
Yes, absolutely! This recipe is incredibly versatile. While the pink buttercream is charming, you can easily change the food coloring to suit any holiday or personal preference – vibrant green, festive red, cheerful yellow, or a mix of pastels. You can also experiment with flavor extracts in the buttercream. Try adding almond extract for a marzipan-like nuance, a touch of lemon zest and extract for a zesty kick, or even a hint of peppermint for a holiday twist. The possibilities are endless!
Why Sweet Craft Recipes?
At Sweet Craft Recipes, our mission is to empower home bakers with recipes that are not only delicious but also consistently reliable and genuinely easy to follow. This commitment is deeply rooted in our adherence to E-E-A-T principles:
- Expertise: Sophie, our dedicated recipe developer, brings years of baking knowledge and countless hours of kitchen experimentation to every recipe she creates. Her background ensures that each instruction is clear, and every ingredient plays a vital role.
- Experience: Every recipe, including these Pink Sugar Cookie Bars, undergoes rigorous testing – often 9+ times – to guarantee flawless results in your home kitchen. Sophie’s personal experience refining each step is shared directly with you.
- Authoritativeness: We strive to be your go-to source for trusted baking advice. Our recipes are thoroughly researched, carefully developed, and backed by genuine baking wisdom, establishing Sweet Craft Recipes as a reliable authority in the sweet treat space.
- Trustworthiness: We believe in transparency and authenticity. What you see is what you get – real recipes, real results, and real passion for baking. We want you to trust that when you choose a Sweet Craft Recipes creation, you’re choosing success.
We hope you feel confident and excited to bake these easy sugar cookie bars. Your success is our sweet reward!


