Is there anything more satisfying than a sweet treat that requires absolutely no baking, comes together in a flash, and delivers an explosion of flavor and texture? Here at SweetCraft Recipes, we believe in celebrating the simple joys of homemade comfort food, and this Oreo Rocky Road Slice is a shining example. Forget complicated desserts – this is your new go-to for effortless indulgence!
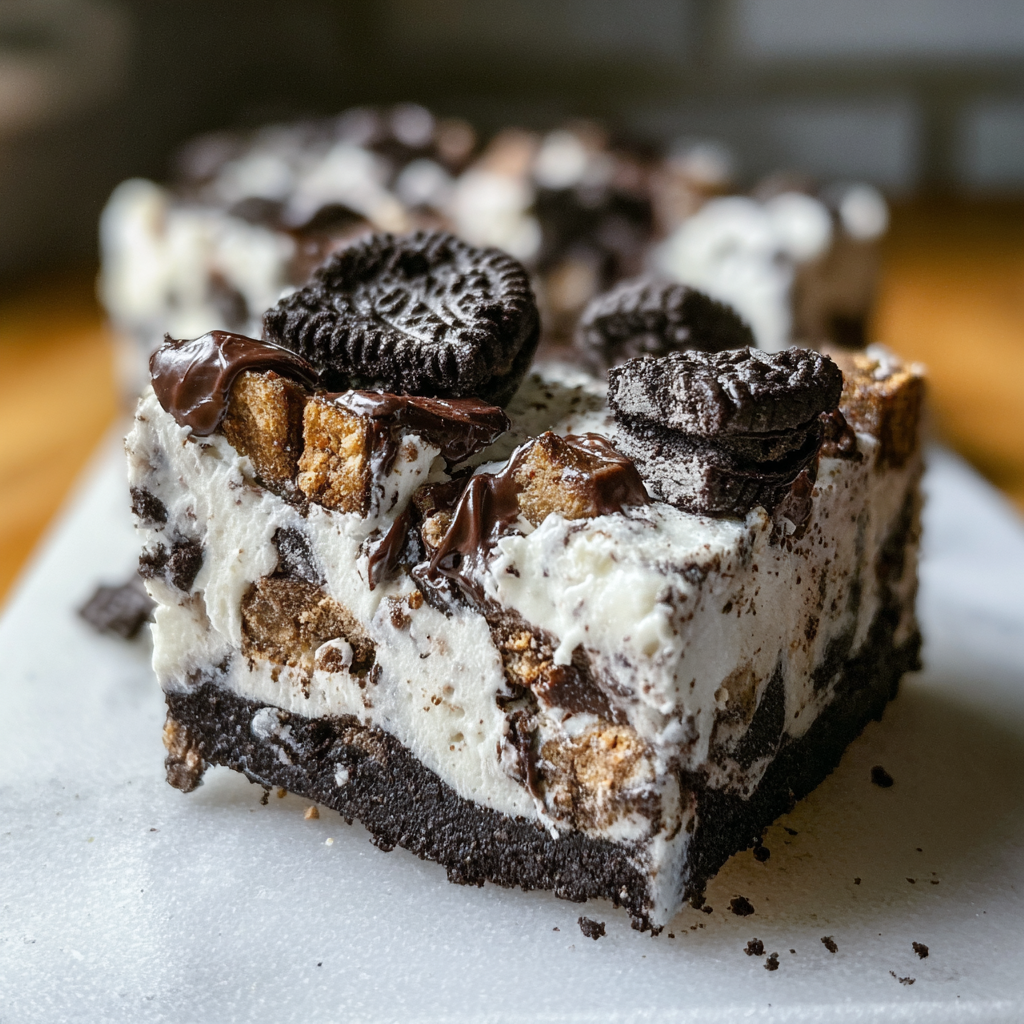
Imagine this: a thick, crunchy Oreo cookie base, topped with a luscious white chocolate mixture studded with even more roughly chopped Oreos and fluffy mini marshmallows. Each bite is a symphony of creamy, crunchy, and chewy textures, perfectly balanced with the iconic taste of everyone’s favorite sandwich cookie. This isn’t just a dessert; it’s a nostalgic trip to childhood, a guaranteed crowd-pleaser, and a true testament to the magic of no-bake recipes.
Why This Oreo Rocky Road Slice Will Become Your New Obsession
In a world full of complex recipes, sometimes all you need is a reliable, utterly delicious, and straightforward dessert. This Oreo Rocky Road Slice ticks all those boxes and more. Here’s why it’s destined to be your next favorite sweet creation:
- Effortlessly Easy & No-Bake: Forget turning on the oven! This recipe is entirely no-bake, making it perfect for hot days, busy schedules, or when you just want a simple win in the kitchen. Most of the time involved is inactive chilling, leaving you free to do other things.
- Speedy Sweet Satisfaction: From start to finish, including chilling time, you’re looking at about 1 hour and 20 minutes. Actual hands-on prep is only about 20 minutes, meaning you can whip up this delightful dessert even on a whim.
- Crowd-Pleasing Powerhouse: Who doesn’t love Oreos and marshmallows drowned in white chocolate? This combination is universally adored, making it the ideal treat for family gatherings, holiday parties, or casual get-togethers with friends. It yields 16 generous squares, ensuring there’s enough for everyone (and maybe even a little extra for you!).
- Texture Heaven: This slice delivers on every textural desire. You get the satisfying crunch from the Oreo base, the creamy melt of white chocolate, and the soft, chewy bite of mini marshmallows. It’s a multi-sensory experience in every square.
- Customizable Fun: While perfect as is, this rocky road is also a fantastic canvas for your creative additions. Add nuts, dried fruit, or other candies to make it uniquely yours.
- Discover-Ready & Shareable: Visually stunning and incredibly approachable, this recipe is designed to captivate. Its vibrant ingredients and simple charm make it perfect for sharing on social media and discovering new fans!
Deconstructing the Dream: Ingredients for Your Oreo Rocky Road Slice
The beauty of rocky road lies in its simplicity, but quality ingredients make all the difference. Here’s what you’ll need and why:
For the Oreo Base:
- 200g Oreo Cookies: The star of our base! Regular Oreos work perfectly. Their distinct chocolatey flavor and crispy texture provide the ideal foundation.
- 40g Unsalted Butter (Melted): The binder that transforms your cookie crumbs into a cohesive, sliceable base. Unsalted allows you to control the overall saltiness.
For the Oreo Rocky Road:
- 600g White Chocolate (Roughly Chopped): This is the canvas for your rocky road. Opt for good quality white chocolate bars or chips. Chocolate labeled as “white confectionery coating” or “candy melts” might not set as firmly or have the same rich, creamy flavor. Look for white chocolate with a higher cocoa butter percentage for the best results. Chopping it roughly ensures it melts more evenly and quickly.
- 240g Oreo Cookies (Roughly Chopped): More Oreos! These get folded into the chocolate mixture, adding incredible crunch and flavor pockets throughout the slice. Rough chopping ensures a good mix of smaller crumbs and larger chunks.
- 60g Mini White Marshmallows: The classic rocky road component! Mini marshmallows are ideal because they disperse evenly and provide those delightful pockets of soft, chewy sweetness.
Quick Ingredient Notes:
- Butter: If you only have salted butter, you can use it, but be mindful that the overall taste might be slightly saltier.
- Oreo Substitutions: While this is an Oreo Rocky Road, you could technically experiment with other cookies like chocolate sandwich cookies or even graham crackers for the base, but the classic Oreo flavor is truly superior here.
- Marshmallow Freshness: Ensure your marshmallows are fresh and soft. Stale marshmallows can be tough.
Step-by-Step Instructions
Ready to create some magic? Follow these simple steps for a perfect Oreo Rocky Road Slice every time.
Part 1: Building the Irresistible Oreo Base
- Prepare Your Pan: Start by lining an 8-inch square baking pan with parchment paper. Make sure to leave an overhang on two opposite sides. This “sling” will be your best friend for easily lifting the entire slice out of the pan once it’s set. Set this prepared pan aside.
- Blitz the Oreos: Take the 200g of Oreo cookies and place them into a food processor. Pulse until they are reduced to fine, uniform crumbs. You want a consistency similar to coarse sand.
- Combine with Butter: Pour the 40g of melted unsalted butter over the Oreo crumbs in the food processor. Blitz again for a few more seconds until the butter is fully incorporated, and the mixture resembles wet sand. It should hold together when pressed.
- Form the Base: Transfer the buttery Oreo mixture into your prepared pan. Using the back of a spoon, a flat-bottomed glass, or your clean fingertips, press the mixture down firmly and evenly across the bottom of the pan. This creates a compact, delicious base. Set aside in the fridge while you prepare the rocky road topping.
Part 2: Assembling the Luscious Oreo Rocky Road
- Prep the Mix-ins: In a large mixing bowl, combine 200g of the roughly chopped Oreos (from your 240g batch) and all the 60g mini white marshmallows. Give them a quick stir to distribute them.
- Melt the White Chocolate: Place the 600g of roughly chopped white chocolate into a microwave-safe bowl. Microwave in 30-second intervals, stirring thoroughly after each burst. White chocolate can seize easily if overheated, so go slowly! Continue until the chocolate is completely melted and smooth, with no lumps remaining. Alternatively, you can melt it over a double boiler.
- Combine and Coat: Pour the melted white chocolate directly over the Oreo pieces and marshmallows in your large mixing bowl. Using a sturdy spatula, fold everything together until all the Oreos and marshmallows are thoroughly coated in the luxurious white chocolate. You want a uniform distribution of all the components.
- Layer and Spread: Immediately pour the rocky road mixture over your prepared Oreo base in the square pan. Using your spoon or spatula, gently spread the mixture evenly to cover the base completely. Don’t press too hard, just ensure an even layer.
- Final Touches & Chill: Take the remaining 40g of chopped Oreos and sprinkle them generously over the top of the rocky road mixture. For a better hold, gently press them into the chocolate just slightly. Now, the waiting game begins! Place the pan in the refrigerator for at least one hour, or until the white chocolate has fully set and is firm to the touch. For a super firm set, you can even leave it for 2-3 hours.
- Cut and Enjoy! Once completely set, use the parchment paper overhangs to lift the entire slice out of the pan and onto a cutting board. Using a sharp knife, cut the rocky road into 16 even squares. For cleaner cuts, you can run your knife under hot water and wipe it clean between cuts.
And there you have it – your absolutely irresistible Oreo Rocky Road Slice, ready to be devoured!
Pro Tips for Rocky Road Perfection
Even though this recipe is designed to be easy, a few extra tips can elevate your Oreo Rocky Road Slice from great to absolutely phenomenal:
- Quality Chocolate Matters: As mentioned, investing in a good quality white chocolate will make a noticeable difference. It melts smoother, tastes richer, and sets more reliably. Avoid chocolate flavored melts if possible.
- Don’t Overheat the Chocolate: When melting white chocolate, low and slow is the way to go. Overheating can cause it to seize, becoming thick and grainy. If it does seize, sometimes adding a tiny bit of vegetable oil (1/2 teaspoon at a time) and stirring vigorously can rescue it, but it’s best to avoid it altogether.
- Even Base Pressure: When forming the Oreo base, press it down firmly and evenly. A well-compacted base prevents crumbling and provides a sturdy foundation for the rocky road layer.
- Chill Thoroughly: Resist the urge to cut into your rocky road before it’s fully set. Adequate chilling ensures clean, crisp squares and a delightful snap when you bite in. If your kitchen is warm, it might need a little extra time in the fridge.
- Clean Cuts: For the neatest squares, use a long, sharp knife. You can warm the blade under hot water and wipe it dry between each cut. This helps prevent the chocolate from cracking and gives you those picture-perfect slices.
- Consider the Base Option: The recipe includes an Oreo base, which adds an incredible layer of texture and flavor. However, as noted in the recipe, you can certainly skip the base if you’re in an even bigger rush or prefer a simpler rocky road. The rocky road mixture itself is fantastic!
Serving Suggestions & Storage
This Oreo Rocky Road Slice is incredibly versatile and makes a fantastic addition to almost any occasion.
- Party Platter: Cut into smaller bite-sized pieces for an impressive dessert platter. It pairs beautifully with other simple sweets.
- Coffee or Tea Time: Enjoy a square (or two!) with your favorite hot beverage for a delightful afternoon pick-me-up.
- Gift Idea: Package a few squares in a cute box or bag for a homemade gift that everyone will appreciate. It’s especially lovely during the holidays!
- Dessert Table Companion: Serve alongside other sweet treats. If you’re looking for more cookie inspiration, why not try our Stuffed Red Velvet Cookies or our decadent Peanut Butter Nutella Cookie Recipe? They would make a delightful spread!
Storage Instructions:
Store any leftover Oreo Rocky Road Slice in an airtight container in the refrigerator for up to 1 week. It tastes fantastic chilled, and the textures hold up beautifully. For longer storage, you can freeze individual squares wrapped tightly in plastic wrap for up to 1 month. Thaw in the refrigerator before serving.
Creative Variations & Customizations
One of the best things about rocky road is how easy it is to customize! While the Oreo Rocky Road Slice is perfect as written, don’t hesitate to get creative with additional mix-ins.
- Nutty Additions: Fold in some chopped almonds, pecans, walnuts, or even salted peanuts for extra crunch and a savory counterpoint to the sweetness.
- Fruity Fun: Dried cranberries, cherries, or chopped apricots can add a lovely tang and chewiness.
- Pretzel Perfect: Crushed pretzels add a fantastic salty-sweet dynamic and an extra layer of crunch.
- Candy Crazy: Add mini chocolate chips, chopped candy bars (like Snickers or Kit Kats), or even M&Ms for bursts of extra flavor and color.
- Different Chocolate: While this recipe highlights white chocolate, you could certainly experiment with milk or dark chocolate for a different flavor profile. Or even do a swirl of two types!
- Festive Flair: For holidays, add some festive sprinkles to the top before chilling, or swap out some marshmallows for holiday-themed candies.
- White Chocolate Stuffed Cookies: If you love white chocolate, you might also enjoy exploring our White Chocolate Stuffed Cookies for another delightful dessert experience!
Just remember to keep the total quantity of mix-ins balanced so the chocolate can still effectively bind everything together. A good rule of thumb is to keep the total “add-ins” (Oreos + marshmallows + any extras) to roughly the same volume as the chocolate.
Frequently Asked Questions (FAQs) About Oreo Rocky Road Slice
Have a question about making the perfect Oreo Rocky Road Slice? Here are some common queries I get:
Can I make this Oreo Rocky Road Slice ahead of time?
Absolutely! This Oreo Rocky Road Slice is perfect for making in advance. Once set, you can store it in an airtight container in the refrigerator for up to a week. In fact, making it ahead often allows the flavors to meld even more, resulting in an even tastier treat.
What kind of white chocolate is best for rocky road?
For the best results, use good quality white chocolate chips or baking bars. Compound white chocolate (often labeled ‘white confectionery coating’) can be difficult to melt smoothly and doesn’t always set as firmly. A higher cocoa butter content will give you a creamier texture and better flavor. I recommend brands like Ghirardelli, Lindt, or Callebaut for their superior melting and taste.
Can I add other mix-ins to my Oreo Rocky Road?
Yes, customization is one of the best parts of rocky road! Feel free to add chopped nuts (like almonds or pecans), dried fruits (cranberries, raisins), pretzels for extra saltiness, or even other candies like chopped chocolate bars or mini peanut butter cups. Just be mindful of the total quantity of mix-ins so the chocolate can still bind everything together.
Why isn’t my rocky road setting properly?
There are a few common reasons. The most frequent is using too much liquid (like butter in excess of what’s called for in the rocky road mixture itself, though butter is fine for the base) or using a white chocolate that isn’t true chocolate (white confectionery coating often struggles to set firm). Ensure your white chocolate is high quality, and don’t add any extra liquid to the chocolate as it melts. Also, give it ample time in the refrigerator—sometimes it needs a little longer than an hour, especially if your fridge isn’t super cold.
Can I use a different size pan?
You can, but it will affect the thickness of your rocky road. If you use a larger pan (e.g., 9×13 inch), your slice will be thinner, and you might want to slightly increase the quantity of ingredients to maintain a good thickness. If you use a smaller pan, it will be much thicker and may require longer chilling time. An 8×8 inch pan is ideal for the proportions in this recipe, giving you a substantial, satisfying slice.
Final Thoughts: A Sweet Invitation
The Oreo Rocky Road Slice isn’t just another dessert; it’s a celebration of simplicity, flavor, and pure, unadulterated joy. It’s the kind of treat that brings smiles to faces, sparks conversations, and creates sweet memories around the table. With its no-bake ease and irresistible combination of crunchy Oreos, fluffy marshmallows, and smooth white chocolate, it’s destined to become a beloved staple in your recipe collection.
I’m incredibly proud of this recipe, honed through many joyful (and delicious!) experiments in my own kitchen. I truly believe it’s one of the easiest, most satisfying comfort-food favorites you can make.
So, what are you waiting for? Gather your ingredients, get ready for minimal fuss and maximum flavor, and whip up a batch of this incredible Oreo Rocky Road Slice today. Don’t forget to share your creations and thoughts in the comments below – I love hearing from you! Happy no-baking!


