Is there any combination more iconic and universally loved than chocolate and mint? It’s a pairing that evokes memories of refreshing after-dinner mints, holiday candies, and indulgent ice cream flavors. But when you combine that cool, invigorating mint flavor with a rich, fudgy chocolate brownie, topped with a vibrant, creamy mint frosting and a silky chocolate ganache… well, that’s not just a treat, it’s an experience. Get ready to elevate your dessert game with these show-stopping Decadent Mint Brownies!
For years, I’ve been on a quest to perfect the ultimate mint brownie. I’ve tried recipes that were too cakey, frostings that were too sweet, and ganaches that were either too thin or too thick. But after countless delicious experiments, I’ve cracked the code to a layered masterpiece that’s not only incredibly easy to make but consistently delivers bakery-quality results right in your home kitchen. This isn’t just a recipe; it’s a celebration of texture and flavor, designed to impress and delight.
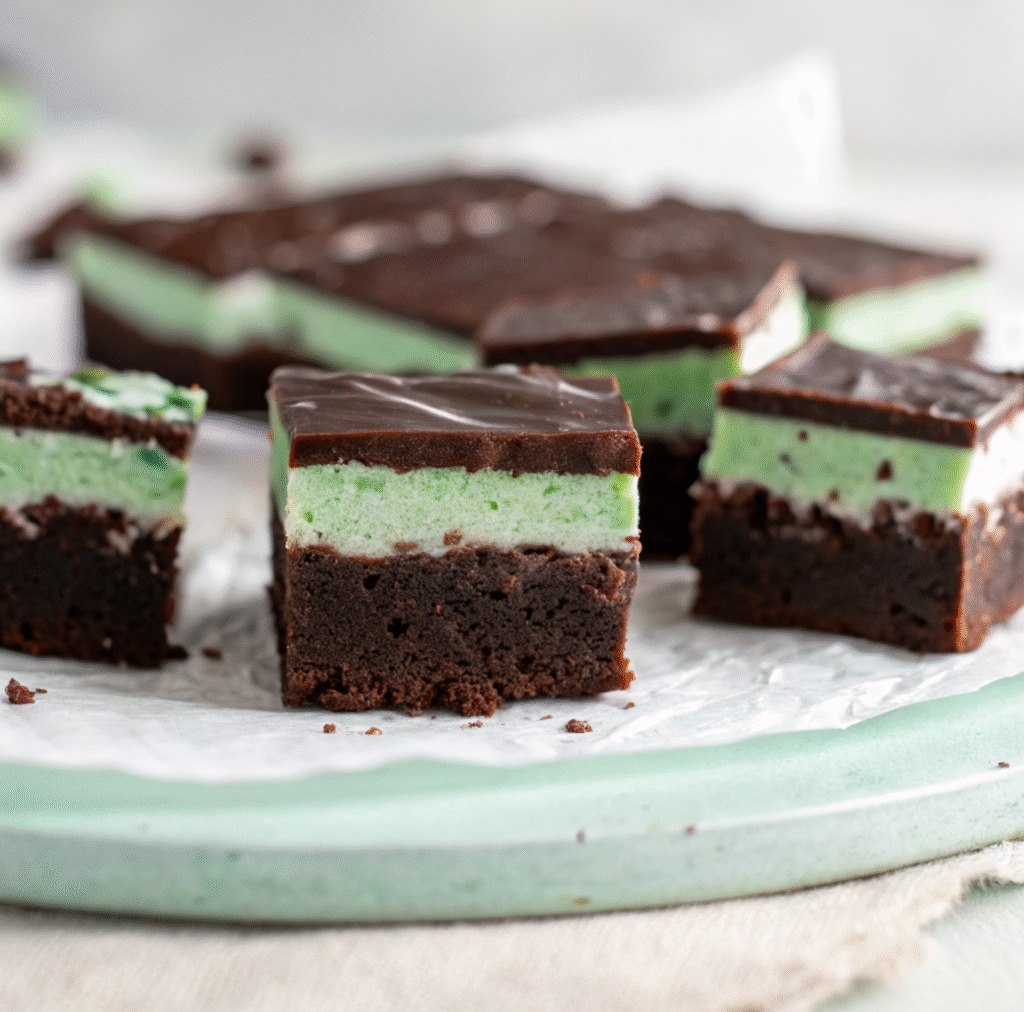
These mint brownies aren’t your average dessert. They start with an intensely fudgy, chewy chocolate brownie base that’s packed with deep cocoa flavor. Then comes the star: a light, airy, and brilliantly green mint buttercream frosting that’s perfectly balanced—refreshing without being overpowering. Finally, a luxurious, glossy chocolate ganache caps it all off, adding another layer of rich chocolate and a smooth finish that melts in your mouth. Each bite is a symphony of cool mint and deep chocolate, a harmonious blend that will leave you craving more.
Whether you’re looking for the perfect holiday dessert, a unique treat for a party, or simply want to indulge your own chocolate-mint obsession, this recipe is your answer. It’s designed to be approachable for home bakers of all skill levels, with detailed instructions and expert tips to ensure your success. So, tie on your apron, gather your ingredients, and prepare to bake the most incredible mint brownies you’ve ever tasted!
Why You’ll Absolutely Adore This Mint Brownie Recipe
- Triple-Layered Decadence: A rich brownie, creamy mint frosting, and glossy chocolate ganache create an irresistible trifecta.
- Intensely Fudgy Brownie: Say goodbye to dry, cakey brownies! Our base is dense, chewy, and packed with deep chocolate flavor.
- Perfectly Balanced Mint: The frosting provides a refreshing coolness without overwhelming the chocolate.
- Show-Stopping Presentation: These brownies are visually stunning, making them perfect for potlucks, parties, or special occasions.
- Surprisingly Simple: Despite their gourmet appearance, this recipe is straightforward with clear, step-by-step instructions.
- Make-Ahead Friendly: They taste even better the next day, making them ideal for planning ahead.
The Science Behind the Perfect Brownie: Unlocking Fudgy Excellence
Achieving that coveted fudgy brownie texture isn’t rocket science, but it does involve understanding a few key principles. This recipe leverages these secrets to guarantee a dense, chewy, and intensely chocolatey base that sets the stage for our minty layers.
- Melted Butter vs. Softened Butter: We start with melted butter in our brownie base, not softened. Melted butter incorporates seamlessly with the sugars and eggs, resulting in a denser, chewier texture. Softened butter, often used in cake recipes, introduces more air, which can lead to a cakier brownie.
- Sugar Ratios: The combination of brown sugar and granulated sugar is crucial. Brown sugar adds moisture and contributes to chewiness and a deeper caramel-like flavor, while granulated sugar ensures a crisp, crackly top crust.
- The Power of Eggs: Eggs are essential for binding, richness, and structure. Our recipe uses three eggs for a 9×9 inch pan, which provides enough moisture and protein to create that signature fudgy consistency. The fat in the egg yolks also contributes to the brownie’s tender crumb.
- Dutch-Processed Cocoa: Using Dutch-processed cocoa powder is key for the brownie’s intense, deep chocolate flavor and dark color. Unlike natural cocoa, which is acidic, Dutch-processed cocoa is alkalized, resulting in a smoother, less bitter taste that harmonizes beautifully with the mint.
- Cornstarch for Tenderness: A small amount of cornstarch acts as a tenderizer, preventing the brownies from becoming tough and contributing to a softer, more delicate chew without making them cakey.
- Minimal Mixing: This is arguably the most important rule for fudgy brownies. Once you add the dry ingredients, mix just until combined. Overmixing develops gluten in the flour, leading to a tough, bready brownie texture rather than a fudgy one.
By understanding and applying these principles, you’re not just following a recipe; you’re mastering the art of the perfect brownie!
Gather Your Mint Brownie Arsenal: Ingredients You’ll Need
Each ingredient in this recipe plays a vital role in creating the layers of flavor and texture that make these mint brownies so special. Sourcing good quality ingredients will undoubtedly elevate your final product.
For the Fudgy Brownie Base:
- Salted Butter, Melted: We use salted butter to balance the sweetness, and melting it ensures a dense, chewy brownie. If you only have unsalted, add an extra pinch of salt to the batter.
- Brown Sugar & Granulated Sugar: The perfect duo for fudginess and that lovely crinkly top. Make sure your brown sugar is packed!
- Large Eggs: Essential for binding, richness, and moisture. Ensure they are at room temperature for better emulsification.
- Pure Vanilla Extract: Adds depth and warmth to the chocolate flavor. Don’t skip it!
- All-Purpose Flour: The structural base. Again, avoid overmixing.
- Dutch-Processed Cocoa Powder: As discussed, this is crucial for the deep chocolate color and smooth, intense flavor.
- Cornstarch: Our secret weapon for a tender, fudgy crumb.
- Fine Sea Salt: Balances sweetness and enhances all the chocolate flavors.
For the Light & Fluffy Mint Frosting:
- Salted Butter, Softened: Crucial for a creamy, spreadable frosting. Ensure it’s truly softened, but not melted, for optimal whipping.
- Powdered Sugar, Sifted: Sifting prevents lumps and ensures a silky-smooth frosting.
- Clear Vanilla Extract: Used to keep the frosting a vibrant green without any brown tint from regular vanilla. If you can’t find it, regular vanilla is fine, your green might just be slightly less intense.
- Pure Mint Extract: The star of the show! Make sure it’s mint extract, not peppermint, for that classic green mint flavor. A little goes a long way, so measure carefully.
- Green Food Coloring (Gel Preferred): Gel food coloring provides intense color with only a few drops, avoiding excess liquid that could thin your frosting.
For the Decadent Chocolate Ganache:
- Good Quality Chocolate Chips: Use semi-sweet or dark chocolate chips for the best flavor. Higher quality chocolate will result in a richer, glossier ganache.
- Heavy Whipping Cream: The magic ingredient that transforms chocolate into luxurious ganache.
Step-by-Step Mint Brownie Mastery: A Detailed Guide
Let’s break down each layer of these incredible mint brownies to ensure your success from start to finish.
Layer 1: The Fudgy Brownie Base
- Prep Your Pan & Oven: Preheat your oven and line your 9×9 inch pan with parchment paper. This step is a lifesaver for easy removal and clean cuts later!
- Cream Butter & Sugars: In your mixer, combine the melted butter, brown sugar, and granulated sugar. Beat this for a full 3 minutes. This isn’t just mixing; it’s aerating the mixture, which contributes to the crackly top and chewy texture.
- Eggs & Vanilla: Add the eggs one at a time, mixing until just combined after each. Follow with the vanilla. Avoid overmixing here, you want to keep the batter dense.
- Dry Ingredients Unite: In a separate bowl, whisk together your flour, Dutch-processed cocoa, cornstarch, and salt. Then, gradually add them to your wet ingredients. Mix on low speed until the batter just comes together. Stop immediately when no dry streaks remain. Seriously, step away from the mixer! Overmixing leads to cakey brownies.
- Bake to Perfection: Pour into your prepared pan, spread evenly, and bake. The key to fudgy brownies is not to overbake. A toothpick should come out with moist crumbs, not wet batter, and the internal temperature should hit 190°F (88°C).
- Cool Completely: Patience is a virtue here. The brownies must be completely cool before frosting. Rushing this step will result in melted frosting and a messy situation. You can speed this up by placing the cooled brownies in the fridge for 30 minutes.
Layer 2: The Light & Fluffy Mint Frosting
- Whip the Butter: This is where the magic happens! Beat your softened salted butter on high speed for a full 10 minutes. Yes, 10 minutes! This process incorporates a significant amount of air, making the butter lighter in color, incredibly fluffy, and contributes to the overall light texture of the frosting. It’s also crucial for dissolving the powdered sugar completely.
- Add Remaining Ingredients: Reduce speed to low and gradually add the sifted powdered sugar, clear vanilla, and mint extract. Once incorporated, increase speed to medium-high and whip for an additional 2 minutes until it’s smooth and airy.
- Color Your World: Add your green food coloring a few drops at a time, mixing well after each addition until you achieve your desired vibrant mint green. Gel food coloring works best here for intense color without thinning the frosting.
- Frost & Chill: Evenly spread the beautiful green frosting over your completely cooled brownies. Then, refrigerate for at least 30 minutes. This step is vital to firm up the frosting so it can hold up to the warm ganache layer without melting or shifting.
Layer 3: The Decadent Chocolate Ganache
- Prepare Chocolate: Measure your chocolate chips into a heat-safe bowl.
- Heat Cream: Microwave your heavy cream until it’s hot and just beginning to boil, usually 30 seconds to 1 minute. Be careful not to scald it.
- Combine & Rest: Pour the hot cream directly over the chocolate chips. Immediately cover the bowl with foil or a plate and let it sit undisturbed for 5 minutes. This allows the residual heat from the cream to gently melt the chocolate chips.
- Stir to Smoothness: After 5 minutes, uncover and gently stir with a spatula or whisk until the mixture is completely smooth and glossy. If you still have a few stubborn lumps, you can microwave it for another 10-15 seconds and stir again.
- Pour & Set: Pour the warm (not hot!) ganache over your chilled frosted brownies. Quickly spread it to cover the entire surface.
- Final Chill & Serve: Return the brownies to the refrigerator for at least 1-2 hours to allow the ganache to set up firm. Once set, use the parchment paper overhang to lift the entire slab from the pan. For picture-perfect cuts, use a sharp knife run under hot water and wiped dry between each slice.
Expert Tips for Fudgy Brownies, Fluffy Frosting & Glossy Ganache
Even with detailed instructions, a few expert insights can make all the difference in achieving bakery-worthy results.
Brownie Base Wisdom:
- Don’t Overmix Dry Ingredients: This is the golden rule for fudgy brownies. Overmixing develops gluten, which makes brownies tough and cake-like. Mix just until combined.
- Underbake Slightly: A slightly underbaked brownie (where a toothpick still has moist crumbs, not wet batter) is the secret to maximum fudginess. Brownies continue to cook slightly from residual heat as they cool.
- Cool Completely: Patience is your friend! Warm brownies will cause your frosting to melt, resulting in a messy, sliding dessert.
Frosting Finesse:
- Whip Butter for 10 Minutes: Don’t skimp on this step! Whipping the butter for an extended period creates a light, airy, and pale base for your frosting, which dissolves the powdered sugar better and yields a truly fluffy texture.
- Sift Powdered Sugar: This prevents lumps and ensures your frosting is silky smooth.
- Use Clear Vanilla: If a vibrant, unmarred green color is important to you, opt for clear vanilla extract.
- Gel Food Coloring: Gel colors are more concentrated and won’t thin your frosting like liquid food colorings can.
Ganache Genius:
- Quality Chocolate Matters: Using good quality chocolate chips or finely chopped baking chocolate will result in a superior ganache in terms of flavor and shine.
- Don’t Stir Immediately: Resist the urge to stir the hot cream and chocolate right away. Allowing it to sit for 5 minutes lets the heat penetrate and melt the chocolate uniformly, preventing seizing.
- Warm, Not Hot, Ganache: Ensure your ganache has cooled slightly but is still pourable when you spread it over the chilled frosting. If it’s too hot, it will melt the frosting. If it’s too cool, it will be too thick to spread smoothly.
Troubleshooting Common Mint Brownie Blunders
Even the most seasoned bakers run into issues sometimes. Here’s how to tackle common problems with these layered delights:
- Brownies are Cakey/Dry:
- Cause: Most likely overbaked or overmixed.
- Solution: For next time, check for doneness at the earlier end of the baking window. A toothpick should have moist crumbs, not be perfectly clean. And remember, mix dry ingredients just until combined!
- Frosting is Too Runny:
- Cause: Too much liquid, or butter wasn’t whipped enough, or it’s too warm.
- Solution: Add more sifted powdered sugar, 1/4 cup at a time, beating well after each addition until desired consistency. Ensure your butter was thoroughly whipped and the kitchen isn’t overly hot. You can also refrigerate the frosting for 15-20 minutes, then re-whip.
- Frosting is Too Stiff:
- Cause: Not enough liquid, or too much powdered sugar.
- Solution: Add a very tiny amount (1/2 tsp at a time) of heavy cream or milk, beating until smooth and spreadable.
- Ganache Seized/Lumpy:
- Cause: Too much heat, not enough heat, or a tiny bit of water.
- Solution: If it’s lumpy, try adding a tablespoon of very hot cream or milk and whisking vigorously. If it seized and looks like gritty paste, it might be recoverable by gently warming it over a double boiler with a splash more cream, stirring constantly until smooth. Prevention is key: don’t overheat cream, ensure chocolate is dry, and let it sit before stirring.
- Ganache Melted into the Frosting:
- Cause: The mint frosting wasn’t chilled enough before the ganache was poured, or the ganache was too hot.
- Solution: For next time, ensure the frosted brownies are very firm from chilling. Let the ganache cool for a few minutes until it’s warm but not hot to the touch before pouring.
Serving Suggestions & Storage
Once your beautiful mint brownies have set, the hardest part is waiting to cut into them! Here’s how to enjoy and store them:
Cutting the Perfect Square:
- Chill Thoroughly: This is non-negotiable for clean cuts. Ensure the brownies are fully set in the fridge.
- Hot Knife Technique: For the sharpest, cleanest lines, run a long, sharp knife under hot water, wipe it completely dry with a towel, and then make a single, decisive cut. Repeat for each cut, reheating and wiping the knife every time. This prevents the chocolate layers from dragging and smearing.
Serving Suggestions:
- As Is: These brownies are a complete dessert on their own, rich and satisfying.
- With Coffee or Milk: A cold glass of milk or a hot cup of coffee makes an excellent accompaniment.
- A La Mode: For true indulgence, serve a warm (microwaved for 10-15 seconds) mint brownie with a scoop of vanilla bean ice cream or, even better, mint chocolate chip ice cream!
- Holiday Platter: Their festive green color makes them perfect for St. Patrick’s Day, Christmas, or any seasonal gathering.
Storage:
- Countertop: While tempting, due to the buttercream frosting, these are best stored in the refrigerator.
- Refrigerator: Store in an airtight container in the refrigerator for up to 3-4 days. The flavors actually meld beautifully overnight, making them even more delicious the next day.
- Freezer: For longer storage, cut the brownies into individual squares, wrap each tightly in plastic wrap, and then place them in a freezer-safe airtight container or bag. They can be frozen for up to 2-3 months. Thaw in the refrigerator or at room temperature.
Frequently Asked Questions (FAQ)
What kind of cocoa powder should I use for the best fudgy brownies?
For these mint brownies, Dutch-processed cocoa powder is highly recommended. It has been treated to reduce acidity, resulting in a darker color and a smoother, less bitter chocolate flavor that pairs beautifully with mint. While natural cocoa powder can be used, it will yield a lighter colored brownie with a slightly different flavor profile.
Can I make these mint brownies ahead of time?
Absolutely! These mint brownies are an excellent make-ahead dessert. You can bake the brownies a day in advance, allow them to cool completely, then frost and ganache them. They store beautifully in an airtight container in the refrigerator for up to 3-4 days. In fact, the flavors often meld and deepen overnight, making them even better the next day.
How do I get clean cuts when slicing brownies with ganache?
Getting clean cuts on layered brownies requires a few tricks! First, ensure the brownies are thoroughly chilled and the ganache is fully set. Second, use a very sharp knife. For the cleanest cuts, run your knife under hot water for a few seconds, wipe it completely dry, and then make a single cut. Repeat this process for each cut – hot knife, wipe dry, cut. This prevents the chocolate from dragging and creates beautiful, neat squares.
My ganache seized and became lumpy. What went wrong?
Ganache seizing often happens when there’s a sudden temperature shock or a tiny bit of water gets introduced at the wrong time. Ensure your chocolate chips are completely dry. When pouring hot cream over chocolate, let it sit for the full 5 minutes to melt the chocolate evenly before stirring. If it does seize, try adding a tablespoon of very hot cream or milk and whisking vigorously until smooth. Sometimes, gently warming it over a double boiler can also rescue it.
What is ‘clear vanilla extract’ and why is it used in the frosting?
Clear vanilla extract is simply vanilla extract that has been decolorized or made with artificial vanilla flavoring. It’s often used in frostings and icings where you want a pure, vibrant color (like bright green mint frosting) without the brown tint that regular vanilla extract would impart. While regular vanilla extract can be used, it might dull your green a little. The taste difference is minimal for most people.
Variations & Customizations
These mint brownies are fantastic as is, but don’t be afraid to experiment and make them your own!
- Mint Chocolate Chip Brownies: Fold 1/2 cup of mini chocolate chips into your mint frosting for extra texture and chocolatey goodness.
- Dark Chocolate Lovers: Use a higher percentage dark chocolate (60-70%) for both the brownie base and the ganache for a more intense, less sweet chocolate flavor.
- Peppermint Twist: If you prefer a stronger, more holiday-centric mint flavor, you can swap out the mint extract for peppermint extract. Just be cautious, as peppermint is often more potent.
- Festive Colors: For other occasions, change the food coloring in the frosting! Red for Valentine’s Day, orange for Halloween, or even blue for a winter wonderland theme.
- Nutty Crunch: For an added layer of texture, sprinkle a thin layer of finely chopped toasted pecans or walnuts over the brownie base before baking, or over the ganache before it sets.
The Grand Finale: Your New Favorite Mint Brownies!
You’ve now armed yourself with all the knowledge, tips, and tricks to create the most incredible mint brownies. From the fudgy, deeply chocolatey base to the refreshingly vibrant mint frosting and the mirror-smooth ganache, every layer of this dessert is designed to deliver pure bliss.
This recipe isn’t just about baking; it’s about creating memories, sharing joy, and indulging in a truly special treat. Whether you’re making them for a special occasion or just because you deserve something extraordinary, these decadent mint brownies are guaranteed to become a cherished addition to your recipe repertoire.
Don’t wait another moment! Gather your ingredients, put on your favorite music, and get ready to bake something truly magical. And when you do, be sure to share your creations with us! We can’t wait to see your stunning results and hear about how much you (and everyone else!) loved them. Happy baking!


