Hello, fellow sweet craft enthusiasts! Sophie here, and today, I’m absolutely thrilled to share a recipe that holds a special place in my heart (and my family’s cookie jar): my Malteser Cookies. If you’re anything like me, the idea of a deeply satisfying, chewy cookie, bursting with that unmistakable malted crunch, is pure bliss. And trust me when I say, this isn’t just any Malteser cookie recipe. This is the result of countless baking experiments, over 9 rigorous tests in my kitchen, all to bring you the absolute perfect version.
We’re talking about a cookie that delivers on every front: a rich, buttery base, a delightful chewiness that melts in your mouth, and then, that glorious, airy crunch of roughly chopped Maltesers, creating a symphony of textures and flavors. It’s a true comfort-food favorite, but with the added satisfaction of knowing exactly what goes into it – a wholesome, homemade treat that’s miles better than anything store-bought. So, if you’re ready to bake up a batch of pure joy, grab your apron, and let’s get started on these incredible Malteser Cookies!
Why These Malteser Cookies Will Become Your New Go-To Recipe
In a world full of cookie recipes, what makes this one stand out? My years of baking experience have taught me that it’s all about balance, consistency, and a little bit of love. These Malteser Cookies embody all of that, making them a must-have in your recipe collection.
The Unbeatable Texture: Chewy, Crunchy, Pure Bliss
What’s the secret to a truly outstanding cookie? Texture, texture, texture! This recipe masters the art of contrast. You get a gorgeously chewy, soft cookie base that has a depth of flavor reminiscent of a rich, comforting brownie, but then, with every bite, you hit those pockets of crisp, airy Malteser crunch. It’s a textural dream that keeps you coming back for more. We achieve this through a careful balance of sugars and flours, combined with the unique addition of sweetened condensed milk, which contributes to that irresistible chewiness.
Sophie’s Seal of Approval: 9+ Batches of Perfection
As a passionate recipe developer, my mission is always to deliver recipes that are not just good, but great. This Malteser Cookie recipe has undergone extensive testing in my own kitchen – more than nine batches, to be precise! Each iteration was refined, adjusted, and taste-tested to ensure the perfect ratio of ingredients, optimal baking time, and that flawless balance of flavor and texture. When I share a recipe, you can be confident it’s tried, true, and consistently delicious. This is my promise to you, built on real experience and expertise.
Effortless Elegance: Quick Prep, Maximum Flavor
Who has hours to spend in the kitchen? Not many of us! That’s why I’ve designed this recipe to be incredibly straightforward, with a prep time of just 15 minutes and a cook time of 10 minutes. In under half an hour, you can have warm, freshly baked cookies ready to enjoy. It’s the perfect solution for busy weeknights, impromptu gatherings, or when you just need a little sweet escape without the fuss. Despite its simplicity, the flavor profile is anything but basic – it’s rich, complex, and utterly satisfying.
A Healthier-ish Comfort? The Homemade Advantage
While we’re indulging in a classic comfort food, there’s a subtle “healthy twist” by opting for homemade over highly processed store-bought alternatives. By baking your own Malteser Cookies, you control the quality of ingredients, from the butter to the vanilla extract. There are no mysterious additives or preservatives, just pure, wholesome components coming together to create a treat that feels truly good. It’s a small step towards conscious indulgence, knowing you’re fueling your body with something made with care, offering that comforting goodness without unnecessary guilt.
What Makes a Malteser Cookie So Special?
The magic of a Malteser cookie lies, of course, in the Maltesers themselves! These iconic chocolate-covered malted milk balls, known for their light, honeycombed center and thin chocolate coating, bring a unique flavor and texture to any baked good. Their distinctive malt flavor is subtly sweet and slightly nutty, complementing the rich butteriness of the cookie dough perfectly. When chopped and incorporated into a cookie, they maintain some of their crispness, providing an unexpected, delightful crunch that elevates a simple cookie into something truly extraordinary. It’s a playful combination that hits all the right notes for both kids and adults.
The Essential Ingredients for Malteser Cookie Magic
Creating the perfect Malteser Cookie relies on a few key ingredients, each playing a vital role in achieving that delicious balance of chewiness, richness, and crunch. Let’s break them down:
- Unsalted Butter (Softened): The foundation of nearly every great cookie, softened unsalted butter provides the rich flavor and tender texture we crave. Ensure it’s truly softened, not melted, for proper creaming with the sugars.
- Caster Sugar & Brown Sugar: This dynamic duo is crucial. Caster sugar contributes to a delicate crispness on the edges and helps spread, while brown sugar adds moisture, depth of flavor (with its molasses content), and that wonderful chewiness.
- Sweetened Condensed Milk: Ah, the secret weapon! This ingredient sets these cookies apart, contributing to an incredibly soft, dense, and chewy texture, along with a unique milky sweetness that perfectly complements the malt flavor of the Maltesers.
- Vanilla Extract: A non-negotiable flavor enhancer. Pure vanilla extract amplifies all the other sweet notes and adds a warm, inviting aroma.
- Maltesers (Roughly Chopped): The star of the show! Roughly chopping them ensures you get delightful chunks throughout the cookie, maintaining their crunch and distributing that unique malty flavor. Remember, we’ll be saving some for topping!
- Self-Raising Flour (Sifted): This provides structure and a gentle lift, thanks to the pre-mixed leavening agents. Sifting ensures a lighter texture and no lumpy bits.
- Plain Flour (Sifted): A combination of plain and self-raising flour allows for precise control over the cookie’s rise and structure, contributing to that perfect balance of chewiness and stability.
Sophie’s Step-by-Step Guide: Crafting Your Perfect Malteser Cookies
Ready to bring these delectable cookies to life? Here’s my detailed, easy-to-follow guide to ensure perfect Malteser Cookies every time.
- Preheat and Prepare: First things first, get your oven ready! Preheat it to 180°C (350°F). Line 3-4 baking trays with parchment paper. This prevents sticking and makes cleanup a breeze.
- Cream the Butter and Sugars: In a large mixing bowl, combine your softened unsalted butter, caster sugar, and brown sugar. Using a handheld electric beater, beat them together until the mixture is light, fluffy, and creamy. This process incorporates air, which is essential for a tender cookie.
- Add Wet Ingredients: Next, pour in the sweetened condensed milk and vanilla extract. Beat again until everything is well combined, ensuring the mixture is smooth and uniform.
- Fold in Flours and Maltesers: Gently fold in both the sifted self-raising flour and plain flour until just combined. Be careful not to overmix! Then, add about 170g of the roughly chopped Maltesers to the dough, folding them in evenly. Crucial tip: Remember to save the remaining Maltesers for topping – this is key for presentation and crunch!
- Shape and Top: Roll the cookie dough mixture into medium-sized balls. Place them onto your prepared baking trays, leaving enough space between each cookie for spreading. Gently flatten each ball with your hands to your desired thickness. Now, take the reserved Maltesers and sprinkle them generously on top of each flattened cookie, gently pressing them into the dough so they adhere.
- Bake to Golden Perfection: Transfer your trays to the preheated oven. Bake for approximately 10 minutes, or until the edges are golden brown and the centers are still slightly soft. For even baking, I highly recommend swapping the trays’ positions halfway through the baking time.
- Cool and Enjoy: Once baked, remove the trays from the oven. Allow the cookies to cool slightly on the trays for about 5-10 minutes. This allows them to firm up without breaking. Then, carefully transfer them to a wire cooling rack to cool completely.
And just like that, you have a batch of my perfectly crafted Malteser Cookies ready to be devoured!
Pro Tips & Expert Secrets for Malteser Cookie Perfection (From Sophie’s Kitchen)
Over my many years of baking, I’ve gathered some invaluable tips and tricks that truly make a difference in the outcome of any recipe. For these Malteser Cookies, here are my top secrets to ensure your batch is absolutely flawless, straight from my kitchen to yours.
The Golden Rule: Don’t Skimp on the Maltesers (and How to Place Them!)
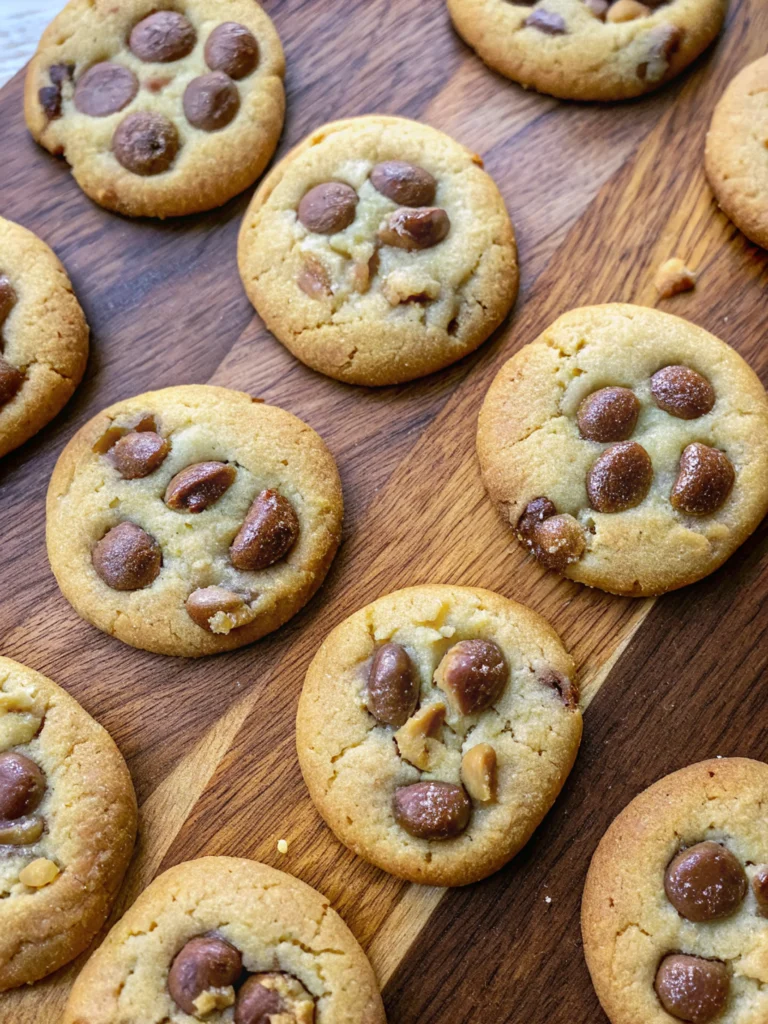
This might sound obvious, but the placement of your Maltesers is paramount. I strongly suggest reserving a portion of the Maltesers (around 110g from the 280g total), giving them a rough chop, and sprinkling them generously on top of each cookie prior to baking. Incorporating all the Maltesers into the dough might result in them getting lost, melting too much, or simply not being as visible or crunchy. The topping method ensures that beautiful visual appeal and that delightful subtle crunch with every bite. It’s a game-changer!
The Art of Mixing: Avoid Overworking the Dough
When adding the flours, mix just until combined. Overmixing develops the gluten in the flour too much, which can lead to tough, dense cookies instead of the desired chewy and tender texture. Once you no longer see streaks of dry flour, stop mixing!
Chilling the Dough (Optional, but Recommended for Spreading)
While this recipe is designed to be quick, if you have an extra 30 minutes to an hour, chilling the dough can work wonders. Chilled dough spreads less in the oven, resulting in thicker, chewier cookies. It also allows the flavors to meld beautifully. If you notice your cookies spreading too much, a quick chill is often the solution.
Oven Dynamics: Rotate for Even Baking
Ovens often have hot spots. To ensure all your cookies bake evenly and achieve that perfect golden-brown finish, remember to rotate your baking trays halfway through the baking time. This simple step prevents one side from browning more than the other.
Patience is a Virtue: Cooling for Firmness
It’s tempting to dive into a warm cookie straight from the oven, but for these Malteser Cookies, a little patience pays off. Allowing them to cool slightly on the baking tray before transferring to a cooling rack helps them firm up. This prevents them from breaking apart and ensures they maintain their shape and texture.
Flavor Explorations: Beyond Original Maltesers
While classic Maltesers are fantastic, don’t be afraid to experiment! There are often different flavored Maltesers available, from white chocolate to dark chocolate or even seasonal editions. Swapping them in can create an exciting new twist on this beloved recipe.
If you love experimenting with cookie flavors, you might also enjoy our Stuffed Red Velvet Cookies.
Serving Suggestions & Creative Variations
These Malteser Cookies are magnificent on their own, but a little creativity can elevate them even further!
Classic Pairings: Milk, Coffee, Tea
There’s nothing quite like a freshly baked cookie with a cold glass of milk, a warm cup of coffee, or a comforting mug of tea. The richness of the cookie and the malted chocolate notes pair beautifully with these classic beverages.
Dessert Delights: With Ice Cream or a Drizzle
Turn these cookies into an even more indulgent dessert! Serve them warm with a scoop of vanilla bean ice cream, allowing the cookie’s warmth to slightly melt the ice cream for a blissful mouthful. A drizzle of melted milk or dark chocolate over the top can also add an extra layer of decadence. A tiny sprinkle of sea salt flakes can really make the flavors pop!
Beyond Maltesers: Adding Other Chocolates or Nuts
While Maltesers are the star, you can always enhance the cookie experience. Consider adding a handful of white chocolate chips or dark chocolate chunks to the dough along with the Maltesers for an extra chocolatey kick. For a nutty contrast, finely chopped pecans or walnuts could offer another layer of texture.
For more delicious stuffed cookie ideas, check out our White Chocolate Stuffed Cookies.
Storing Your Malteser Cookie Bounty
You’ve baked a delicious batch of Malteser Cookies, now how do you keep them fresh?
- Room Temperature: Once completely cooled, store your cookies in an airtight container at room temperature. They will stay fresh and perfectly chewy for 3-5 days.
- Freezing: For longer storage, these cookies freeze beautifully. Place fully cooled cookies in a single layer on a baking sheet to freeze for about an hour until solid. Then, transfer them to a freezer-safe bag or airtight container, layering with parchment paper to prevent sticking. They can be frozen for up to 3 months. Thaw at room temperature for a quick treat!
Frequently Asked Questions About Malteser Cookies (FAQs)
Can I use different types of Maltesers in this cookie recipe?
Absolutely! One of the joys of this recipe is its versatility. While classic Maltesers are fantastic, you have the freedom to select any flavor that suits your taste. Think white chocolate Maltesers, dark chocolate Maltesers, or even limited-edition flavors if you can find them. Just ensure they are roughly chopped to integrate well into the dough and as a topping.
How should I store these Malteser Cookies to keep them fresh?
To maintain their freshness and delicious texture, store your Malteser cookies in an airtight container at room temperature for up to 3-5 days. If you want to keep them longer, they freeze beautifully for up to 3 months. Just layer them with parchment paper in a freezer-safe container and thaw at room temperature before enjoying.
Why do you recommend reserving some Maltesers for topping instead of mixing them all into the dough?
This is one of my top tips, gained from many baking experiments! Incorporating all the Maltesers directly into the cookie dough might result in them getting lost, melting away, or not being as visible after baking. By reserving a portion and sprinkling them on top of each cookie just before baking, you ensure a beautiful presentation, a more pronounced crunch with every bite, and a stronger visual appeal that truly showcases the Malteser goodness.
The Sweet Craft of Comfort: Why These Malteser Cookies Are More Than Just a Treat
There’s a unique joy that comes from baking. It’s the scent of vanilla filling your home, the simple pleasure of watching ingredients transform, and the incomparable satisfaction of sharing something delicious you’ve made with your own hands. My Malteser Cookies embody this spirit of “sweet craft” – they’re not just a dessert, but an experience.
These cookies are a celebration of comfort food, perfect for family gatherings, a quiet afternoon treat, or simply to bring a smile to someone’s face. They bring people together, spark conversations, and create cherished memories around the kitchen table. The “healthy twist” aspect truly shines here; by choosing to bake this rich, satisfying treat at home, you’re providing a comforting indulgence with controlled, quality ingredients, making it a mindful choice for your loved ones.
I’ve poured my expertise and experience from countless baking hours into perfecting this recipe, ensuring that every batch you make will be a resounding success. From the chewy texture to the delightful crunch, every element has been thoughtfully considered. So go ahead, trust the process, and embark on this delicious journey.
If you’re on a quest for more ultimate comfort cookies, our Pistachio NYC Cookies are another must-try! And for unique, indulgent treats, don’t miss our Creme Egg Stuffed Cookies or Peanut Butter Nutella Cookie Recipe!
I truly hope you enjoy baking and sharing these Malteser Cookies as much as I do. They’re more than just a recipe; they’re a little piece of comfort, crafted with love. Happy baking, and don’t forget to share your cookie creations with me in the comments below!


