Hello, sweet craft connoisseurs and cookie enthusiasts! Sophie here, your guide to baking bliss. Today, we’re diving headfirst into a recipe that’s been on repeat in my kitchen: the Lemonade Cookies – Crumbl Copycat. If you’ve ever had the pleasure of tasting Crumbl’s vibrant, tangy Lemonade Cookie, you know the magic I’m talking about. That perfect balance of chewy lemon cookie and a cloud of zesty, bright lemon buttercream? Pure summer joy in cookie form!
As someone who loves a good baking challenge, especially when it comes to replicating beloved bakery treats, I knew I had to crack the code on these. After no less than nine (yes, nine!) rounds of testing, tweaking, and tasting, I’m thrilled to share my perfected version with you. This isn’t just a recipe; it’s the culmination of countless hours dedicated to achieving that ideal texture, that unmistakable burst of lemon, and that signature thick, fluffy frosting.
Forget the long lines and weekly waits. Now, you can bring the joy of Crumbl right into your home kitchen, anytime you crave a taste of sunshine. Whether you’re a seasoned baker or just starting your culinary journey, my detailed, step-by-step instructions, complete with all the insider tips I picked up during my extensive testing, will ensure your success. So grab your mixer, a fresh lemon, and let’s bake some happiness!
Why This Crumbl Lemonade Cookie Copycat Will Become Your New Favorite
Why dedicate your precious baking time to this particular Lemonade Cookie recipe? Let me count the ways!
- Spot-On Flavor & Texture: This recipe delivers a cookie that’s incredibly soft and chewy, infused with just the right amount of bright lemon zest and juice. The frosting is a luscious, fluffy lemon buttercream that perfectly mirrors the iconic Crumbl experience – not too sweet, not too tart, just pure, refreshing bliss.
- Expertly Tested for Perfection (by me, Sophie!): I can’t emphasize enough how many times I’ve made these. Each iteration brought me closer to perfection, refining ratios, chilling times, and baking temperatures. My goal was to eliminate any guesswork for you, ensuring a consistent, incredible result every single time. This means less wasted ingredients and more delicious cookies!
- A Crowd-Pleaser for All Ages: Lemonade evokes happy, nostalgic memories for many. These cookies are a hit with kids and adults alike, making them ideal for family gatherings, summer parties, or just a delightful treat for yourself. They’re a fantastic way to capture the essence of a warm, sunny day, even if it’s grey outside.
- Comfort Food with a Refreshing Twist: While cookies are a classic comfort food, the vibrant lemon flavor of these stands out. It offers a refreshing departure from heavier chocolate or peanut butter varieties (though if you’re a fan of those, you simply must check out my amazing Peanut Butter Nutella Cookie Recipe!). These Lemonade Cookies provide a lighter, zesty experience that still hits all the comfort notes.
- Impressive Yet Approachable: While they look like they came straight from a professional bakery, I’ve broken down every step to make it accessible for home cooks of all skill levels. With my guidance, you’ll confidently create cookies that will wow your friends and family.
The Secret to a Perfect Crumbl-Style Lemonade Cookie: My Testing Journey Revealed
My quest to perfect these Lemonade Cookies began with a simple craving and a desire to bring that distinct Crumbl magic home. It wasn’t always smooth sailing! My initial attempts yielded cookies that spread too much, or frosting that was either too thin or too sweet. Here’s what I learned through rigorous experimentation:
- The Magic of Melted Butter (and Cooling It!): For the cookie base, using melted butter contributes to that signature chewy texture. But the crucial detail is letting it cool for 10 minutes. Adding hot butter to sugar and eggs can scramble the eggs or create a greasy texture. Sophie’s golden rule: patient cooling ensures proper emulsification and a smooth dough.
- Chilling is Non-Negotiable: This was a big discovery. Many cookie recipes call for chilling, but for these large, thick cookies, a full 2-hour chill is absolutely essential. It allows the butter to re-solidify, preventing excessive spreading and guaranteeing those perfectly puffed, thick disks. It also gives the flavors time to meld and deepen, making for a richer lemon taste. Trust me, do not skip this step! I tried, and the results were always inferior.
- Cornstarch for Tenderness: A secret weapon in many copycat cookie recipes is cornstarch. Just a teaspoon makes a remarkable difference in the texture, keeping the cookies incredibly soft and tender, rather than cakey or dry. It’s a small addition with a big impact!
- The Lemonade Buttercream Balance: Achieving the right tang-to-sweetness ratio in the frosting was paramount. Using both fresh lemon juice and a touch of Country Time Lemonade mix (optional, but recommended for that authentic ‘lemonade’ punch) delivers a complex, bright flavor. And whipping it at medium-high speed at the end makes it irresistibly light and fluffy, just like a cloud!
Every single ingredient and step in this recipe has been optimized based on these and many other lessons learned during my testing marathon. You’re getting the absolute best version, directly from my kitchen to yours!
Ingredients Deep Dive: What You’ll Need and Why
Let’s break down the components of our Lemonade Cookies. Each ingredient plays a vital role in creating that exquisite taste and texture.
For the Lemonade Cookies:
- Unsalted Butter (Melted & Cooled): As mentioned, melted butter ensures chewiness. Using unsalted gives you control over the overall saltiness.
- Granulated Sugar: Provides sweetness and helps with browning and crisp edges.
- Large Egg: Binds the ingredients, adds moisture, and contributes to the chewiness.
- Vanilla Extract: Enhances all the flavors, balancing the lemon.
- Fresh Lemon Juice & Zest: The star of the show! Fresh is non-negotiable for that bright, tangy flavor. Zest holds the most potent lemon oil, giving a vibrant aroma and taste.
- All-Purpose Flour: The structure of our cookie. Measuring by weight (ounces/grams) is highly recommended for accuracy.
- Baking Powder: Leavening agent, giving the cookies a slight lift and softness.
- Cornstarch: My secret ingredient for that tender, soft crumb!
- Salt: Balances sweetness and enhances all flavors.
For the Lemonade Buttercream:
- Unsalted Butter (Room Temperature): Crucial for a smooth, creamy frosting. Cold butter will result in lumpy frosting.
- Powdered Sugar: Creates a smooth, stable buttercream without a gritty texture.
- Milk or Cream: Thins the frosting to the right consistency and adds richness. Cream makes it extra luxurious!
- Country Time Lemonade Mix (Optional): This is my trick for that classic “lemonade drink” flavor profile, setting it apart from just a regular lemon buttercream. If you’re going for maximum Crumbl authenticity, don’t skip it!
- Vanilla Extract: A touch to round out the flavors.
- Fresh Lemon Juice & Zest: Reinforces the natural lemon flavor and adds zing.
- Yellow Food Coloring (Optional): For that vibrant, sunny yellow hue that makes these cookies pop!
Step-by-Step Instructions with Sophie’s Expert Tips
Follow these detailed steps carefully for the best Lemonade Cookies you’ve ever made.
Part 1: Crafting the Perfect Lemon Cookie Base
- Start with the Wet Ingredients (and Patience!):
- In a large bowl, combine your melted and cooled unsalted butter with granulated sugar. Whisk vigorously until the mixture is thick, glossy, and well combined. This is where you build the base of your cookie’s texture.
- Whisk in the egg, vanilla extract, and fresh lemon juice. Continue whisking for about 60 seconds until the mixture is smooth and emulsified. This aeration adds lightness.
- Fold in the Dry Ingredients:
- Into the same bowl, add your measured all-purpose flour, baking powder, cornstarch, lemon zest, and salt.
- Using a spatula, gently fold the dry ingredients into the wet until just combined. Do not overmix! Overmixing develops gluten, leading to tough cookies. The dough will be soft – this is normal.
- The All-Important Chill:
- Cover the dough tightly with plastic wrap and chill in the refrigerator for a minimum of 2 hours. As I stressed, this step is vital for preventing spread and ensuring thick, chewy cookies. You can chill it overnight if preferred.
- Preheat and Prep:
- Once your dough is almost done chilling, line a baking sheet with parchment paper. This prevents sticking and promotes even baking.
- Preheat your oven to 350°F (175°C).
- Portion and Shape:
- Divide the chilled dough into 6 large, 1/3-cup portions. A large ice cream scoop works perfectly here for consistent sizing.
- Shape each portion into a disk, approximately 2.5 inches (6.3 cm) in diameter and 7/8 inch (2.2 cm) tall. This specific shaping is key to achieving that classic Crumbl cookie look and thickness.
- Bake to Perfection:
- Place the shaped cookies on your prepared baking sheet, ensuring they are spaced at least 3 inches apart to allow for slight spreading.
- Bake for 15-16 minutes, or until the edges are lightly golden and the centers look just set but still slightly soft. Do NOT overbake! This is crucial for retaining that soft, chewy interior. They will continue to firm up as they cool.
- Cool Completely:
- Allow the cookies to cool completely on the baking sheet or a wire rack before attempting to frost them. Warm cookies will melt your beautiful buttercream!
Part 2: Whipping Up the Zesty Lemonade Buttercream
- Cream the Butter:
- In a medium bowl, using an electric mixer with beater attachments, beat your room temperature unsalted butter on medium speed until it’s wonderfully creamy and smooth. This typically takes 2-3 minutes.
- Gradually Add Powdered Sugar:
- Turn your mixer to low speed. Gradually add the powdered sugar to the butter, one cup at a time, beating until each addition is fully combined before adding more. This prevents a powdered sugar cloud from engulfing your kitchen!
- Whisk the Lemonade Mixture:
- In a small separate bowl, whisk together the milk (or cream), Country Time Lemonade mix (if using), vanilla extract, fresh lemon juice, and lemon zest. Whisk until the lemonade mix is totally dissolved.
- Combine and Color:
- Add this liquid mixture to your buttercream base and beat until well combined.
- Now’s the time to add a tiny drop or two of yellow food coloring, if desired, for that vibrant, sunny lemonade look.
- Adjust Consistency & Whip:
- If your frosting is too thick, add an additional 1-2 tablespoons of heavy cream or milk, one teaspoon at a time, until you reach your desired consistency. It should be thick but spreadable.
- Once smooth, increase the mixer speed to medium-high and beat for 1-2 minutes until the buttercream is light and fluffy. This step incorporates air, making it irresistible.
- Frost and Garnish:
- Once the cookies are completely cool, scoop about 3 tablespoons of frosting onto each cookie. Use a small offset spatula or the back of a spoon to create a thick, smooth layer.
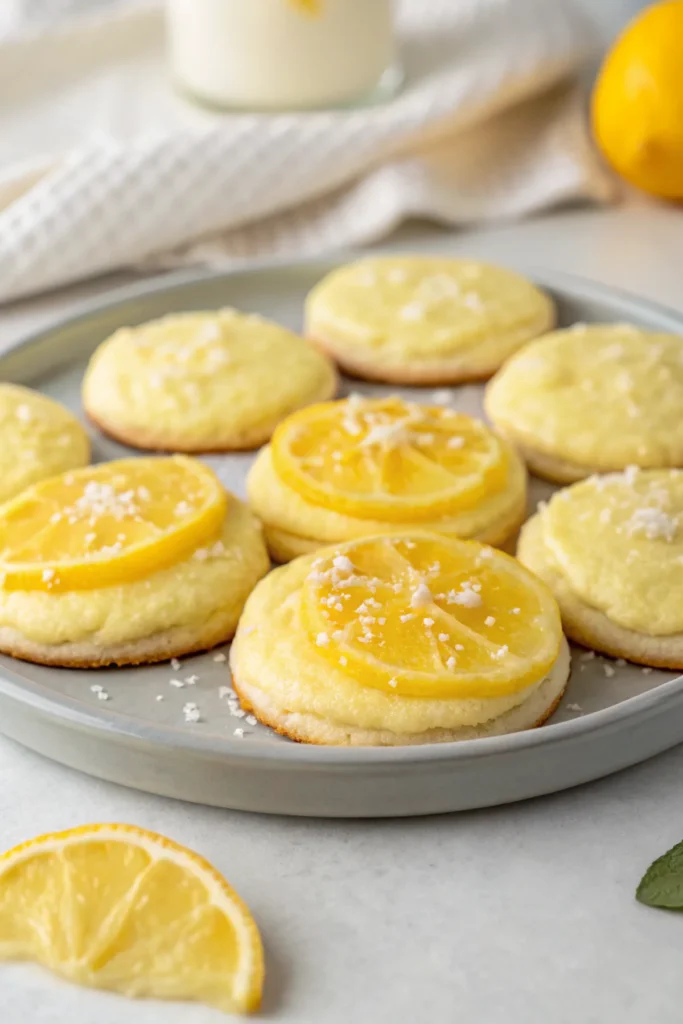
- For an extra touch of elegance and freshness, garnish each cookie with a thin fresh lemon slice. Then, stand back and admire your culinary masterpiece before diving in!
The Science Behind Your Perfect Cookie: Why It Works
Baking is a delightful blend of art and science, and understanding the ‘why’ behind each step elevates your skills. Here’s a peek into the scientific magic that makes these Lemonade Cookies so good:
- Melted Butter and Cookie Spread: Melted butter allows for a more even distribution of fat throughout the dough, contributing to a chewier cookie. However, it also means the fat is already soft, which is why chilling is paramount. Without chilling, the butter would melt too quickly in the oven, causing excessive spread.
- The Role of Cornstarch: Cornstarch is a pure starch, and when added to flour, it inhibits gluten development. This results in a softer, more tender crumb and prevents the cookies from becoming tough, especially with the extended chilling time. It’s the secret to that perfectly soft interior.
- Lemon Zest vs. Lemon Juice: Lemon zest contains aromatic oils that deliver a bright, floral lemon flavor without adding excess liquid or acidity. Lemon juice, on the other hand, provides the tangy, acidic notes. Using both ensures a well-rounded and complex lemon profile.
- Beating Butter for Buttercream: When you beat butter, you’re incorporating air, which creates a light and fluffy texture. Gradually adding powdered sugar prevents lumps and helps create a stable emulsion. The final high-speed whip aerates it further, giving it that luxurious, cloud-like consistency.
Understanding these principles will not only help you troubleshoot but also empower you to confidently experiment with other recipes!
Expert Tips for Success from Sophie’s Kitchen
Beyond the step-by-step, these little nuggets of wisdom from my extensive testing will guarantee your Lemonade Cookies are nothing short of spectacular.
- Weigh Your Flour: I cannot stress this enough! Using a kitchen scale to measure flour (8.1 ounces for the cookie base) is far more accurate than cup measurements. Too much flour leads to dry, dense cookies; too little causes spread. This is the biggest game-changer for consistent baking.
- Don’t Rush the Chill Time: Seriously, two hours minimum. If you try to bake them sooner, they will spread more and won’t have that signature thick Crumbl shape. Plan ahead!
- Room Temperature Butter for Frosting: Ensure your butter for the buttercream is truly at room temperature. It should be soft enough to indent with a finger but not greasy or melted. This creates the smoothest, fluffiest frosting.
- Taste and Adjust: Don’t be afraid to taste your cookie dough (before adding eggs, or just a tiny bit!) and especially your buttercream. Need more lemon zing? Add a tiny bit more juice or zest. Prefer it sweeter? A little more powdered sugar. Make it your own!
- Even Cookie Sizing: Using a cookie scoop (1/3 cup is large, so ensure it’s a good one!) or even weighing your dough portions will ensure all your cookies bake evenly and look consistent, just like the bakery’s.
- Storage Savvy: Store frosted cookies in an airtight container at room temperature for up to 3 days, or in the refrigerator for up to a week. If refrigerated, let them come to room temperature for 15-20 minutes before serving for the best texture.
Variations & Customizations: Make Them Your Own!
While this copycat recipe aims for authenticity, there’s always room to play!
- Add a Berry Twist: Fold in a handful of fresh or freeze-dried raspberries or blueberries into the dough for a Lemon-Berry Lemonade Cookie.
- Extra Zest: For those who adore an intensely lemony flavor, increase the lemon zest in both the cookie and the frosting by another ½ teaspoon each.
- Gluten-Free Option: While I haven’t specifically tested a GF version, a 1:1 gluten-free all-purpose flour blend (like Bob’s Red Mill or King Arthur) often works well as a direct substitute. Always look for a blend that contains xanthan gum.
- Coconut Infusion: A touch of shredded coconut in the dough or sprinkled on top of the frosting would add a tropical twist!
- Different Citrus: While it wouldn’t be “lemonade,” consider trying lime juice and zest for a Key Lime Pie inspired cookie.
Serving Suggestions: What Pairs Well with Sunshine?
These Lemonade Cookies are a treat all on their own, but they also pair wonderfully with a few complementary elements:
- Iced Tea or Actual Lemonade: A classic pairing that enhances the refreshing qualities of the cookies.
- Fresh Berries: A simple side of mixed berries (strawberries, blueberries, raspberries) adds freshness and a hint of natural sweetness.
- Vanilla Bean Ice Cream: A warm cookie (just slightly warmed, mind you, the frosting will melt!) with a scoop of premium vanilla ice cream is always a winner.
- A Light Brunch: These cookies make a lovely addition to a spring or summer brunch spread alongside fruit salads, quiches, or yogurt parfaits.
Craving More Cookie Adventures? Sweet Craft Has You Covered!
If these Lemonade Cookies have ignited your passion for baking incredible cookies at home, you’re in the right place! Sweet Craft Recipes is dedicated to bringing you the best, most thoroughly tested cookie recipes that elevate your baking game.
For those who adore stuffed cookies, you absolutely must try some of my other popular creations. Sink your teeth into the rich indulgence of my Stuffed Red Velvet Cookies Recipe, or experience a truly unique flavor adventure with my Pistachio NYC Cookies Recipe. If you’re a chocolate lover seeking an extra surprise, my Creme Egg Stuffed Cookies are a seasonal sensation, and for a truly luxurious treat, you can’t go wrong with my White Chocolate Stuffed Cookies. Each recipe comes with my personal guarantee of deliciousness and detailed instructions for success.
Frequently Asked Questions (FAQs) About Lemonade Cookies
Here are some common questions I get asked during my testing and by fellow bakers:
Q1: Why do I need to chill the cookie dough for so long?
A1: Chilling the cookie dough for at least 2 hours is a crucial step that I discovered during my multiple tests. It allows the butter to re-solidify, which prevents the cookies from spreading too much in the oven, ensuring they maintain their thick, chewy Crumbl-like texture. It also deepens the flavors and helps the gluten relax, leading to a more tender crumb.
Q2: Can I skip the Country Time Lemonade mix in the frosting?
A2: Yes, absolutely! The Country Time Lemonade mix is optional and primarily used to amplify that distinct ‘lemonade’ flavor often found in the Crumbl version. If you prefer a more natural lemon flavor, or simply don’t have the mix on hand, you can omit it. Just ensure you still use fresh lemon juice and zest for a bright, tangy buttercream.
Q3: How can I make sure my cookies are perfectly soft and chewy?
A3: The key to soft, chewy cookies lies in two main things: accurate ingredient measurement (especially flour and butter) and not overbaking. Bake until the edges are just set and lightly golden, but the centers still look slightly soft. They will continue to set as they cool. Sophie’s tip: A gram scale for flour is your best friend!
Q4: How long do these Lemonade Cookies stay fresh?
A4: These Lemonade Cookies are best enjoyed within 2-3 days when stored in an airtight container at room temperature. For longer storage, you can refrigerate them for up to a week. If refrigerating, let them come to room temperature for about 15-20 minutes before serving for the best texture.
Q5: Can I freeze Lemonade Cookie dough or baked cookies?
A5: Yes, both! You can freeze scooped, unbaked cookie dough balls for up to 3 months. Bake from frozen, adding a couple of extra minutes to the baking time. Baked and unfrosted cookies can be frozen in an airtight container for up to 2 months. Thaw at room temperature before frosting.
Your Homemade Crumbl Lemonade Cookies Await!
There you have it – the ultimate guide to creating Lemonade Cookies – Crumbl Copycat that taste just like the real deal, if not better, because you made them yourself with love and care! My extensive testing (9+ times!) ensures that every step of this recipe is optimized for your success, bringing you a truly delightful baking experience.
Imagine biting into that perfectly chewy, lemon-infused cookie, followed by the lush, tangy embrace of the lemonade buttercream. It’s an instant mood booster, a perfect treat for any occasion, and a fantastic way to share some homemade sunshine with your loved ones.
Don’t hesitate to leave a comment below if you have any questions or just want to share your baking triumph. I love hearing from you! Happy baking, and enjoy every zesty, sweet bite of these incredible cookies.


