Hey there, fellow dessert lovers! Sophie here, from SweetCraft Recipes, and today, I’m beyond excited to share a recipe that has truly earned its “ultimate” title in my kitchen. Picture this: a brownie so rich, so fudgy, it melts in your mouth, studded with crunchy, cool mint Oreos and topped with that perfect, crackly crinkle. This isn’t just a brownie recipe; these are my Ultimate Fudge Mint Oreo Brownies, a comfort-food favorite that has been tested, tweaked, and perfected over nine separate batches to ensure absolute perfection every single time.
If you’re anything like my family, who considers cookies and brownies essential to any gathering, you understand the quest for that truly spectacular dessert. This recipe perfectly marries the classic American comfort of a deep, dark chocolate fudge brownie with the exhilarating twist of mint and Oreo crunch. It’s an experience that’s both familiar and exhilarating, and trust me, it’s going to be a massive hit at your next family gathering or simply when you need that personal moment of pure, unadulterated bliss.
Why These Fudge Mint Oreo Brownies Are Truly “Ultimate”
What makes a brownie go from good to legendary? For me, it’s a combination of texture, flavor depth, and that undeniable homemade touch. This recipe delivers on all fronts, and here’s why you’re going to fall head over heels for it:
- The Unrivaled Fudginess: Forget cakey brownies. We’re talking dense, rich, intensely chocolatey fudginess that sticks to your ribs (in the best way possible). The precise ratio of butter, oil, and sugars creates a moist crumb that’s truly decadent.
- That Perfect Crinkle Top: Ah, the crinkle top! The hallmark of a well-made brownie. I’ve cracked the code for achieving that beautiful, glossy, crackly top that contrasts perfectly with the soft interior. It’s all in the sugar and egg technique, which I’ll walk you through.
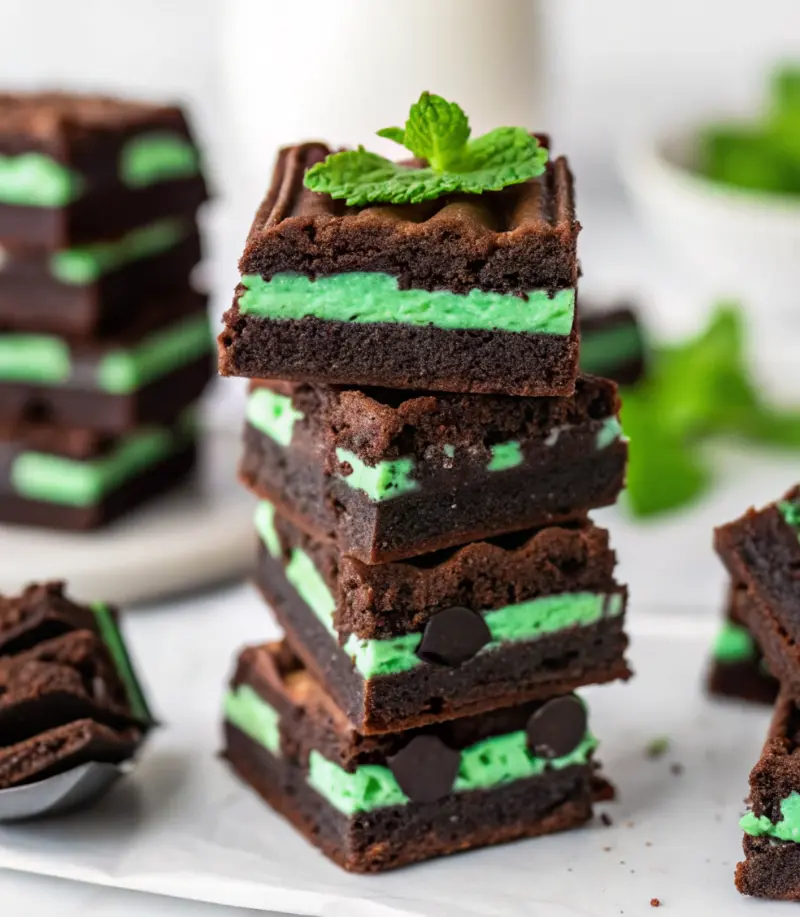
- The Mint Oreo Magic: The hero ingredient here, beyond the chocolate! Mint Oreos aren’t just thrown in; they’re strategically layered within the brownie batter and sprinkled on top. This ensures every bite gives you that refreshing burst of mint and delightful crunch, cutting through the richness in the most harmonious way.
- Simplicity Meets Sophistication: Despite their impressive appearance and flavor, these brownies are surprisingly straightforward to make. No complicated techniques, just careful execution of a few key steps that yield extraordinary results.
- Crowd-Pleaser Extraordinaire: Planning for a family gathering or a potluck? These brownies are guaranteed to disappear faster than you can say “seconds.” They serve up to 10 people generously, making them ideal for sharing (or not, no judgment here!).
As someone who bakes constantly and meticulously tests recipes to ensure they are foolproof for you, my dear readers, I can confidently say this recipe is a gem. I’ve made variations of brownies countless times, from simple chocolate to intricate stuffed creations (like my popular Stuffed Red Velvet Cookies), and I always come back to the fundamental science of a truly great brownie. This one encapsulates that perfection, elevated by the joy of mint Oreos.
Demystifying the Ingredients: What You Need and Why
Every ingredient in this recipe plays a crucial role in achieving the “Ultimate” status. Let’s break down the lineup:
- Unsalted Butter & Vegetable Oil: The dynamic duo for texture. Butter provides rich flavor and tenderness, while vegetable oil (or any neutral oil) contributes to a moist, chewy, and undeniably fudgy brownie. The oil helps keep the brownies soft and prevents them from drying out, even after a few days.
- Granulated Sugar & Brown Sugar: Granulated sugar is essential for that coveted crinkle top (it forms a thin, crisp layer as it bakes), while brown sugar adds moisture, depth of flavor (thanks to molasses), and a chewier texture. The combination is pure brownie bliss.
- Unsweetened Cocoa Powder: The heart of our chocolate flavor. Use a good quality unsweetened natural cocoa powder for the best depth of flavor. Dutch-processed cocoa will give a darker color and a milder chocolate flavor, but natural cocoa provides a slightly fruitier, more intense chocolate hit.
- Cold Eggs: This might seem counterintuitive, but cold eggs are a secret weapon for the crinkle top! The temperature difference helps the sugar on the surface crystallize faster, creating that beautiful crackly crust.
- Vanilla Extract: A touch of vanilla enhances and rounds out the chocolate flavor, adding a warm, aromatic note.
- Salt: Don’t skip the salt! It balances the sweetness and intensifies all the other flavors, particularly the chocolate.
- All-Purpose Flour: Just enough to bind everything together without making the brownies cakey. We want fudgy, not fluffy! Overmixing the flour is the enemy of a fudgy brownie, so handle with care.
- Mint Oreos: The star of the show! These provide the vibrant mint flavor, a delightful crunch, and an extra layer of chocolatey goodness. We use them both in the brownie and on top for maximum impact.
Ingredient Quality Matters!
While brownies are relatively forgiving, using good quality ingredients can elevate your baking significantly.
- Butter: Opt for a good quality unsalted butter.
- Cocoa Powder: A reputable brand of cocoa powder will make a noticeable difference in the final chocolate flavor.
- Oreos: Stick to genuine Mint Oreos for that authentic flavor and texture.
Step-by-Step: Crafting Your Ultimate Fudge Mint Oreo Brownies
Follow these instructions carefully, and you’ll be rewarded with a batch of the most incredible brownies you’ve ever made.
Equipment You’ll Need:
- 8×8 inch baking pan
- Parchment paper
- Microwave-safe bowl
- Whisk
- Rubber spatula or wooden spoon
- Wire cooling rack
Yields: 10 servings
Prep Time: 15 minutes
Cook Time: 30 minutes
Total Time: 45 minutes
Difficulty: Easy-Moderate
Instructions:
- Preheat Oven & Prepare Pan: Preheat your oven to a precise 350°F (175°C). This ensures even baking from the moment your brownies enter the oven. Line an 8×8 inch baking pan with parchment paper, allowing some overhang on two sides. This “sling” will make lifting the cooled brownies out of the pan a breeze, preventing any stuck-on messes. Set aside.
- Melt Butter, Oil, and Sugars: In your microwave-safe bowl, combine the measured butter, vegetable oil, granulated sugar, and brown sugar. Microwave this mixture in 30-second bursts, stirring vigorously after each interval. The goal here is to fully melt the butter and dissolve both sugars into the fats. Once fully melted and combined, microwave for another minute and stir vigorously once more. This extra minute and vigorous stirring are absolutely crucial for initiating the sugar dissolution that contributes to that famous crinkle top. Don’t rush this step!
- Whisk in Eggs & Vanilla: Allow the melted sugar mixture to cool slightly – you don’t want to scramble the eggs! Once it’s warm but not piping hot, whisk in the two cold eggs, one at a time. Make sure each egg is fully incorporated into the batter before adding the next. You’ll notice the batter starting to thicken and become glossy, pulling away slightly from the sides of the bowl. This is a sign of proper aeration and emulsion. Finally, stir in the vanilla extract, which rounds out the chocolate flavor beautifully.
- Fold in Dry Ingredients: Add the all-purpose flour, cocoa powder, and salt to the wet ingredients. With a rubber spatula or wooden spoon, gently fold them into the batter. The key word here is gently and just until combined. Overmixing develops gluten, which can lead to tough, cakey brownies rather than the fudgy texture we’re after. Stop mixing as soon as you no longer see streaks of dry ingredients.
- Layer First Half of Batter: Pour roughly half of your perfectly prepared brownie batter into the parchment-lined baking pan. Use an offset spatula or the back of a spoon to spread it evenly across the bottom. Don’t worry if it’s not perfectly precise; we’re just creating a base for our delicious surprise.
- Add Mint Oreo Layer: Carefully arrange the 15 whole mint Oreos over the first layer of batter. Try to space them out relatively evenly so that almost every slice gets a piece of that minty crunch. Gently press them down slightly into the batter. Now, pour the remaining brownie batter over the Oreos, meticulously spreading it to completely cover them. Take your time to ensure the Oreos are fully encased.
- Top & Bake: Crumble the extra 5 mint Oreos and generously sprinkle them over the top of the brownie batter. This adds visual appeal and an extra layer of crunch and minty flavor. Place the pan in your preheated oven and bake for 30 minutes. The brownies are done when the edges are set and a toothpick inserted into the center comes out with moist crumbs, not wet batter, but also not completely clean. Remember, brownies continue to set as they cool, and slightly underbaked is better than overbaked for maximum fudginess.
- Cool & Slice: This is arguably the most critical step for perfect presentation! Once baked, remove the brownies from the oven and place the entire pan on a wire rack. Allow the brownies to cool down completely to room temperature before attempting to slice them. This can take several hours, or even better, let them cool overnight. Cooling allows the brownies to firm up and set, preventing crumbling and ensuring those coveted clean, perfect squares with their shiny crinkle top. Patience will be rewarded!
The Science of a Perfect Brownie: Troubleshooting & Tips
Baking is as much an art as it is a science. Understanding a few principles can elevate your brownie game significantly.
Common Brownie Pitfalls and How to Avoid Them:
- Cakey Brownies: The most common culprit is overmixing the flour. Once flour is added, mix only until just combined. Another factor can be too much leavening (though this recipe doesn’t use baking powder/soda, which helps prevent cakeiness). Overbaking can also dry them out, making them seem cakey.
- No Crinkle Top: This often happens if the sugar isn’t fully dissolved or if the eggs aren’t cold. The vigorous stirring of melted sugars helps create the crust, and cold eggs aid in sugar crystal formation on the surface.
- Dry Brownies: Almost always due to overbaking. Start checking for doneness a few minutes before the recommended time, especially if your oven runs hot. A toothpick should have moist crumbs, not wet batter, but definitely not come out clean.
- Brownies Sticking to the Pan: Always use parchment paper! It’s a lifesaver.
Pro-Tips from Sophie:
- Don’t Rush the Cooling: I cannot stress this enough. Cooling completely is paramount for a clean cut and that true fudgy texture to develop. If you cut them warm, they’ll be a gooey, delicious mess, but not those neat squares.
- Clean Slicing: Once completely cool, use a large, sharp knife. For extra clean cuts, wipe the knife clean with a damp cloth after each slice.
- Salt is Your Friend: A good pinch of flaky sea salt sprinkled over the top after baking can elevate the flavors even further, providing a delightful salty-sweet contrast.
- Oven Thermometer: Every oven is different. An inexpensive oven thermometer can ensure your oven is truly at 350°F, preventing under or overbaking.
Serving Suggestions & Delightful Variations
These Ultimate Fudge Mint Oreo Brownies are phenomenal on their own, but here are a few ways to elevate the experience:
- Warm with Ice Cream: A slightly warmed brownie with a scoop of vanilla bean or mint chocolate chip ice cream is pure bliss. The contrast of warm and cold, fudgy and creamy, is irresistible.
- Drizzled with Chocolate Ganache: For the ultimate indulgence, a light drizzle of homemade chocolate ganache takes these over the top.
- Coffee or Milk Pairing: A cold glass of milk or a hot cup of coffee makes the perfect accompaniment.
- Holiday Treat: The minty flavor makes these perfect for Christmas or St. Patrick’s Day gatherings.
Creative Variations:
Want to switch things up? This base brownie recipe is incredibly versatile!
- Classic Oreo Brownies: Simply swap out the mint Oreos for regular, golden, or even double-stuffed Oreos.
- Peppermint Bark Brownies: During the holidays, crush peppermint bark and sprinkle it on top after baking (or melt some and swirl it in).
- Other Cookie Inclusions: Get creative! Consider crushed Peanut Butter Nutella Cookies for an extra nutty layer, or even something like my Pistachio NYC Cookies for a unique twist.
- White Chocolate Swirl: Melt some white chocolate and swirl it into the top layer of batter before baking for an elegant touch. (Speaking of white chocolate, you might love my White Chocolate Stuffed Cookies!)
- Cream Egg Stuffed: If you’re feeling extra adventurous, you could even try stuffing them with small Creme Eggs for an Easter twist, though the baking time might need slight adjustment.
Storage and Shelf Life
Your Ultimate Fudge Mint Oreo Brownies, if stored correctly, will maintain their incredible fudginess for days.
- Room Temperature: Store cooled brownies in an airtight container at room temperature for up to 3-4 days. Placing a piece of parchment paper between layers can prevent sticking.
- Refrigeration: While not strictly necessary for freshness, refrigerating them can extend their shelf life slightly, up to a week. However, they may become firmer when cold. Allow them to come to room temperature for the best texture.
- Freezing: Brownies freeze beautifully! Cut them into individual squares, wrap each tightly in plastic wrap, then place them in a freezer-safe bag or container. They will last for up to 2-3 months. Thaw at room temperature for an hour or two before enjoying.
FAQs About Fudge Mint Oreo Brownies
Got questions? I’ve got answers! Here are some common queries I get about making the perfect brownies:
How do I get that perfect crinkle top on my brownies?
Achieving the elusive crinkle top involves a few key steps. First, ensure your butter, oil, and sugars are fully melted and vigorously stirred together – this creates a sugar crust. Second, use cold eggs; their temperature helps with the sugar crystal formation. Third, do not overmix the flour. Finally, and crucially, allow the brownies to cool completely before cutting. Patience is key for that beautiful shine!
Can I use different types of Oreos or other cookies?
Absolutely! While mint Oreos provide a fantastic flavor combination, this recipe is incredibly versatile. Feel free to experiment with classic Oreos, peanut butter Oreos, or even other sturdy sandwich cookies like chocolate chip or shortbread. Just ensure they can withstand baking without completely disintegrating. Adjusting the top layer with complementary crushed cookies will also enhance the experience.
My brownies came out dry/cakey. What went wrong?
Dry or cakey brownies are often a sign of overbaking or overmixing. Ensure you only fold the dry ingredients until just combined, as overmixing develops too much gluten. Also, pay close attention to baking time. Brownies are often done when the edges are set and a toothpick inserted into the center should come out with moist crumbs, not wet batter, but not completely clean. Oven temperatures can vary, so an oven thermometer can be very helpful.
How long do these brownies last, and how should I store them?
These fudge mint Oreo brownies will stay fresh at room temperature in an airtight container for up to 3-4 days. For longer storage, you can freeze them for up to 2-3 months. Wrap individual slices tightly in plastic wrap, then place them in a freezer-safe bag or container. Thaw at room temperature for an hour or so before enjoying.
Can I make these brownies in a different sized pan?
You can, but you’ll need to adjust baking times. An 8×8 inch pan is ideal for the thickness and fudginess of this recipe. If using a 9×13 inch pan, you might need to double the recipe, and the baking time will likely be similar or slightly longer. For a 9×9 inch pan, the brownies will be slightly thinner, and baking time might reduce by 3-5 minutes. Always check for doneness with a toothpick.
Indulge in the Ultimate Comfort
There’s something truly special about a homemade brownie – the aroma filling your kitchen, the anticipation as it cools, and that first glorious bite. These Ultimate Fudge Mint Oreo Brownies bring all that joy and more. They’re a celebration of comfort, a testament to thoughtful baking, and a guaranteed crowd-pleaser that will have everyone asking for the recipe.
I’m Sophie, and I genuinely believe that everyone deserves to experience the magic of baking. This recipe is a culmination of passion, precision, and countless taste tests to bring you nothing but the best. So go ahead, preheat that oven, gather your ingredients, and prepare to make some unforgettable memories (and delicious brownies!).
Happy baking,
Sophie


