There are some flavors that just evoke pure comfort, nostalgia, and a touch of indulgence. Red velvet is undeniably one of them. That rich, subtly cocoa-infused flavor paired with a striking crimson hue captures hearts (and taste buds!) every single time. But what if you could have all that decadent joy with a fraction of the fuss, and even a smart, healthy-ish twist? That’s precisely what we’re diving into today with my absolute favorite Easy Red Velvet Cake Mix Cookies!
As Sophie, the recipe developer behind SweetCraft Recipes, I’ve always been on a mission to bring delicious, accessible baking into every home. This particular recipe for Red Velvet Cake Mix Cookies has been a labor of love, tested and tweaked no less than nine times in my kitchen. Why so many? Because I wanted to ensure every single batch was perfectly soft, beautifully crinkled, and utterly foolproof. It’s the kind of recipe that makes you feel like a baking superstar, even when you’re short on time and ingredients.
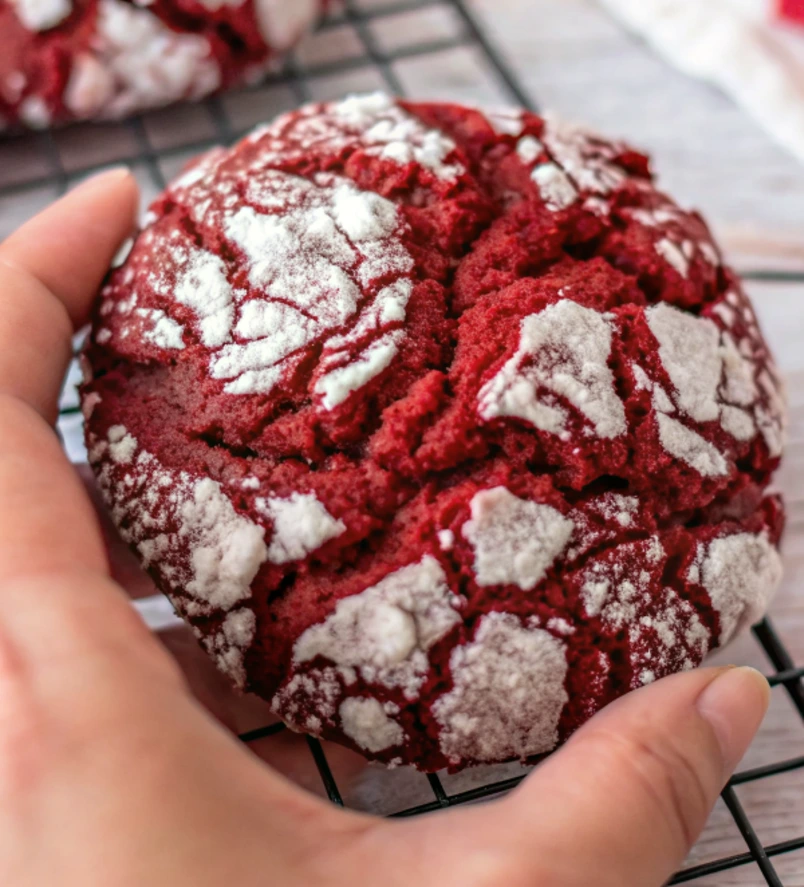
Imagine biting into a soft, chewy cookie, bursting with that signature red velvet flavor, its surface delicately powdered with sugar, creating those irresistible crinkles. These aren’t just cookies; they’re little bites of happiness, perfect for a cozy evening, a bustling family gathering, or a thoughtful homemade gift. They’re a comfort-food favorite, streamlined for modern life, and designed to bring smiles to everyone who tries them. Let’s get baking!
Why You’ll Absolutely Love These Red Velvet Cake Mix Cookies
These aren’t just any red velvet cookies; they’re the ones you’ll return to again and again. Here’s why they’re destined to become a staple in your recipe collection:
- Effortlessly Easy: Starting with a cake mix drastically cuts down on ingredients and prep time. You’ll be amazed at how quickly these come together!
- Pure Comfort in Every Bite: That iconic red velvet flavor is rich, comforting, and perfectly balanced, reminiscent of your favorite bakery treat.
- A “Healthy-ish” Twist: We’re talking about controlled indulgence here! These cookies are perfectly portioned for a satisfying sweet treat, making them a smarter choice for those mindful moments. Plus, fewer processed ingredients than many complex scratch recipes.
- Beautiful Crinkly Texture: The powdered sugar coating creates a gorgeous crinkled surface that’s visually stunning and adds a delightful textural contrast.
- Family-Friendly: Kids and adults alike adore these cookies. They’re simple enough for little helpers to assist with (especially the rolling part!), making baking a fun family activity.
- Versatile for Any Occasion: Whether it’s a holiday party, a school bake sale, a casual get-together, or just a treat for yourself, these cookies fit right in.
What Are Cake Mix Cookies, Anyway? The Secret to Stress-Free Baking
If you’re new to the world of cake mix cookies, prepare to have your mind blown. This ingenious baking hack takes a boxed cake mix – typically used for, well, cakes – and transforms it into a delightful batch of cookies with just a few additional ingredients. It’s one of my go-to methods for achieving homemade taste with minimal effort.
Here’s why they’re so brilliant:
- Built-in Flavor and Leavening: Cake mixes come pre-loaded with flour, sugar, leavening agents, and flavorings. This means you skip measuring out a dozen different dry ingredients.
- Foolproof Consistency: They’re designed for consistent results, making it harder to mess up your cookie dough.
- Speed: From start to finish, these cookies can be in your hand in under an hour (including chill time!), which is a lifesaver when cravings strike or unexpected guests arrive.
- Versatility: Beyond red velvet, almost any cake mix flavor can be turned into cookies. The possibilities for customization are endless, from adding chocolate chips to sprinkles or different glazes.
These cookies truly embody the spirit of “semi-homemade” baking at its best – taking a convenient shortcut without sacrificing flavor or quality.
The “Healthy Twist”: Enjoying Comfort Food, Smarter
You might be wondering, “Red velvet and healthy in the same sentence?” And it’s a fair question! When we talk about a “healthy twist” for a comfort-food favorite like these Red Velvet Cake Mix Cookies, we’re not suggesting they’re a health food. Instead, it’s about making smarter choices that allow you to enjoy your favorite indulgences thoughtfully.
Here’s how these cookies fit that bill:
- Portion Control is Key: Unlike a large slice of red velvet cake, these cookies are perfectly portioned. Each cookie offers a satisfying burst of flavor without being an overwhelming treat. This makes it easier to enjoy one or two without overindulging.
- Fewer Added Ingredients: Using a cake mix means you’re adding very few extra fats and sugars to the base. While cake mixes contain these, you’re not doubling down on them with additional butter or sugar as you might in a scratch recipe.
- Simplicity: The minimal ingredient list means you’re not introducing a host of highly processed ingredients that might be found in more complex recipes or store-bought versions. You know exactly what’s going into your cookies.
- Homemade Advantage: Baking at home gives you control. You choose the oil, the eggs, and you avoid many of the preservatives and artificial additives often found in commercially baked goods.
So, while these are still a delightful dessert, they offer a way to indulge in that beloved red velvet flavor in a more controlled, mindful, and simplified manner. It’s about finding that sweet spot between deliciousness and smart consumption.
Essential Ingredients for Your Red Velvet Masterpiece
One of the greatest joys of this recipe is its incredibly short ingredient list. You likely have most of these on hand already!
- 1 15.25 oz. box red velvet cake mix: This is our star! Any brand will work, but I often reach for Duncan Hines or Betty Crocker. The specific box size is important for the right dough consistency.
- 1/3 cup vegetable oil: This provides moisture and contributes to the chewy texture. You can also use canola oil or another neutral-flavored oil.
- 2 large eggs: Eggs bind the ingredients, add richness, and help with the cookie’s structure. Room temperature eggs blend more smoothly.
- 1 teaspoon baking powder: While cake mix has leavening, adding a little extra baking powder ensures your cookies puff up beautifully and maintain a soft, cake-like interior.
- 1/2 cup powdered sugar, for coating: This is non-negotiable for those gorgeous crinkles! Don’t skimp on the coating.
That’s it! Simple, right? Minimal ingredients mean less shopping and quicker prep, leaving more time for enjoying the fruits of your labor.
Baking Your Red Velvet Cake Mix Cookies: Step-by-Step with Sophie’s Pro Tips
Ready to create some magic? Follow these simple steps for perfect Red Velvet Cake Mix Cookies every time. My 9+ tests have ironed out all the kinks, so you can bake with confidence!
Step 1: Combine the Dry and Wet Ingredients
In a large mixing bowl, add the entire box of red velvet cake mix, 1/3 cup vegetable oil, 2 large eggs, and 1 teaspoon of baking powder. Using a large bowl will prevent any spills as you mix.
- Sophie’s Pro Tip: Ensure your eggs are at room temperature. This helps them incorporate more evenly into the dough, leading to a smoother, more consistent batter. If your eggs are cold, simply place them in a bowl of warm water for 5-10 minutes.
Step 2: Mix Until Smooth
Use an electric hand mixer to mix the ingredients until they are well combined and the dough is smooth. Start on low speed to prevent a cloud of cake mix dust, then increase to medium. Mix until no dry streaks of cake mix remain.
- Sophie’s Pro Tip: Avoid overmixing! Once everything is just combined and smooth, stop. Overmixing can develop the gluten too much, leading to tougher cookies. We want soft and chewy!
Step 3: Chill the Dough
Cover the dough with plastic wrap and refrigerate for 15-20 minutes.
- Sophie’s Pro Tip (Crucial Step!): Do NOT skip this chilling step! It’s the secret to perfectly formed cookies that don’t spread too much. The dough will firm up, making it much easier to handle and roll. This also helps lock in moisture and flavor.
Step 4: Preheat and Prepare
While your dough is chilling, preheat your oven to 350 degrees F (175 degrees C). Prepare a cookie sheet by lining it with a silicone baking mat or parchment paper. This prevents sticking and promotes even baking.
Step 5: Roll the Dough Balls
Take about 3 tablespoons of dough and roll it gently into a smooth ball between your palms. The dough should be slightly sticky but manageable thanks to the chilling.
- Sophie’s Pro Tip: For uniform cookies, use a cookie scoop (about a 3-tablespoon size) if you have one, then just roll the scooped dough into a ball. Consistency in size means consistent baking.
Step 6: Coat in Powdered Sugar
Roll each dough ball generously in the powdered sugar, ensuring it’s fully coated. Gently knock off any excess sugar before placing it on the baking sheet.
- Sophie’s Pro Tip: Don’t be shy with the powdered sugar! A thick, even coating is what creates those beautiful, dramatic crinkles as the cookies bake and expand. Use a shallow bowl to make the coating process easier and less messy.
Step 7: Arrange on Baking Sheet
Place the powdered sugar-coated balls about 2-3 inches apart on the prepared baking sheet. This spacing allows them to spread without touching.
Step 8: Repeat and Bake
Continue with the remaining dough until all the cookies are portioned and placed on the baking sheets. Bake for 10-12 minutes, or until the cookies are slightly browned on the sides and the centers are set but still look soft.
- Sophie’s Pro Tip: Watch your cookies carefully, especially during the last few minutes. Ovens can vary, so the baking time might be slightly shorter or longer. The cookies are done when the edges are just set, and the centers still look a tiny bit soft. This ensures a perfectly chewy interior.
Step 9: Cool and Enjoy
Let the cookies cool on the baking sheet for 5 minutes. This allows them to firm up without breaking. Then, carefully remove them to a wire rack to cool completely.
- Sophie’s Pro Tip: Cooling on the baking sheet for a few minutes is important. Freshly baked cookies are delicate. Moving them too soon can cause them to fall apart. The wire rack then allows air to circulate, preventing soggy bottoms.
Serving Suggestions & Delightful Variations
These Red Velvet Cake Mix Cookies are absolutely divine on their own, but they’re also fantastic canvases for a little extra flair!
- Classic Cream Cheese Frosting Drizzle: A thin drizzle of homemade cream cheese frosting (butter, cream cheese, powdered sugar, vanilla) is the quintessential pairing for red velvet. Add it once the cookies are completely cool.
- White Chocolate Wonders: Fold 1/2 to 1 cup of white chocolate chips into the dough before chilling for an extra layer of sweetness and texture.
- Festive Sprinkles: If making these for a holiday, gently press some festive sprinkles onto the tops of the dough balls after rolling them in powdered sugar, but before baking.
- Ice Cream Sandwich: For an ultimate treat, sandwich a scoop of vanilla bean or cream cheese ice cream between two cooled cookies.
- Coffee or Tea Companion: Pair these cookies with a warm cup of coffee, tea, or even a glass of cold milk for a comforting snack.
How to Store Your Delicious Red Velvet Cake Mix Cookies
Once completely cooled, store your Red Velvet Cake Mix Cookies in an airtight container at room temperature for up to 5 days. Layer them with parchment paper if stacking to prevent sticking.
For longer storage, these cookies freeze beautifully! Place cooled cookies in a single layer on a baking sheet and freeze until solid. Then transfer them to a freezer-safe bag or container for up to 3 months. Thaw at room temperature before serving.
Expert Tips from Sophie: Lessons from 9+ Batches
After countless batches of these delicious cookies, I’ve gathered a few extra insights to ensure your success:
- Quality Cake Mix Matters: While any brand works, a good quality cake mix will yield better flavor and texture. Don’t be afraid to try different ones to find your favorite.
- Don’t Over-Mix the Dough: This is a common mistake in cookie baking. Mixing past the point where ingredients are just combined can lead to tough cookies. Less is more here!
- Cool Completely Before Storing: Storing warm cookies in an airtight container will create condensation, making them soggy. Patience is key for fresh, chewy cookies.
- Batch Baking: If you’re making a large quantity for a party, you can prepare the dough in advance and keep it refrigerated for up to 2 days before rolling and baking. Just let it sit at room temperature for 10-15 minutes before rolling if it’s too firm.
- Embrace the Imperfection: Not every crinkle will be identical, and that’s the beauty of homemade! Focus on the flavor and the joy of baking.
Common Questions About Red Velvet Cake Mix Cookies (FAQs)
Q1: Why do you refrigerate the cookie dough for Red Velvet Cake Mix Cookies?
A: Chilling the dough is a crucial step for cake mix cookies! It helps to firm up the dough, making it much easier to roll into balls without sticking to your hands. More importantly, it prevents the cookies from spreading too much in the oven, resulting in perfectly thick, chewy cookies with that beautiful crinkly texture on top. Sophie, our recipe developer, found that 15-20 minutes is the sweet spot for these particular cookies.
Q2: Can I use a different flavor of cake mix for these cookies?
A: Absolutely! The beauty of cake mix cookies is their versatility. While red velvet offers a distinct flavor and vibrant color, you can easily swap it for chocolate, vanilla, lemon, or even strawberry cake mix. The proportions of oil and eggs typically remain the same, but always check the consistency of your dough – you might need a tiny bit more flour or oil depending on the specific cake mix brand. Experiment and find your favorite!
Q3: How do I get the perfect crinkly top on my Red Velvet Cake Mix Cookies?
A: The secret to that signature crinkly top lies in two main things: rolling the dough in powdered sugar and avoiding overbaking. A generous coating of powdered sugar provides a barrier that ‘cracks’ as the cookie expands, creating the crinkle. Baking just until the edges are set and the centers are still slightly soft (10-12 minutes for this recipe) ensures the cookies remain soft and allow for that beautiful crinkle to form as they cool. Overbaking leads to a harder cookie and less prominent crinkles.
Q4: What’s the ‘healthy twist’ in these Red Velvet Cake Mix Cookies?
A: For a comfort food favorite like red velvet, the ‘healthy twist’ here focuses on simplicity, controlled indulgence, and natural ingredients where possible. Using a cake mix significantly cuts down on added sugars, fats, and artificial ingredients often found in complex recipes, streamlining the process. More importantly, it allows for easy portion control. These cookies are perfectly sized for a satisfying treat without overdoing it, making them a ‘healthier-ish’ option compared to larger, more decadent desserts. It’s about enjoying a classic favorite smarter!
Q5: Can I add chocolate chips or other mix-ins to Red Velvet Cake Mix Cookies?
A: Definitely! These cookies are a fantastic base for customization. White chocolate chips or chunks are a classic pairing with red velvet. You could also try dark chocolate chips, chopped pecans, or even a swirl of cream cheese frosting after they cool (though that changes the ‘healthy twist’ aspect!). If adding mix-ins, fold them in gently after mixing the dough, just before chilling.
Q6: How long do Red Velvet Cake Mix Cookies stay fresh?
A: When stored in an airtight container at room temperature, these Red Velvet Cake Mix Cookies will stay wonderfully fresh, soft, and chewy for up to 5 days. For longer storage, you can freeze them for up to 3 months. Just be sure to thaw them completely at room temperature before serving for the best texture.
Nutritional Information
(Disclaimer: The following nutrition information is an estimate based on the ingredients and serving size of 24 cookies per batch. Actual values may vary based on specific brands and preparation methods.)
Per Serving (1 cookie):
- Calories: 137 kcal
- Fat: 2.1 g
- Protein: 2.0 g
- Carbohydrates: 27 g
- Sugar: 20 g
- Saturated Fat: 0.7 g
- Cholesterol: 15 mg
- Sodium: 41 mg
- Fiber: 0.1 g
Ready to Bake? Get Your Printable Recipe Card!
Don’t let this delightful recipe slip away! Click here to grab your printable recipe card for these Easy Red Velvet Cake Mix Cookies. It’s perfect for your recipe binder or for sharing with friends and family.
Explore More Delicious Cookie Recipes from SweetCraft Recipes!
If you’ve loved these easy Red Velvet Cake Mix Cookies, you’re in for a treat! At SweetCraft Recipes, we’re passionate about creating irresistible cookie recipes for every craving and occasion. Check out some of our other popular creations:
- For another take on a classic red velvet, try our indulgent Stuffed Red Velvet Cookies Recipe – a true showstopper!
- Craving something unique and utterly delicious? Our Pistachio NYC Cookies Recipe brings bakery-style goodness right to your kitchen.
- If you’re a fan of whimsical treats, you absolutely must try our delightful Creme Egg Stuffed Cookies Recipe.
- For the ultimate combination of sweet and nutty, our Peanut Butter Nutella Cookie Recipe is simply irresistible.
- And if you love a gooey surprise, don’t miss our White Chocolate Stuffed Cookies – pure bliss in every bite!
Share Your Red Velvet Cake Mix Cookies Creation!
There’s nothing I love more than seeing your baking triumphs! If you make these Easy Red Velvet Cake Mix Cookies, please share a picture and tag us on social media. I’m always so thrilled to see how these recipes come to life in your homes.
These cookies truly embody what SweetCraft Recipes is all about: delicious, comforting food made accessible for every home baker. With Sophie’s seal of approval (after nine batches, you know they’re good!), you’re just a few simple steps away from enjoying one of the best red velvet treats you’ll ever make. Happy baking!


