Is there anything quite as comforting and delightful as a square of rich, creamy fudge? The kind that melts in your mouth, leaving behind a sweet, chocolatey bliss? This easy fudge recipe is your ticket to achieving that very experience, without spending hours in the kitchen. Forget complicated candy thermometers and finicky techniques. We’re talking about a simple, straightforward method that delivers perfect fudge every single time. With the holidays just around the corner, this is your go-to recipe for gifting, sharing, or simply indulging in a well-deserved treat. So gather your ingredients, and let’s whip up a batch of irresistible fudge that everyone will rave about.
My grandmother, bless her heart, always had a batch of fudge ready for any occasion. Her secret? She said it was all about the love you put into it. While I agree that a dash of love certainly helps, I’ve spent years perfecting this easy fudge recipe to ensure it’s foolproof, even for novice bakers. I’ve tested countless variations, tweaking ingredient ratios and cooking times to arrive at the perfect balance of creamy texture and intense flavor. And now, I’m thrilled to share it with you!
Fudge, like other chocolate confectioneries, are definitely trending. In fact, according to the National Confectioners Association, chocolate consumption is steadily on the rise. And, with everyone seeking quick and easy recipes, this fudge will surely be a crowd-pleaser.
Ingredients
The beauty of this easy fudge recipe lies in its simplicity. You likely already have most of these ingredients in your pantry!
- Sweetened Condensed Milk: 1 (14-ounce) can. This is the key to the fudge’s smooth and creamy texture. Don’t confuse it with evaporated milk, which has a different consistency and won’t work as well. Sweetened condensed milk undergoes a partial evaporation process, concentrating the milk solids and sugars, resulting in a rich, syrupy liquid that gives fudge its signature chewiness.
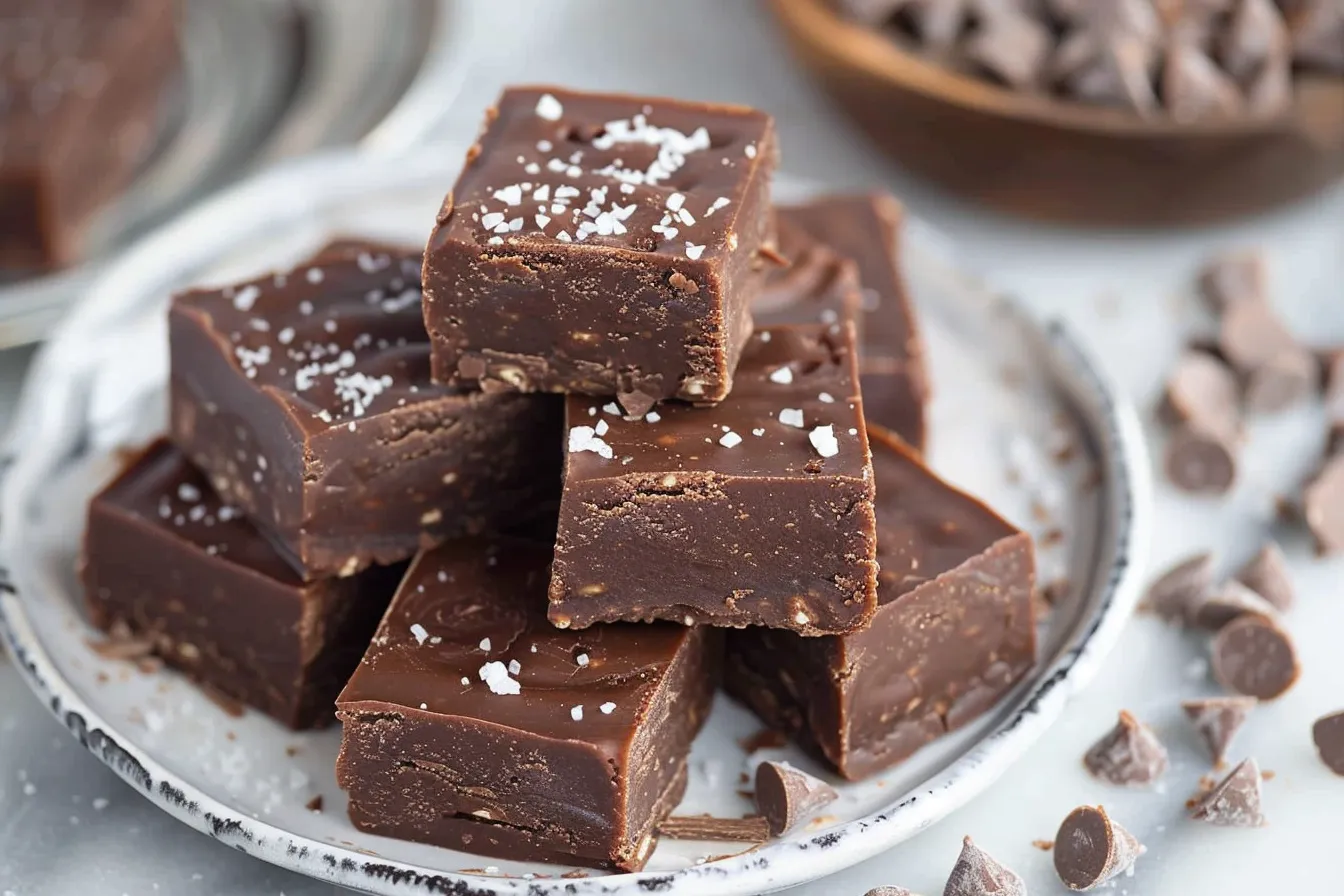
- Chocolate Chips: 3 cups. Use semi-sweet, milk chocolate, dark chocolate, or a combination! The type of chocolate chips you use will significantly impact the flavor profile of your fudge. High-quality chocolate chips will deliver a richer, more intense flavor.
- Butter: 1/4 cup (4 tablespoons), salted or unsalted. Butter adds richness, flavor, and helps to create a softer fudge. If using salted butter, you may want to reduce the amount of added salt slightly.
- Vanilla Extract: 1 teaspoon. Pure vanilla extract enhances the chocolate flavor and adds a touch of warmth. Avoid imitation vanilla extract, which can have an artificial taste.
- Salt: 1/4 teaspoon. A pinch of salt balances the sweetness and intensifies the chocolate flavor.
- Optional Mix-ins: 1/2 cup chopped nuts (walnuts, pecans, or almonds), dried fruit (cranberries or cherries), sprinkles, or peanut butter chips. Get creative and personalize your fudge!
Ingredient Substitutions:
- Dairy-Free Fudge: Use dairy-free chocolate chips and full-fat coconut milk instead of sweetened condensed milk. The result will be slightly different, but still delicious!
- Sugar-Free Fudge: Use sugar-free chocolate chips and a sugar-free sweetened condensed milk alternative. Be aware that sugar-free sweeteners can sometimes have a slightly different texture or aftertaste.
- Nut-Free Fudge: Omit the nuts or substitute with sunflower seeds or chopped pretzels for added crunch.
Expert Tips
These are a few tricks I’ve learned over the years of making fudge that ensures a perfect texture every time. I’ve personally tested these tips countless times, so you can be assured that they’ll work for you!
- Don’t Overcook: This is the most important tip! Overcooked fudge will be dry and crumbly. The fudge is ready when the chocolate is melted and the mixture is smooth.
- Use a Heavy-Bottomed Saucepan: This will help prevent the chocolate from scorching.
- Stir Constantly: This ensures even melting and prevents the chocolate from sticking to the bottom of the pan.
- Line Your Pan: This makes it easy to remove the fudge from the pan after it has set. Use parchment paper or aluminum foil.
- Let it Set Completely: Resist the urge to cut into the fudge before it has fully set. This will take at least 2 hours, but preferably overnight.
- Get Creative with Mix-Ins: Experiment with different flavors and textures to create your own signature fudge. I love adding chopped peppermint candies during the holidays or a swirl of peanut butter for a decadent treat.
- High Quality Chocolate: Using high quality chocolate will make all the difference. It’s worth the extra money and will result in much better and smoother fudge.
I’ve found that the setting time can vary depending on the humidity and temperature in your kitchen. Don’t be afraid to let the fudge sit a little longer if it’s not quite firm enough after a few hours. Trust your instincts!
Storage & Substitutions
Proper storage is key to keeping your fudge fresh and delicious. You can also try the following substitutions if you are low on any specific ingredients.
- Storage: Store fudge in an airtight container at room temperature for up to 2 weeks, or in the refrigerator for up to 1 month. For longer storage, wrap the fudge tightly in plastic wrap and freeze for up to 3 months. Let it thaw in the refrigerator before serving.
- Substitutions: While some substitutions are mentioned in the ingredients section, consider these for specific scenarios. If you don’t have vanilla extract, a dash of almond extract or even a pinch of cinnamon can add a unique flavor. If you are out of butter, you can use coconut oil, but it will change the flavor slightly.
Remember that fudge is best enjoyed at room temperature, as it softens and becomes even more creamy and delicious. Avoid storing it in a warm place, as this can cause it to melt.
FAQ
Can I use different types of chocolate chips?
Absolutely! Experiment with milk chocolate, dark chocolate, white chocolate, or even a combination. Each type of chocolate will impart a different flavor profile to your fudge. I recommend using high-quality chocolate chips for the best results.
How do I prevent my fudge from being grainy?
Grainy fudge is usually caused by overcooking or not stirring constantly. Be sure to use a heavy-bottomed saucepan and stir the mixture continuously to prevent scorching and ensure even melting. Avoid overcooking the fudge, as this can cause the sugar to crystallize.
Can I add marshmallows to this fudge recipe?
Yes, you can! Stir in 1 cup of mini marshmallows after the chocolate has melted and the mixture is smooth. Be gentle, as you don’t want to completely melt the marshmallows. This will create a rocky road-style fudge.
How long does it take for the fudge to set?
The fudge typically takes at least 2 hours to set completely in the refrigerator, but it’s best to let it set overnight for the firmest texture. The setting time can vary depending on the temperature and humidity in your kitchen.
Can I make this fudge in the microwave?
Yes, you can! Combine all ingredients in a microwave-safe bowl. Microwave in 30-second intervals, stirring well after each interval, until the chocolate is completely melted and the mixture is smooth. This method requires close attention to prevent overheating.
What kind of pan should I use?
An 8×8 inch square pan is ideal for this recipe, but you can also use a 9×9 inch pan for slightly thinner fudge. Be sure to line the pan with parchment paper or aluminum foil for easy removal.
Can I add a swirl of peanut butter to the fudge?
Yes! After pouring the fudge mixture into the pan, dollop spoonfuls of peanut butter over the top. Use a knife or toothpick to swirl the peanut butter into the fudge. This creates a delicious peanut butter fudge swirl effect.
So, there you have it – the easiest, most foolproof fudge recipe you’ll ever need. This recipe is perfect for any occasion, especially during the holiday season! Get ready to impress your friends and family with your newfound fudge-making skills.
Now, it’s your turn! Give this easy fudge recipe a try and let me know how it turns out in the comments below. Don’t forget to share your photos on social media using #EasyFudgeRecipe. And if you’re looking for more delicious dessert recipes, be sure to check out my other posts on Chocolate Chip Cookies, Easy Brownies, and Peanut Butter Blossoms.


