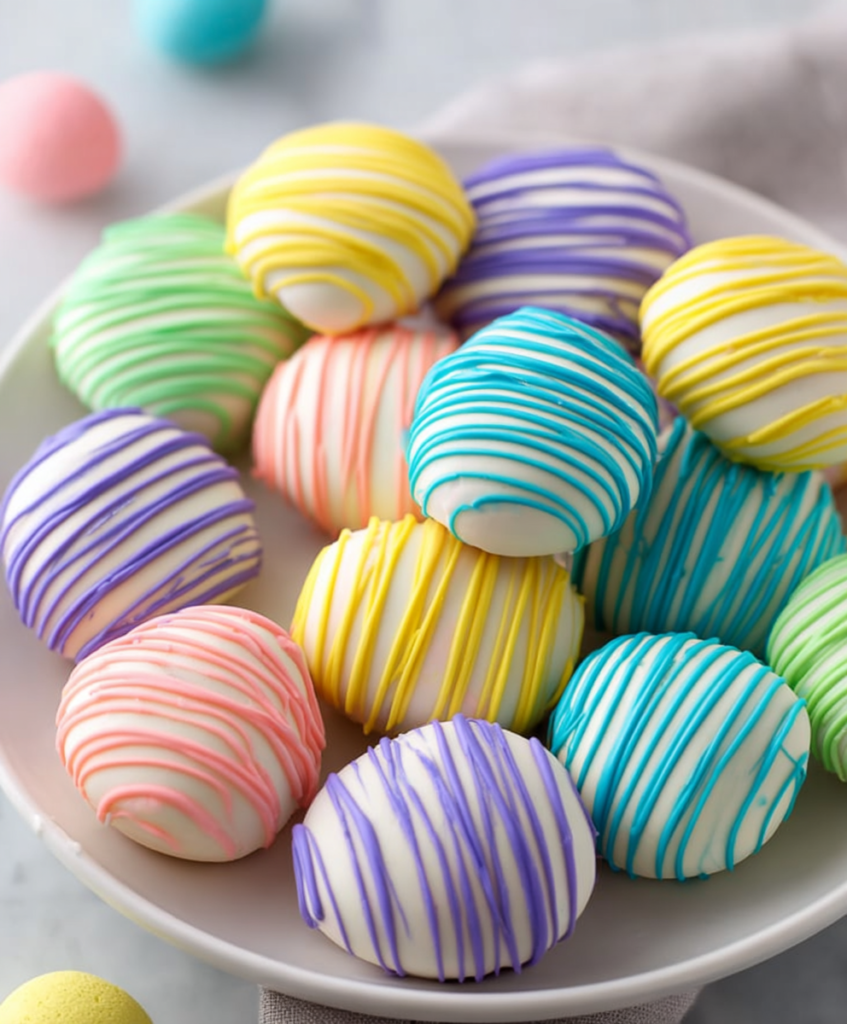
Easter Egg Oreo Cookie Balls are the ultimate no-bake dessert that transforms Golden Oreos and cream cheese into festive egg-shaped treats decorated with colorful pastel drizzles perfect for Easter celebrations. These easy Easter Oreo cookie balls require just two main ingredients for the base, plus white candy coating and gel food coloring for beautiful decorations that look like hand-painted Easter eggs. The best part is that no baking is required just mixing, shaping, dipping, and decorating make this an incredibly kid-friendly activity that yields impressive results everyone will love.
Whether you’re planning Easter parties, looking for classroom treats, organizing family baking activities, or simply wanting festive desserts that travel well, these Oreo cookie balls deliver crowd-pleasing flavor with minimal effort. They stay fresh in the refrigerator for up to a week, making them perfect for preparing ahead of your Easter celebration.
Why You’ll Love This Easter Egg Oreo Balls Recipe
These Easter egg cookie balls prove that impressive treats don’t require ovens or complicated techniques. The two-ingredient base of crushed Golden Oreos and cream cheese creates a texture that’s rich, creamy, and perfectly sweet without being overwhelming. Golden Oreos provide a neutral vanilla flavor that works beautifully as a canvas for colorful decorations, though you can absolutely use regular chocolate Oreos if you prefer.
The shaping process is wonderfully forgiving—even imperfect egg shapes look charming once decorated. Kids can easily help with crushing cookies, mixing the dough, forming eggs, and especially decorating with colorful drizzles. The creative aspect of choosing colors and designing patterns makes this recipe feel more like an art project than baking, which keeps children engaged and excited.
The white candy coating creates a smooth, professional-looking finish that hardens beautifully at room temperature. Unlike some dipped treats that require tempering chocolate or stay soft indefinitely, candy coating sets firm and creates the perfect surface for colorful decorations. The finished eggs look bakery-quality but cost a fraction of store-bought treats.
Ingredients for Easter Egg Oreo Cookie Balls
Cookie Ball Base
- 14.3 oz package Golden Oreos (36 cookies) – Creates the foundation flavor and texture
- 8 oz cream cheese, room temperature – Binds cookies and adds creaminess
Coating and Decoration
- 10 oz white candy coating – For dipping and coating all the eggs
- Additional 1 oz white candy coating per color – For decorating (about 5 colors typically)
- Gel icing colors – Creates vibrant pastel shades for decorating
Special Equipment
- Food processor or blender – For crushing cookies into fine crumbs
- Toothpicks – For dipping eggs into coating
- Parchment paper – For setting coated eggs to dry
Ingredient Notes
Golden vs Regular Oreos: Golden Oreos create a vanilla-flavored base with pale color that showcases decorations beautifully. Regular chocolate Oreos work perfectly too but create a darker base. The recipe works identically with either variety.
Cream Cheese Temperature: Room temperature cream cheese is crucial for smooth mixing. Cold cream cheese creates lumps and won’t incorporate evenly with cookie crumbs. Leave it out for 30-60 minutes before starting.
Candy Coating vs Chocolate: Candy coating (also called candy melts or almond bark) melts smoothly and hardens at room temperature without tempering. White chocolate can be substituted but may require adding 1 tablespoon coconut oil per 10 ounces to achieve proper consistency.
Gel Food Colors: Gel or paste food coloring creates vibrant colors without thinning the melted candy coating. Liquid food coloring can cause the coating to seize and become unusable, so always use gel or paste formulations.
Color Quantities: The recipe suggests using about 1 ounce of white coating per color for decorating. If you’re using only one or two colors, increase to 3-4 ounces per color so you have enough to work with comfortably.
Step-by-Step Instructions
Step 1 – Crush the Cookies
Add the entire package of Golden Oreos (36 cookies, including the cream filling) to a food processor or blender. Pulse until the cookies are crushed into fine, uniform crumbs. The texture should resemble sand with no large chunks remaining. If you don’t have a food processor, place cookies in a sealed plastic bag and crush with a rolling pin, though this takes more time and effort.
Step 2 – Mix with Cream Cheese
Transfer the cookie crumbs to a large bowl. Add the room temperature cream cheese. Using a sturdy spoon, spatula, or your hands (wearing food-safe gloves), mix the cream cheese and cookie crumbs together until completely combined. The mixture should be uniform in color and texture with no cream cheese streaks visible. You should be able to easily form balls that hold together without crumbling.
Step 3 – Shape the Eggs
Using about 1½ tablespoons of mixture per egg, scoop and roll the mixture in your palms to form oval egg shapes. Make one end slightly more pointed and the other slightly more rounded to mimic real egg shapes. Place shaped eggs on a parchment-lined baking sheet or plate. This recipe yields approximately 20-22 eggs depending on exact sizing.
Step 4 – Chill to Firm
Place the baking sheet with shaped eggs in the refrigerator for about 1 hour to firm up. This chilling step is essential—it makes the eggs much easier to dip without falling apart or sliding off the toothpick.
Step 5 – Prepare Dipping Station
Once the eggs are chilled and firm, melt the 10 ounces of white candy coating according to package directions. Typically this means microwaving in 30-second intervals, stirring between each, until completely smooth. Set up your parchment paper on a clean surface for setting the dipped eggs.
Step 6 – Dip the Eggs
Insert a toothpick into the bottom (wider end) of each chilled egg. Dip the egg into the melted white candy coating, submerging it completely. Lift the egg out and gently shake off excess coating by tapping your wrist lightly. Place the coated egg on parchment paper and gently twist the toothpick while pulling it out to minimize the hole. Use a small dab of candy coating on your finger or a toothpick to fill in the hole where the toothpick was inserted. Repeat with all eggs and let the coating dry completely, about 15-20 minutes at room temperature.
Step 7 – Create Colored Coatings
Once the white base coating is completely dry and hard, prepare your decorative colors. Melt about 1 ounce of white candy coating for each color you plan to use. Add gel icing color a little at a time, stirring after each addition, until you achieve your desired pastel shade. Common Easter colors include pink, purple, blue, yellow, and green, but use any colors you prefer.
Step 8 – Decorate the Eggs
Transfer each colored coating to a small piping bag, plastic squeeze bottle, or ziplock bag with a tiny corner snipped off. Drizzle, pipe, or zigzag the colored coatings over the white-coated eggs in decorative patterns. You can create stripes, zigzags, dots, or random drizzles—there’s no wrong way to decorate. Work with one or two colors at a time, letting each color set slightly before adding the next if you want distinct lines rather than colors bleeding together.
Step 9 – Final Setting and Storage
Let all decorated eggs sit at room temperature for about 30 minutes until the colored decorations are completely set and hard. Transfer finished eggs to an airtight container and store in the refrigerator for up to one week.
Pro Tips for Success
Room Temperature Cream Cheese is Essential: Cold cream cheese won’t mix smoothly and creates a lumpy, difficult-to-work-with mixture. Plan ahead and let it soften completely.
Chill Before Dipping: Skipping the chilling step results in eggs that fall apart or slide off toothpicks during dipping. The hour of refrigeration makes an enormous difference in ease of dipping.
Work Quickly with Coating: Candy coating hardens as it cools. If it becomes too thick while dipping, microwave it for 10-15 seconds to thin it back to working consistency.
Toothpick Technique: Inserting the toothpick into the bottom (wider end) of the egg provides better stability during dipping. The twisting motion while removing minimizes the visible hole.
Color Gradually: Start with just a tiny amount of gel color and add more until you reach your desired shade. It’s easy to add more but impossible to remove excess color.
Get Creative with Decorations: Beyond drizzles, try adding sprinkles, edible pearls, or sanding sugar while the colored coating is still wet for extra dimension and texture.
Flavor Variations
Chocolate Easter Eggs: Use regular chocolate Oreos instead of Golden for rich chocolate flavor throughout.
Peanut Butter Oreo Eggs: Use peanut butter Oreos for nutty flavor, or add 2 tablespoons peanut butter to the cream cheese mixture.
Mint Chocolate Eggs: Use mint Oreos or add ¼ teaspoon peppermint extract to the mixture for refreshing mint flavor.
Birthday Cake Eggs: Use Birthday Cake Oreos and decorate with rainbow sprinkles for colorful year-round treats.
Red Velvet Eggs: Use Red Velvet Oreos and drizzle with cream cheese-colored coating for elegant presentation similar to our red velvet cookies.
Serving Suggestions
Display Easter Egg Oreo balls on a decorative serving platter lined with artificial grass or shredded paper “grass” for festive Easter presentation. Arrange them in clear glass bowls where their colorful decorations can shine, or nestle them in Easter baskets alongside our Italian Easter cookies and Valentine brownies for impressive holiday spreads.
For Easter egg hunts, wrap individual eggs in clear cellophane tied with pastel ribbons and hide them alongside plastic eggs filled with candy. Package them in clear boxes or bags for Easter party favors, teacher gifts, or hostess presents. They also make adorable additions to Easter brunch buffets served alongside fresh fruit, pastries, and other spring desserts.
Create an interactive dessert station at parties where kids can decorate their own eggs using pre-dipped white-coated eggs and various colored coatings in squeeze bottles.
Storage and Freezing Instructions
Refrigerator Storage: Store finished Easter Egg Oreo balls in an airtight container in the refrigerator for up to one week. The cream cheese requires refrigeration to stay fresh and prevent spoilage. Layer parchment paper between stacks to prevent decorations from smudging.
Room Temperature: These eggs can sit at room temperature during parties or gatherings for 2-3 hours without issue, but should be returned to the refrigerator for longer storage.
Freezing: Freeze undecorated or decorated eggs in airtight containers for up to two months. Place parchment paper between layers to prevent sticking. Thaw in the refrigerator for several hours before serving. The texture remains excellent after freezing.
Make-Ahead Tips: Shape and dip eggs up to three days ahead, then add colorful decorations the day before serving for freshest appearance.
Nutrition Facts (Per Serving)
| Nutrient | Amount |
|---|---|
| Calories | 132 |
| Protein | 1.6g |
| Carbohydrates | 11.6g |
| Fat | 9g |
| Fiber | 0.2g |
| Sodium | 56mg |
Based on 21 servings (1 egg each). Nutritional values are approximate.
FAQ About Easter Egg Oreo Cookie Balls
Why is my Oreo mixture too crumbly to form balls?
Crumbly mixture usually means the cream cheese is too cold or you haven’t mixed long enough. Make sure your cream cheese is completely softened to room temperature and mix vigorously until the mixture becomes cohesive and slightly sticky. If it’s still too dry after thorough mixing, add 1-2 teaspoons of softened cream cheese and mix again.
Can I use regular chocolate instead of candy coating?
Yes, but regular chocolate requires tempering to harden properly at room temperature, which is more complicated. If using chocolate, add 1 tablespoon coconut oil per 10 ounces of chocolate to help it set without tempering. Candy coating is much easier and produces more reliable results for beginners.
How do I prevent the candy coating from cracking?
Cracking usually happens when cold eggs are dipped into hot coating, causing temperature shock. Make sure your eggs are refrigerator-cold but not frozen, and let your melted coating cool slightly (it should be warm but not hot) before dipping. Also ensure the coating isn’t too thick—thin it with a teaspoon of vegetable oil if needed.
Can kids help make these Easter egg treats?
Absolutely! This is one of the most kid-friendly recipes. Children can help crush cookies (in a sealed bag with a rolling pin), mix ingredients, shape eggs, and especially love decorating with colorful drizzles. Adults should handle the dipping in hot coating, but kids can participate in almost every other step.
Final Thoughts
Easter Egg Oreo Cookie Balls combine the universally loved flavor of Oreos with festive Easter decorations to create treats that impress at parties while being simple enough for family activities. The no-bake method means anyone can make these successfully regardless of baking experience, while the creative decorating process keeps everyone engaged and excited. Whether you’re preparing treats for Easter celebrations, creating edible gifts, or simply enjoying quality time with family in the kitchen, these colorful cookie balls deliver joy in every bite.
Meta Title: Easter Egg Oreo Balls Recipe – Easy No-Bake Treat
Meta Description: Make festive Easter Egg Oreo balls with just 2 ingredients! No-bake cookie balls with colorful decorations. Perfect for kids & parties!
Permalink Slug: easter-egg-oreo-cookie-balls
Category: Desserts
Subcategory: No-Bake Treats


