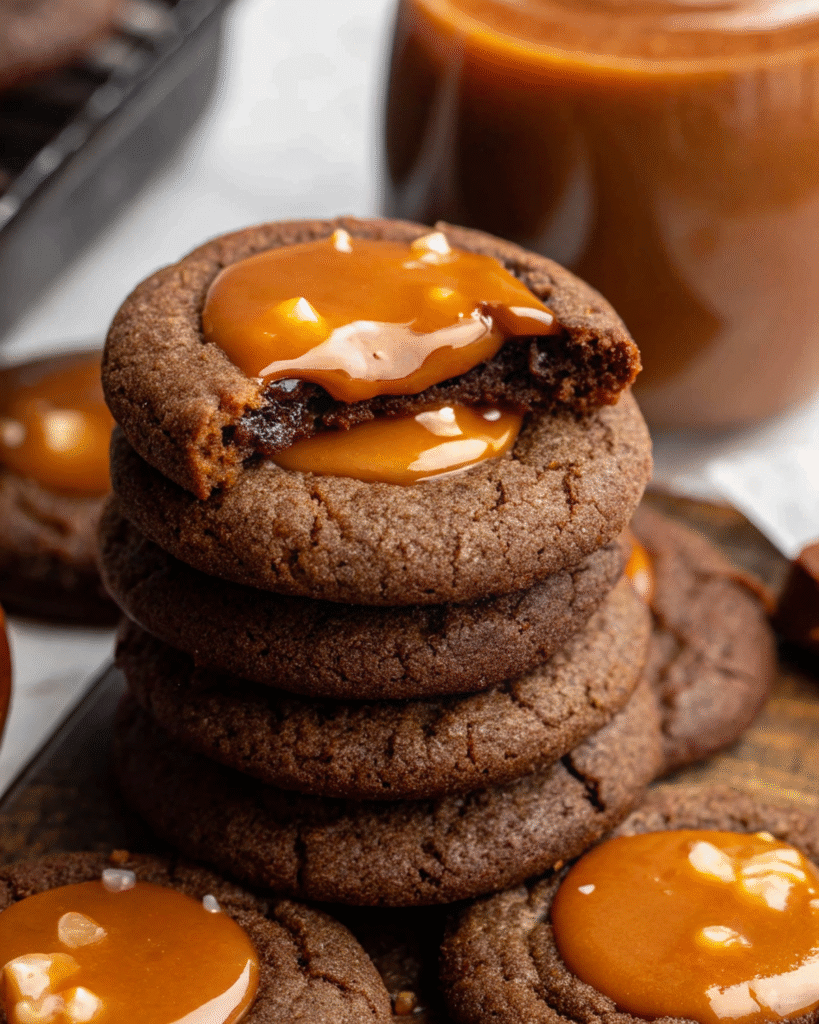
Hey there, fellow cookie lovers! Sophie here from Sweet Craft Recipes, and if there’s one thing I’m absolutely passionate about, it’s creating desserts that bring pure joy and comfort to the table. Today, I’m beyond excited to share a recipe that has become an instant classic in my kitchen – my Chocolate Caramel Cookies. After meticulously testing and refining this recipe over nine times (yes, you read that right!), I’ve finally perfected the balance between a deeply chewy chocolate cookie and a luscious, gooey, homemade caramel filling, all topped with a sprinkle of flaky sea salt that makes every bite an absolute dream.
This isn’t just another cookie recipe; it’s a labor of love designed to be a true comfort-food favorite, perfect for brightening up any family gathering or simply indulging in a moment of sweet bliss. And the best part? I’ve managed to incorporate a delightful “healthy-ish twist” that makes them feel a little less guilt-inducing without sacrificing one ounce of that decadent flavor.
So, if you’re ready to elevate your cookie game and impress everyone with a treat that’s both familiar and spectacularly special, grab your apron. We’re about to make some magic!
Why You’ll Fall Head Over Heels for Sophie’s Chocolate Caramel Cookies
These aren’t just any cookies; they’re an experience. Here’s why this recipe will quickly become your new go-to:
- Unrivaled Chewy Texture: Our chocolate cookie base is designed for maximum chewiness, creating the perfect contrast to the creamy caramel.
- Decadent Homemade Caramel: Forget store-bought! My step-by-step method makes crafting rich, buttery caramel surprisingly achievable and utterly superior.
- Perfect Balance of Sweet & Salty: The sprinkle of flaky sea salt on top cuts through the sweetness beautifully, creating an addictive flavor profile.
- Comfort Food with a Twist: While undeniably indulgent, my “healthy-ish” approach means you can enjoy these beloved treats with a little extra peace of mind.
- Impressive & Shareable: Perfect for potlucks, holidays, or just a cozy night in, these cookies are a guaranteed crowd-pleaser for any family gathering.
The Magic Behind Sophie’s Chocolate Caramel Cookies: A Deeper Dive
As a passionate baker and recipe developer, I believe in understanding why certain ingredients and techniques yield the best results. It’s this level of expertise and attention to detail that ensures my recipes are not just good, but consistently great.
The Perfect Chocolate Cookie Base
My quest for the ultimate chocolate cookie led me to a few key discoveries:
- Dutch Process Cocoa Powder: This isn’t just for color; Dutch process cocoa has a milder, less bitter chocolate flavor compared to natural cocoa. It creates a darker, more mellow chocolate cookie that perfectly complements the sweet caramel, without being overpowering. Its alkalized nature also reacts differently with baking powder, contributing to a wonderfully soft and chewy texture.
- Brown Sugar Dominance: Notice the higher ratio of brown sugar to granulated sugar? Brown sugar contains molasses, which not only adds a lovely depth of flavor but also contributes significantly to the cookie’s moisture and chewiness. This is crucial for that soft, almost fudgy center.
- Egg Yolks Only: This is one of my favorite “secret weapons” for rich, tender cookies! Using only egg yolks (and ditching the whites for this recipe) adds fat and emulsifiers, resulting in an incredibly tender, melt-in-your-mouth texture without making the cookie tough or cakey. It’s a simple swap that makes a monumental difference.
- Chilling the Dough: Patience is a virtue, especially in baking! Chilling the dough serves several purposes: it prevents the cookies from spreading too much, allows the flavors to meld, and helps create that ideal chewy texture. It’s a non-negotiable step for cookie perfection.
Mastering the Homemade Caramel
Making caramel from scratch can seem intimidating, but I promise it’s more straightforward than you think if you follow a few simple rules. My method focuses on building layers of flavor and achieving that perfectly soft, pourable consistency for filling:
- Dry Sugar Method: We start by melting granulated sugar dry in a saucepan. This method is fantastic for beginners as it’s less prone to crystallization than wet methods (where you add water). Patience is key here – let the sugar melt slowly and evenly.
- Room Temperature Ingredients: Notice I specify room temperature butter and heavy cream for the caramel. Adding cold ingredients to hot sugar can cause it to seize and clump, making it harder to get a smooth, cohesive caramel.
- The Right Pan: A heavy-bottomed saucepan is your best friend here. It distributes heat more evenly, preventing hot spots that can burn the sugar.
- Salted Butter: Using salted butter for the caramel adds an extra layer of flavor complexity and a subtle counterpoint to the sweetness. You’ll still add more sea salt, but this initial saltiness is key.
With these foundational principles, you’re not just following a recipe; you’re understanding the craft of baking, which is what Sweet Craft Recipes is all about!
Ingredients You’ll Need (and Why They Matter)
Using quality ingredients is the bedrock of any truly excellent recipe. Here’s a breakdown of what you’ll need for these incredible Chocolate Caramel Cookies, with a few notes on why each component plays a vital role.
For the Chewy Chocolate Cookies:
- All-Purpose Flour (spooned and leveled): The base of our cookie. Spooning and leveling ensures you don’t compact the flour, leading to a denser, drier cookie.
- Dutch Process Cocoa Powder: As discussed, for a deep, mellow chocolate flavor and rich color.
- Baking Powder: Our leavening agent, providing a slight lift for a tender crumb.
- Sea Salt: Balances the sweetness and enhances all the chocolate flavors.
- Unsalted Butter (softened): Provides richness, tenderizes the cookies, and helps create that perfectly chewy texture. Softened butter creams easily with sugar, incorporating air.
- Light Brown Sugar (packed): Essential for moisture, chewiness, and that distinct caramel-like flavor in the cookie itself.
- Granulated White Sugar: Contributes to structure and sweetness.
- Egg Yolks (at room temperature): The secret to super tender, rich cookies. Room temperature ensures they emulsify smoothly into the butter mixture.
- Vanilla Extract: A flavor enhancer that complements chocolate beautifully. Use good quality extract!
For the Luscious Homemade Caramel:
- Granulated White Sugar: The foundation of our caramel.
- Salted Butter (softened): Adds rich flavor and balances the sweetness. Softened butter incorporates more smoothly.
- Heavy Cream (at room temperature): Provides the necessary fat and liquid to create a creamy, emulsified caramel sauce. Room temperature is key to prevent seizing.
- Vanilla Extract: Enhances the caramel flavor.
- Sea Salt (1/4 – 1/2 tsp, to taste): Crucial for that irresistible sweet-and-salty dynamic. Adjust based on your preference!
For Finishing:
- Flaky Sea Salt: A final flourish that makes these cookies visually stunning and provides a textural pop with every bite. Don’t skip it!
Gathering your ingredients and having them prepped (mise en place!) makes the baking process so much smoother and more enjoyable.
How to Make Chocolate Caramel Cookies (Step-by-Step with Expert Tips)
This recipe might have a few steps, but each one is straightforward. Just take your time, follow my instructions, and you’ll be rewarded with the best chocolate caramel cookies you’ve ever tasted!
Cookie Dough Preparation:
- Combine Dry Ingredients: In a medium bowl, whisk together the all-purpose flour, Dutch process cocoa powder, 1/2 tsp baking powder, and 1/2 tsp sea salt. Set this flour mixture aside.
- Cream Butter & Sugars: In a large bowl, using an electric mixer on high speed, cream the softened unsalted butter, packed light brown sugar, and 1/4 cup granulated white sugar together until the mixture is light, fluffy, and pale in color. This takes a good 2-3 minutes.
- Add Egg Yolks & Vanilla: Reduce the mixer speed to medium. Add the two room temperature egg yolks and 1 1/2 tsp vanilla extract. Mix for another 1-2 minutes until everything is well combined and fluffy again.
- Incorporate Dry into Wet: With the mixer on low speed, gradually add the reserved dry ingredients to the wet mixture. Mix just until barely combined. Be careful not to overmix; overmixing can develop the gluten too much, leading to tough cookies. A few streaks of flour are fine, they’ll disappear with the next step.
- Scoop, Indent, & Chill: Scoop the dough into 32 equal portions using a tablespoon-sized cookie scoop (this helps with uniformity). Roll each portion into a smooth ball. Immediately after rolling, take a 1/4 teaspoon measuring spoon and press it firmly into the center of each dough ball to create a clear indent. Place the indented dough balls on a plate or baking sheet lined with parchment paper and chill them in the refrigerator for at least one hour. This step is crucial for preventing spread and developing flavor!
Baking the Cookies:
- Preheat Oven: About 15 minutes before you’re ready to bake, preheat your oven to 350°F (175°C). Line large baking sheets with parchment paper.
- Arrange & Bake: Arrange no more than 12 chilled cookie dough balls per prepared baking sheet, ensuring plenty of space between them. Bake for 9-11 minutes. The edges should be set, but the centers will still look soft and slightly underbaked. This is perfect for a chewy cookie!
- Reshape & Cool: As soon as the cookies come out of the oven, use the 1/4 teaspoon again to gently press down on the centers, reinforcing the indent. Immediately, while the cookies are still hot, take a circular cookie cutter or biscuit cutter slightly larger than your cookies and gently swirl it around each cookie. This trick, known as “cookie scooting,” helps create perfectly round cookies. Let the cookies cool on the baking sheet for five minutes to set, then carefully transfer them to a wire rack to cool completely before filling.
Crafting the Perfect Homemade Caramel Sauce
Now for the star of the show – that irresistible caramel! Don’t let homemade caramel intimidate you. With focus and patience, you’ll nail it.
- Melt the Sugar: In a large, heavy-bottomed saucepan (this is important for even heating), add the 1 cup granulated white sugar. Heat it over medium-low heat. Do not stir initially. Watch as the sugar slowly melts and turns into a clear liquid, then gradually transforms into a beautiful golden amber color. Swirl the pan occasionally to help it melt evenly. Be patient; this can take 8-10 minutes. Do not let it burn, as burnt sugar is bitter.
- Add Butter: Once all the sugar has melted and achieved that gorgeous amber hue, immediately remove the pan from the heat. Carefully add the 5 tbsp softened salted butter. It will bubble vigorously! Stir quickly and vigorously with a heat-proof whisk or wooden spoon until the butter is fully incorporated and the mixture is smooth.
- Incorporate Cream: Slowly pour in the 1/2 cup room temperature heavy cream, stirring quickly and continuously. Again, the mixture will bubble and steam intensely, and it might seize up or look separated – this is normal! Keep stirring vigorously. If it separates, turn the heat back to medium-low and continue whisking forcefully until it comes back together into a smooth, emulsified sauce.
- Finish Caramel: Remove the pan from the heat. Stir in the 1 tsp vanilla extract and the 1/4 to 1/2 tsp sea salt (taste and adjust the saltiness to your preference).
- Simmer & Cool: Return the saucepan to low heat and let the caramel simmer for 2-3 minutes, stirring occasionally, until it thickens slightly. Remove from heat and allow the caramel to cool completely before using. This is crucial! It will thicken considerably as it cools, becoming a spoonable, gooey consistency. This can take 1-2 hours at room temperature, or you can speed it up slightly in the fridge (stirring every 15-20 mins).
Final Assembly:
- Fill & Serve: Once both the chocolate cookies are completely cooled and the homemade caramel has thickened, fill each cookie’s indent with a heaping teaspoon of the luscious caramel. Finish by sprinkling a little flaky sea salt on top of each filled cookie. Serve immediately and watch them disappear!
Pro Tips for Cookie Perfection
Baking is an art and a science, and a few expert tricks can make all the difference, especially when you’re crafting a dessert as special as these Chocolate Caramel Cookies.
- Accuracy in Measuring: Especially for flour and cocoa powder, always spoon and level. Scooping directly from the bag can pack in too much, leading to dry cookies.
- Room Temperature Ingredients: For creaming butter and sugar, and for adding to hot caramel, room temperature ingredients emulsify better, resulting in a smoother batter and a more stable caramel. Plan ahead!
- Don’t Overmix: Once you add the dry ingredients to the wet, mix just until combined. Overmixing develops gluten, which can make your cookies tough.
- The Power of Chilling: The dough chilling step is non-negotiable. It helps prevent spread, deepens the flavors, and ensures that wonderful chewy texture.
- Invest in a Cookie Scoop: A cookie scoop ensures uniform cookie size, which means even baking. Plus, it makes the process so much faster!
- Caramel Caution: When making caramel, always be careful! Melted sugar is extremely hot. Have all your ingredients measured and ready before you start, and move quickly when adding butter and cream. Don’t walk away from the stovetop.
- Perfectly Round Cookies: The “cookie scooting” trick with a larger cookie cutter right out of the oven is a game-changer for picture-perfect round cookies. Sophie swears by it!
Healthy-ish Twist: Making Smart Swaps
You know how much I love a good comfort food, but I also believe in balance. My “healthy-ish twist” for these Chocolate Caramel Cookies means we’re making thoughtful choices without compromising on flavor or enjoyment.
- Focus on Quality Ingredients: Using real butter, heavy cream, and high-quality cocoa means you get intense flavor without needing excessive amounts of artificial enhancers.
- Portion Control: By creating 32 cookies from the batch, you get a satisfying treat in a moderate portion. One cookie is a perfect indulgence!
- Homemade vs. Processed: Making your own caramel from scratch gives you control over the sugar type and quantity, avoiding unnecessary additives often found in store-bought versions.
- The Egg Yolk Advantage: While we’re not cutting sugar here, the rich fat from the egg yolks allows for an incredibly tender cookie without needing a host of other ingredients, contributing to a more wholesome feel.
- The Salt Factor: The flaky sea salt isn’t just for taste; it enhances the perception of sweetness, meaning you might be satisfied with less sugar overall because the flavors are more dynamic.
Remember, “healthy-ish” means mindful enjoyment. These cookies are a treat, and a delicious one at that!
Serving Suggestions & Pairing Ideas
These Chocolate Caramel Cookies are glorious on their own, but if you’re looking to elevate the experience, here are a few ideas:
- Warm it Up: A quick 10-15 second zap in the microwave will make the caramel wonderfully gooey and warm – pure bliss!
- With Coffee or Tea: The richness of the chocolate and caramel pairs beautifully with a strong cup of coffee or a comforting Earl Grey tea.
- A La Mode: Serve a warm cookie alongside a scoop of vanilla bean ice cream for an extra indulgent dessert.
- Milk’s Best Friend: Nothing beats a classic pairing of a freshly baked cookie with a cold glass of milk.
- Gifts from the Kitchen: These cookies make fantastic gifts. Arrange them in a pretty tin or box tied with a ribbon for a thoughtful homemade present.
Storage & Make-Ahead Tips
Want to enjoy these cookies for days or get a head start on baking? Here’s how:
- Storing Baked Cookies: Store the completely cooled Chocolate Caramel Cookies in an airtight container at room temperature for up to 3-4 days. If your kitchen is very warm, or for longer storage (up to a week), you can refrigerate them. Bring them back to room temperature before serving for the best texture.
- Storing Caramel Sauce: The homemade caramel sauce can be made up to a week in advance. Store it in an airtight container in the refrigerator. When ready to use, gently warm it on the stovetop over very low heat or in the microwave in short bursts, stirring frequently, until it’s spoonable.
- Freezing Dough: You can freeze the scooped and indented cookie dough balls! Arrange them on a baking sheet and freeze until solid. Once frozen, transfer them to a freezer-safe bag or container for up to 2-3 months. When ready to bake, you can bake them from frozen (add 2-3 minutes to the baking time), or let them thaw in the fridge first.
- Freezing Baked Cookies: Baked cookies can also be frozen! Once completely cooled, arrange them in a single layer on a baking sheet and freeze until solid. Then, transfer to an airtight, freezer-safe container or bag, separating layers with parchment paper, for up to 1 month. Thaw at room temperature.
Frequently Asked Questions (FAQ)
Q: Can I make the caramel sauce ahead of time?
A: Absolutely! The homemade caramel sauce can be made up to a week in advance. Store it in an airtight container in the refrigerator. When you’re ready to use it, you might need to gently warm it on the stovetop over very low heat, or in the microwave in short bursts, stirring frequently, until it’s spoonable again.
Q: What if my caramel separates or crystallizes?
A: Caramel can be a bit finicky! If your caramel separates (looks greasy or clumpy), it likely means the temperature was too low or you added cold ingredients too quickly. Try gently reheating it over medium-low heat and stirring vigorously with a whisk until it comes back together. For crystallization, ensure your saucepan is impeccably clean, and avoid stirring the sugar too much before it melts completely. If it crystallizes, sometimes adding a tablespoon of hot water and reheating can help, but often it’s best to start fresh.
Q: How should I store these Chocolate Caramel Cookies?
A: Store the Chocolate Caramel Cookies in an airtight container at room temperature for up to 3-4 days. If your kitchen is very warm, or if you want to extend their freshness, you can refrigerate them for up to a week. Just bring them back to room temperature before serving for the best texture.
Q: Can I use store-bought caramel for this recipe?
A: While Sophie highly recommends making the homemade caramel for its superior flavor and texture, you can use good quality store-bought caramel if you’re short on time. Look for a thick, spoonable caramel sauce. Just make sure it’s cooled and firm enough to hold its shape in the cookie indent without spreading too much.
Q: What does ‘healthy-ish twist’ mean for these cookies?
A: The ‘healthy-ish twist’ refers to thoughtful ingredient choices and preparation methods that enhance flavor while being mindful. For example, using egg yolks for richness without extra whites, and the option to use Dutch process cocoa for deeper flavor with less sugar impact. While these are still indulgent cookies, the focus is on quality ingredients and portion control for a satisfying treat that feels a little lighter than traditional, overly sweet versions, without sacrificing any of the joy.
More Irresistible Cookie Recipes from Sweet Craft Recipes
If you’ve loved these Chocolate Caramel Cookies, then you’re definitely going to want to explore more of our cookie collection. We have something for every craving!
- For the Red Velvet Fans: You absolutely must try our Stuffed Red Velvet Cookies Recipe. They’re an explosion of flavor and perfectly gooey.
- Nuts About Pistachio? Our Pistachio NYC Cookies Recipe brings that iconic bakery experience right to your kitchen.
- Seasonal Delights: If you love a surprise center, our Creme Egg Stuffed Cookies Recipe is a holiday favorite that’s truly unique.
- Peanut Butter & Chocolate Obsession: You can’t go wrong with the classic combo in our Peanut Butter Nutella Cookie Recipe.
- White Chocolate Dream: Indulge in the creamy, sweet goodness of our White Chocolate Stuffed Cookies.
Each of these recipes has been developed with the same love and attention to detail you found in today’s cookie adventure.
Get Ready to Indulge!
There you have it – my tried-and-true recipe for the most irresistible Chocolate Caramel Cookies. I’ve poured my heart (and countless tests!) into perfecting these, and I truly believe they strike the ideal balance of rich chocolate, gooey caramel, and that all-important chewy texture. They’re the kind of cookies that make memories, bring smiles, and disappear far too quickly from the plate.
So go ahead, preheat your oven, gather your ingredients, and embark on this delicious baking journey. Don’t forget to sprinkle that flaky sea salt for the ultimate finishing touch! I can’t wait to hear how much you and your loved ones enjoy these incredible comfort-food cookies. Happy baking!


