There’s something truly magical about a homemade cookie, isn’t there? That comforting aroma wafting through the kitchen, the warmth of a fresh-baked treat, and the sheer joy of biting into something made with love. Here at SweetCraft Recipes, we live for those moments, and today, I’m absolutely thrilled to share a recipe that embodies all of that and more: my Irresistible Chewy Caramel Biscuits (Cookies).
As Sophie, the recipe developer behind SweetCraft, I can tell you these aren’t just any caramel biscuits. I’ve personally tested and refined this recipe no less than nine times (and probably a few more beyond counting!) to ensure every single batch comes out perfect. This is a true comfort-food favorite that brings a smile to everyone’s face, whether you call them biscuits or cookies!
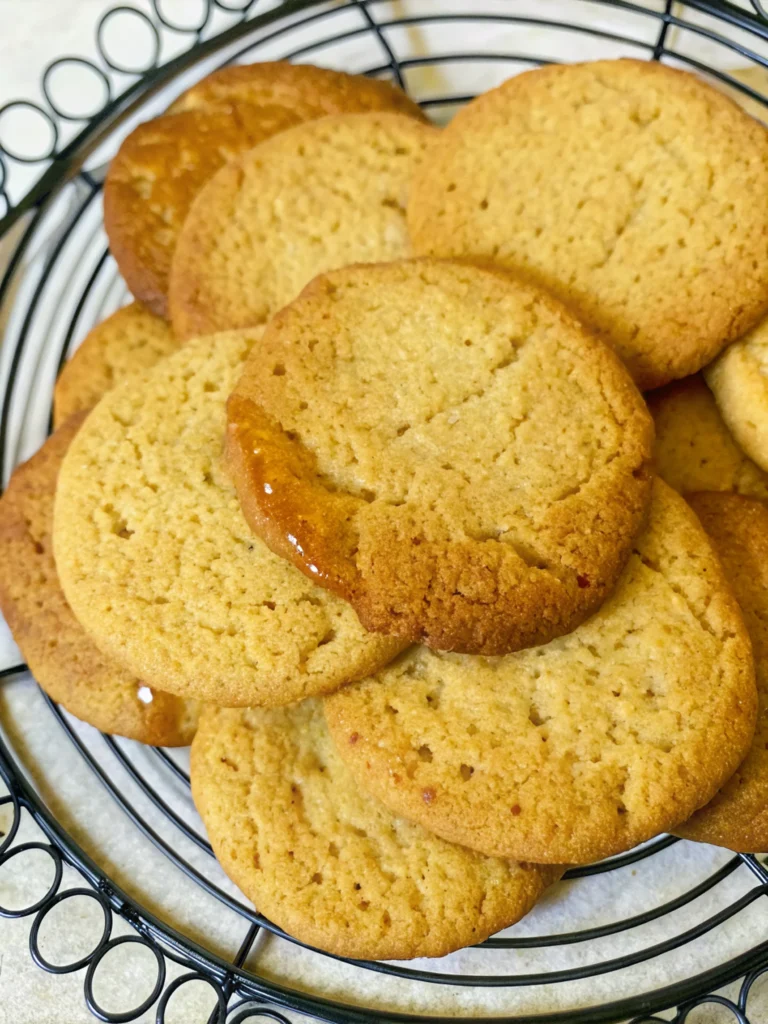
Why nine times? Because I was determined to achieve that perfect balance: a delightful crispness on the edges, a wonderfully chewy center, and that deep, rich caramel flavour that sings on your palate. And the best part? They come together in just 30 minutes from start to finish, making them ideal for those unexpected family gatherings or when a sudden craving for something sweet strikes.
While the “healthy twist” in a cookie might seem like an oxymoron, my philosophy at SweetCraft is all about mindful indulgence. Making them at home means you control the ingredients, choose quality products, and can enjoy these treats knowing exactly what’s in them. Plus, portion control is always in your hands! So, let’s dive into creating these delightful golden gems that are sure to become a staple in your baking repertoire.
The SweetCraft Secret to Perfect Caramel Biscuits Every Time
My journey to perfecting these caramel biscuits was driven by a simple desire: to create a cookie that was both easy to make and utterly unforgettable. I wanted a recipe that even novice bakers could conquer, but one that still delivered on gourmet taste and texture. Through extensive experimentation, I discovered key techniques and ingredient ratios that consistently produce these crowd-pleasing treats.
I poured over dozens of recipes, adjusted quantities, experimented with different types of sugar, and played with baking times. It was a labour of love, and the result is a recipe that I’m incredibly proud to share with you today. This isn’t just a recipe; it’s a tested-and-true method for consistent cookie perfection, straight from my kitchen to yours.
What Makes SweetCraft’s Caramel Biscuits Stand Out?
- Quick Prep & Cook Time: Forget recipes that take hours. With just 15 minutes of prep and 15 minutes of baking, you can have warm, delicious cookies ready in half an hour.
- Simple, Accessible Ingredients: You won’t need any fancy, hard-to-find items. Most ingredients are likely already in your pantry!
- Melt-in-Your-Mouth Texture: These biscuits boast perfectly crisp edges that give way to a soft, chewy, and tender caramel-infused interior. It’s a textural dream!
- Customizable for Everyone: Whether you love coconut or prefer to omit it, or need a golden syrup substitute, this recipe is incredibly forgiving and adaptable.
Gathering Your Sweet Arsenal: The Simple Ingredients List
One of the beauties of these caramel biscuits is their reliance on pantry staples. Each ingredient plays a crucial role in building that signature flavour and texture. Let’s break them down:
- 115g Unsalted Butter (Softened): The foundation of any good biscuit! Softened butter creams beautifully with sugar, creating air pockets that contribute to a light texture. Using unsalted butter gives you control over the overall saltiness.
- 110g Brown Sugar: This is where much of our “caramel” flavour and chewiness comes from. Brown sugar contains molasses, which imparts a deeper, richer flavour and keeps the cookies moist.
- 125g Self-Raising Flour: Our chosen flour includes a leavening agent (baking powder) already mixed in, making the recipe even simpler. It ensures a lovely lift and tenderness.
- 2 Tbsp Golden Syrup: The star of the show for that distinct caramel note! Golden syrup is a thick, amber-coloured inverted sugar syrup, prized for its buttery, warm, and slightly toasted flavour. It’s what gives these biscuits their unique depth.
- 25g Shredded Coconut (Optional): For those who love a bit of tropical texture and flavour, shredded coconut adds a wonderful chewiness and complementary sweetness. If you’re not a fan, no problem – simply omit it!
Ingredient Deep Dive & Smart Substitutions (Sophie’s Expertise)
As an experienced baker, I know that sometimes you don’t have exactly what a recipe calls for, or you might want to understand the why behind each ingredient. Here are a few insights:
- Butter Temperature is Key: When the recipe specifies “softened,” it means butter that yields slightly when pressed but isn’t melted or greasy. Cold butter won’t cream properly, and melted butter can lead to flat, oily cookies. Take it out of the fridge about 30-60 minutes before you start.
- The Magic of Golden Syrup: While I highly recommend golden syrup for its authentic caramel depth, I understand it might not be readily available everywhere. Don’t fret! Honey or maple syrup are excellent 1:1 substitutes. Honey will add a floral sweetness, while maple syrup contributes its distinct earthy sweetness. Both will still give you a wonderfully moist and flavourful biscuit.
- Self-Raising Flour Alternatives: If you only have plain (all-purpose) flour, you can easily make your own self-raising flour. For every 125g of plain flour, whisk in 1.5 teaspoons of baking powder and a pinch of salt. This will give you the necessary lift for your biscuits.
Baking Bliss: Step-by-Step Instructions for Caramel Perfection
Ready to get baking? Follow these simple steps for perfectly delicious caramel biscuits every time. Remember, baking is a joyful process, so take your time and enjoy each stage!
- Prepare Oven and Baking Trays: First things first, preheat your oven to 170°C (340°F). While it’s warming up, grab two baking trays and line them with parchment paper. This step is crucial for preventing sticking and ensuring your cookies bake evenly and release easily.
- Cream Butter and Sugar: In a large mixing bowl, combine your softened unsalted butter and brown sugar. Using a handheld electrical beater, beat them together until the mixture becomes light, creamy, and visibly paler. This usually takes about 2-3 minutes. This process incorporates air, which helps make your biscuits tender.
- Incorporate Flour: Add the self-raising flour to your butter and sugar mixture. Before you switch on the beater, I highly recommend mixing it slightly with a spatula. This little trick prevents a dreaded “flour explosion” when the electrical beater starts up!
- Add Golden Syrup and Coconut (Optional): Now, pour in the golden syrup. If you’re opting for the shredded coconut, add it at this stage too. Again, give it a quick mix with your spatula before gently beating with the electrical beater on a low speed. Continue mixing just until a cohesive dough forms. The key here is to not overmix; stop as soon as the ingredients are combined.
- Shape and Place Biscuits: It’s time to get your hands a little doughy! Roll the dough into balls of your desired size. For a yield of 20 cookies, aim for balls roughly 1.5 inches (about 4 cm) in diameter. Place these dough balls on your prepared baking trays, making sure to leave ample space between each one – they will spread! Gently pat each ball down using your hands or the back of a fork.
- Bake Until Golden: Carefully place your trays into the preheated oven. Bake for approximately 15 minutes, or until the edges of the biscuits are beautifully golden brown and the centers look just set. Keep an eye on them, as oven temperatures can vary!
- Cool Completely and Enjoy! Once baked, remove the trays from the oven. This is a critical step: allow the caramel biscuits to cool completely on the baking trays. This allows them to firm up and develop that perfect chewy-crisp texture. Patience is a virtue here! Once cooled, transfer them to a wire rack, and they’re ready to be devoured.
Sophie’s Pro Tips & Tricks for Biscuit (Cookie) Mastery
Baking, while following a recipe, also benefits immensely from a few insider tips. Here are some of my tried-and-true secrets that I’ve gathered over my nine-plus tests of this very recipe:
- The Magic of Softened Butter (Revisited): I can’t stress this enough! Butter that is too cold won’t cream properly, leading to a denser dough. Butter that is too warm (greasy or melted) will cause your cookies to spread excessively, resulting in flat, crispy disks instead of chewy biscuits. Aim for room temperature, where a gentle press leaves an indentation.
- Avoiding the “Flour Cloud” is Real: That quick mix with a spatula before engaging the electrical beater after adding flour isn’t just a suggestion – it’s a preventative measure against a messy flour explosion. Trust me on this one!
- Don’t Overmix! Seriously: Once the flour is added, gluten starts to develop. Overmixing will toughen your biscuits, making them less tender and chewy. Mix just until the ingredients are combined and no dry streaks of flour remain.
- Perfect Spacing is Key: These biscuits will spread. If you crowd them on the baking sheet, they’ll merge into one giant, misshapen cookie. Give them at least 2 inches of space all around to ensure they bake evenly and maintain their individual shapes.
- The Importance of Cooling: It’s tempting to grab a warm biscuit straight from the oven, and a nibble is fine! However, for the ultimate texture and to allow the caramel flavour to fully develop and the biscuit to firm up, let them cool completely on the baking sheet. They’ll be much easier to handle and taste even better.
- Tweaking for Texture: For a slightly crispier biscuit, you can bake them for an extra 1-2 minutes. If you prefer them on the softer, chewier side, take them out just as the edges are golden and the centers are still slightly soft. They will continue to set as they cool.
Elevate Your Caramel Biscuits: Variations & Serving Suggestions
While this recipe is perfect as is, a true SweetCraft baker loves to experiment! Here are some ideas to customize your caramel biscuits and impress your family and friends:
- Chocolate Drizzle Delight: Once cooled, melt some dark, milk, or white chocolate and drizzle it decoratively over your biscuits. A sprinkle of sea salt flakes on top of the chocolate takes them to another level!
- Nutty Crunch: For an added layer of texture and flavour, fold in about 50g (1/2 cup) of finely chopped pecans, walnuts, or macadamia nuts with the golden syrup.
- Spice It Up: A pinch of cinnamon, nutmeg, or a touch of ginger powder added with the flour can give these biscuits a warm, spiced twist, especially lovely for cooler months.
- Make Them Stuffed: Feeling adventurous? For a truly indulgent treat, wrap the dough around a small square of white chocolate or a dollop of caramel sauce before baking. If you love the idea of a surprise center, you might also enjoy our decadent White Chocolate Stuffed Cookies.
- Serving Ideas:
- Classic Comfort: Serve with a warm cup of coffee, tea, or a tall glass of milk.
- Dessert Topper: Crumble over vanilla ice cream, yogurt, or use as a base for a mini cheesecake.
- Afternoon Treat: A perfect companion for an afternoon pick-me-up or a simple dessert after dinner.
Beyond the Batch: Storing, Freezing, and Gifting Your Caramel Treats
You’ve put in the effort to bake these delicious biscuits, so let’s make sure they stay fresh and fabulous!
- Storage: Once completely cooled, store your caramel biscuits in an airtight container at room temperature. They will remain wonderfully fresh and chewy for up to 5-7 days. To maintain their texture, you can even place a slice of bread in the container to help keep them soft.
- Freezing Baked Cookies: These biscuits freeze beautifully! Once fully cooled, place them in a single layer on a baking sheet and freeze until solid. Then, transfer them to a freezer-safe bag or airtight container, separated by parchment paper, for up to 2-3 months. Thaw at room temperature for an hour or so, or gently warm in a low oven for a fresh-baked feel.
- Freezing Dough: You can also prepare the dough, roll it into balls, flatten them slightly, and freeze them uncooked on a baking sheet. Once solid, transfer to a freezer bag. When you’re ready for fresh cookies, simply bake from frozen (you might need to add a few extra minutes to the baking time). This is my go-to for quick treats!
- Gifting: These homemade caramel biscuits make a thoughtful and delicious gift. Stack them neatly in a decorative tin or tie a few in a cellophane bag with a pretty ribbon. Perfect for hostess gifts, holiday treats, or just to brighten someone’s day.
Common Questions About Caramel Biscuits (FAQ)
Here at SweetCraft, I get a lot of questions from home bakers. Here are some of the most common ones about these caramel biscuits:
What is the difference between biscuits and cookies in this context?
In many parts of the world, particularly the UK, Australia, and other Commonwealth countries, ‘biscuit’ is the term used for what Americans call a ‘cookie.’ This recipe for Caramel Biscuits refers to sweet, baked treats similar to what Americans would recognize as a thin, chewy caramel cookie. So whether you call them biscuits or cookies, they’re delicious!
Can I substitute golden syrup with honey or maple syrup?
Absolutely! Golden syrup provides a unique depth of caramel flavor, but honey or maple syrup are excellent substitutes. They will offer a similar richness and sweetness, slightly altering the flavor profile but still yielding delicious results. Sophie recommends using a 1:1 ratio for substitution.
Why did my caramel biscuits spread too much?
Excessive spreading can be caused by several factors: your butter might have been too soft (almost melted), you might have added too much liquid, or your oven temperature might have been too low. Ensure your butter is just softened (not greasy), measure ingredients precisely, and preheat your oven properly. Chilling the dough for 15-30 minutes before baking can also help prevent spreading.
Can I make these caramel biscuits gluten-free?
While this recipe uses self-raising flour, you can experiment with a 1:1 gluten-free self-raising flour blend (ensure it contains xanthan gum or add 1/4 tsp per cup if not). Results may vary slightly in texture, but many home bakers have success with this substitution. Sophie recommends starting with a smaller batch to test.
How do I know when they’re done baking?
Your caramel biscuits are ready when their edges are golden brown and the centers look just set. They might appear slightly soft in the middle when you first take them out, but they will firm up as they cool. Overbaking can lead to a drier, crispier biscuit, so keep a close eye on them!
How do I store these caramel biscuits to keep them fresh?
Once completely cooled, store your caramel biscuits in an airtight container at room temperature for up to 5-7 days. For longer storage, you can freeze baked cookies for up to 2-3 months. Thaw at room temperature or gently warm for a fresh-baked feel.
Explore More SweetCraft Cookie Delights!
If you’ve fallen in love with these irresistible caramel biscuits, you’re in for a treat! SweetCraft Recipes is passionate about all things cookies, and we have a treasure trove of unique and delicious recipes waiting for you.
If you’re craving more creative and indulgent cookie experiences, be sure to check out some of our other popular recipes:
- For an unexpected and rich treat, try our incredible Stuffed Red Velvet Cookies Recipe.
- If you dream of bakery-style giants, our Pistachio NYC Cookies Recipe delivers that perfect crisp-on-the-outside, gooey-on-the-inside texture.
- For a truly seasonal (or just delightfully decadent) surprise, our Creme Egg Stuffed Cookies Recipe is always a hit.
- And for the ultimate classic combo, you absolutely must try our Peanut Butter Nutella Cookie Recipe – pure bliss in every bite!
No matter your preference, there’s always a cookie waiting to be discovered and loved in the SweetCraft kitchen.
The Sweetest Conclusion: A Recipe You’ll Treasure
There you have it – my cherished recipe for Irresistible Chewy Caramel Biscuits (Cookies). This recipe is more than just ingredients and instructions; it’s an invitation to create warmth, joy, and delicious memories in your own home. It’s a testament to the simple pleasure of homemade baking, delivering a taste of comfort that feels both familiar and exciting.
I genuinely believe that every home baker deserves a reliable, easy, and utterly delicious cookie recipe in their arsenal, and I hope this one becomes yours. With just 30 minutes, a few simple ingredients, and Sophie’s tried-and-true tips, you’re well on your way to baking perfection.
So, gather your ingredients, preheat your oven, and prepare to fill your home with the most enticing caramel aroma. Don’t forget to share your baking adventures with us in the comments below! Happy baking, SweetCrafters!
Nutrition At A Glance
Here’s a quick look at the nutritional information per serving (1 cookie):
- Calories: 96
- Fat: 5 g
- Saturated Fat: 3 g
- Carbohydrates: 12 g
- Fiber: 0 g
- Net Carbs: 12 g
- Sugar: 7 g
- Protein: 1 g
- Sodium: 3 mg
- Cholesterol: 12 mg


