Cherry fudge is the ultimate combination of creamy white chocolate, tangy dried cherries, and rich dark chocolate that creates an elegant homemade confection perfect for any celebration. This easy cherry chocolate fudge requires just 5 minutes of active cooking time and uses a foolproof method that guarantees smooth, creamy results every single time. The secret ingredient—cherry-flavored gelatin—infuses the white chocolate layer with beautiful color and authentic cherry flavor without any artificial aftertaste.
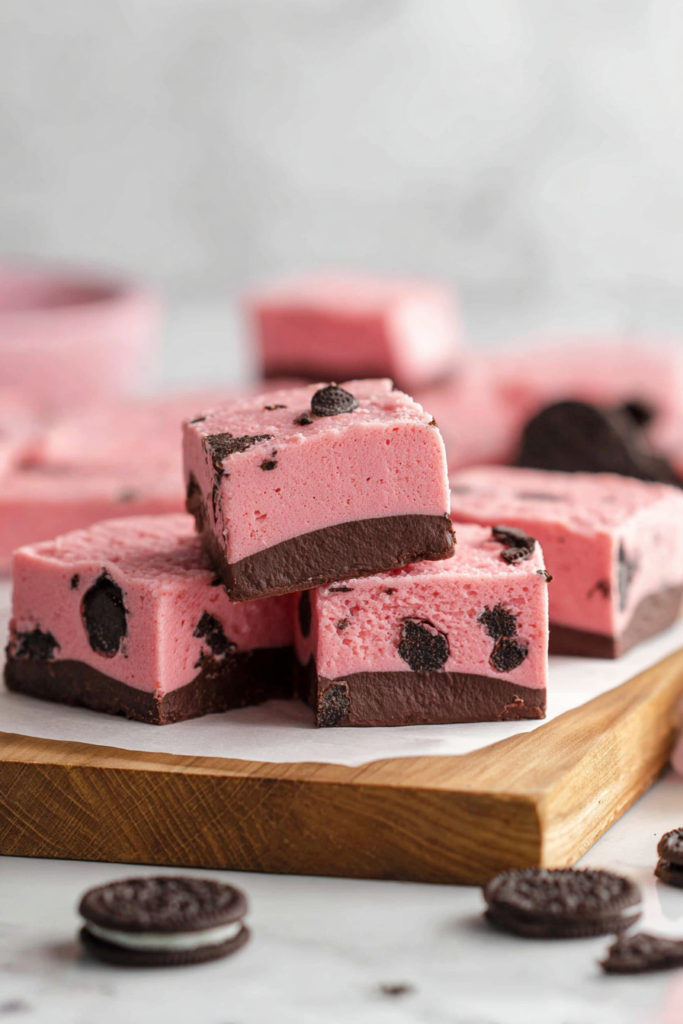
Whether you’re preparing treats for Valentine’s Day, holiday gift-giving, or simply craving something sweet and special, this two-layer fudge delivers bakery-quality results with minimal effort. The stunning contrast between the pale pink cherry layer and glossy dark chocolate topping makes each square look professionally crafted, while the combination of textures keeps everyone reaching for just one more piece.
Why You’ll Love This Cherry Fudge Recipe
This recipe takes the intimidation out of fudge-making with a simple boil-and-pour method that works perfectly every time. Unlike traditional fudge recipes that require candy thermometers and precise temperature monitoring, this version uses marshmallow cream to guarantee smooth, creamy texture without any guesswork. The 5-minute boil time is easy to remember and produces consistent results whether you’re a first-time candy maker or experienced baker.
The cherry gelatin adds both flavor and a gorgeous pink hue that makes this fudge visually stunning. Dried cherries provide chewy bursts of concentrated fruit flavor throughout, while the dark chocolate topping balances the sweetness and adds sophisticated depth. This fudge cuts beautifully into 64 perfect squares, making it ideal for gift-giving, dessert tables, or stashing away for your own sweet tooth emergencies.
Best of all, this fudge stays fresh at room temperature or in the refrigerator, and it freezes beautifully for make-ahead convenience. One batch yields plenty to share while keeping some for yourself—though fair warning, it disappears quickly once people discover how amazing it tastes.
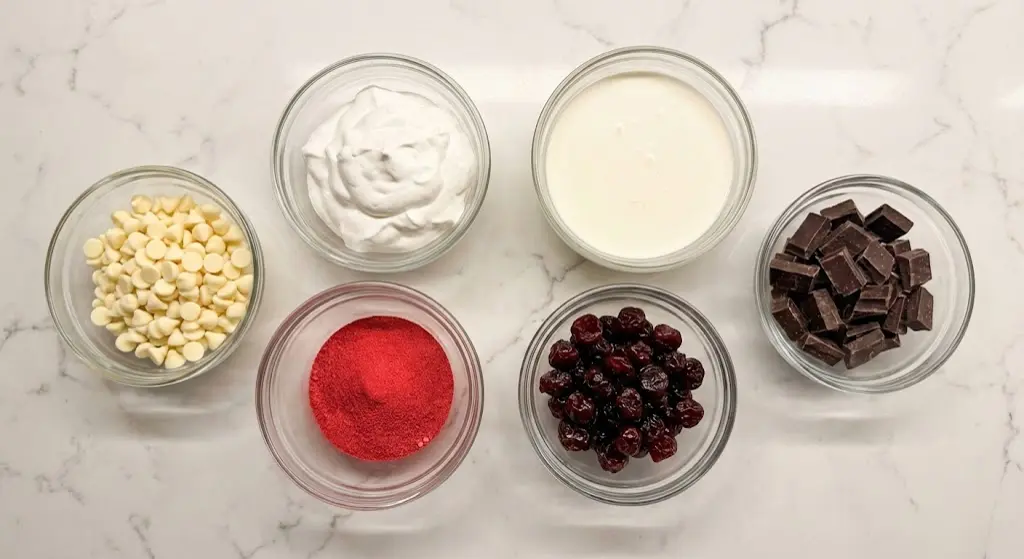
Ingredients for Cherry Fudge
Fudge Base
- 2½ cups white chocolate chips – Creates the creamy foundation
- 7 oz jar marshmallow cream (Fluff) – Ensures smooth texture without crystallization
- ¾ cup unsalted butter – Adds richness and helps everything melt together
- 1 cup granulated sugar – Provides sweetness and proper consistency
- ¾ cup heavy whipping cream – Creates luxurious creaminess
- Pinch of salt – Enhances all the flavors
- 1 tablespoon cherry-flavored gelatin – Infuses cherry flavor and pink color
- ½ cup dried cherries – Adds chewy texture and concentrated fruit flavor
Topping
- 10 oz dark chocolate, melted – Creates the glossy top layer
Ingredient Notes
White Chocolate Quality: Use good-quality white chocolate chips like Ghirardelli or Guittard for best flavor and melting properties. Avoid white baking chips labeled “vanilla flavored” as they won’t melt as smoothly.
Marshmallow Cream: The 7-ounce jar size is standard for Fluff and Kraft brands. This ingredient is the secret to foolproof fudge that never crystallizes or turns grainy.
Cream Substitute: If you want a lighter version, substitute half-and-half for the heavy whipping cream. The fudge will be slightly less rich but still deliciously creamy.
Cherry Gelatin: One tablespoon of dry gelatin powder (like Jell-O) adds incredible cherry flavor. You can experiment with strawberry or raspberry gelatin for different variations.
Dried Cherry Options: Look for sweetened or unsweetened dried cherries in the baking aisle or dried fruit section. Tart cherries create nice flavor contrast, while sweet cherries are more mellow. You can also substitute dried cranberries or chopped dried strawberries.
Chocolate Topping: Dark chocolate (60-70% cacao) provides sophisticated balance to the sweet fudge, but you can use milk chocolate or semi-sweet chocolate if you prefer sweeter results.
Step-by-Step Instructions
Step 1 – Prepare the Pan
Line a 9-inch square baking pan with parchment paper, leaving overhang on two sides for easy removal later. This step is crucial for neat, clean fudge squares. Set aside while you prepare the fudge mixture.
Step 2 – Make the Sugar Mixture
In a large saucepan, combine the butter, granulated sugar, heavy whipping cream, and a pinch of salt. Place over medium-high heat and stir occasionally until the butter melts completely. Bring the mixture to a full rolling boil—you’ll see large bubbles breaking the surface. Once boiling, immediately add the cherry gelatin and stir to dissolve. Set your timer for exactly 5 minutes and maintain the boil, stirring frequently to prevent scorching.
Step 3 – Combine with Chocolate Base
While the sugar mixture boils, place the white chocolate chips and marshmallow cream in a large mixing bowl. After the 5-minute timer goes off, immediately remove the saucepan from heat and pour the hot mixture over the white chocolate and marshmallow cream. Using a strong whisk or hand mixer, beat vigorously until the chocolate melts completely and the mixture becomes smooth and glossy, about 2-3 minutes. The mixture should be completely lump-free and beautifully creamy.
Step 4 – Add Cherries and Pour
Gently fold the dried cherries into the fudge mixture using a spatula, distributing them evenly throughout. Pour the fudge into your prepared pan, using the spatula to spread it into an even layer and smooth the top surface.
Step 5 – Add Chocolate Topping
Melt the dark chocolate in a microwave-safe bowl in 30-second intervals, stirring between each interval until completely smooth. Pour the melted chocolate over the cherry fudge layer and use an offset spatula or the back of a spoon to spread it evenly across the entire surface.
Step 6 – Chill and Cut
Cover the pan loosely with plastic wrap and refrigerate for at least 4 hours or overnight until completely firm. When ready to serve, lift the fudge from the pan using the parchment overhang. Use a sharp knife to cut into 64 small squares (8 rows by 8 rows). For the cleanest cuts, warm your knife under hot water, dry it, and make each cut in one smooth motion.
Pro Tips for Success
Boil Timing Matters: The full 5-minute boil is essential for proper fudge consistency. Under-boiling results in fudge that doesn’t set properly, while over-boiling can make it grainy.
Beat Thoroughly: Don’t rush the whisking step. Beat until every bit of white chocolate melts and incorporates completely. Any unmelted chips will create lumps in your finished fudge.
Use Electric Mixer Option: A stand mixer or hand mixer makes quick work of combining the hot mixture with the chocolate base, saving arm strength and ensuring perfect smoothness.
Sharp Knife for Clean Cuts: Warming your knife between cuts creates smooth, professional-looking edges. Wipe the knife clean after each cut for the neatest squares.
Storage Flexibility: This fudge keeps well at room temperature in moderate climates, but refrigeration extends freshness and prevents softening in warm weather.
Flavor Variations
Triple Berry Fudge: Use strawberry gelatin and mix dried cranberries, blueberries, and strawberries for a colorful berry medley.
Chocolate Cherry Almond: Add ½ teaspoon almond extract to the hot mixture and sprinkle sliced almonds on top of the dark chocolate layer before it sets.
White Chocolate Topped: Skip the dark chocolate and drizzle melted white chocolate in decorative patterns across the top for an all-white elegant presentation.
Mint Cherry: Add ¼ teaspoon peppermint extract along with the cherry gelatin for a refreshing twist reminiscent of chocolate-covered cherries.
Serving Suggestions
Serve cherry fudge at room temperature for the softest, creamiest texture. Arrange squares on a decorative platter for dessert tables, or package them in clear cellophane bags tied with ribbon for beautiful homemade gifts. This fudge pairs wonderfully with coffee, hot chocolate, or dessert wine.
For special occasions, place each square in individual candy cups and arrange them in gift boxes. The pink and dark chocolate color combination makes this fudge particularly stunning for Valentine’s Day, bridal showers, or baby showers. Consider pairing it with our stuffed red velvet cookies and peanut butter Nutella cookies for an impressive dessert spread.
Storage and Freezing Instructions
Room Temperature: Store cut fudge in an airtight container at room temperature for up to one week in moderate climates (below 75°F). Layer parchment paper between stacks to prevent sticking.
Refrigerator: Keep fudge refrigerated in an airtight container for up to three weeks. Let it sit at room temperature for 10-15 minutes before serving for best texture and flavor.
Freezing: Freeze whole uncut fudge or individual squares wrapped in plastic wrap, then placed in freezer bags for up to three months. Thaw at room temperature for 30 minutes before serving. The texture remains perfect after freezing.
Nutrition Facts (Per Serving)
| Nutrient | Amount |
|---|---|
| Calories | 95 |
| Protein | 0.8g |
| Carbohydrates | 12g |
| Fat | 5g |
| Fiber | 0.3g |
| Sodium | 15mg |
Based on 64 servings. Nutritional values are approximate.
FAQ About Cherry Fudge
Why is my cherry fudge grainy?
Grainy fudge typically results from under-beating the mixture or not boiling long enough. Make sure you beat the hot mixture with the chocolate vigorously for 2-3 minutes until completely smooth. The marshmallow cream helps prevent graininess, but thorough mixing is essential for silky texture.
Can I use fresh cherries instead of dried?
Fresh cherries contain too much moisture for fudge and will make it weepy and prevent proper setting. Dried cherries are essential because their concentrated flavor and chewy texture work perfectly in the dense fudge base without adding excess liquid.
How do I prevent the chocolate topping from cracking?
Let the cherry fudge layer cool slightly before adding the chocolate topping—about 10 minutes at room temperature. Chocolate that’s too hot or applied to an extremely cold surface is more likely to crack as it sets. Also avoid refrigerating immediately after adding the topping.
Can I make this fudge without gelatin?
Yes, you can omit the gelatin entirely and add 1-2 teaspoons of cherry extract instead. The fudge won’t have the pink hue but will still have wonderful cherry flavor. You could also add a drop of red food coloring if desired.
This cherry fudge recipe proves that impressive homemade candy doesn’t require professional equipment or advanced skills. The simple boil-and-pour method combined with marshmallow cream creates foolproof results that look and taste like they came from an artisan chocolate shop. The beautiful two-toned appearance and perfect balance of sweet white chocolate, tart cherries, and rich dark chocolate make every square absolutely irresistible.


