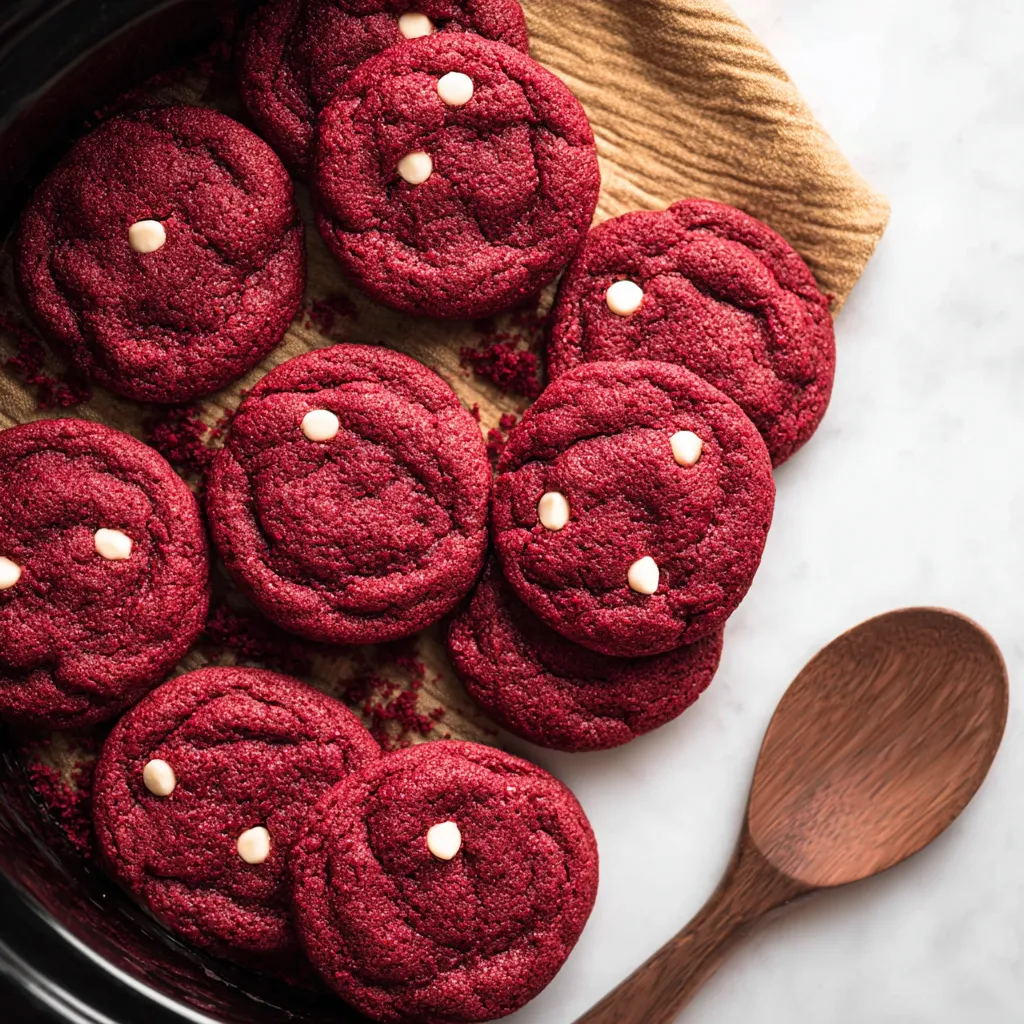
Craving a cookie that’s both decadent and visually stunning? These Red Velvet Cookies are your answer! Imagine sinking your teeth into a soft, chewy cookie with that unmistakable red velvet flavor – a hint of cocoa, a touch of tang, and a whole lot of deliciousness. Perfect for Valentine’s Day, a festive holiday gathering, or simply a special treat any day of the week, these cookies are guaranteed to impress. Their vibrant color and irresistible flavor make them a standout dessert that everyone will love. Plus, they’re surprisingly easy to make!
As a passionate baker with years of experience perfecting cookie recipes, I’ve developed this recipe to be foolproof and utterly delightful. I’ve spent countless hours tweaking the ingredient ratios and baking times to achieve the perfect balance of texture and flavor. My goal is to guide you through each step, ensuring you create Red Velvet Cookies that are not only beautiful but also incredibly delicious. Let’s get baking and create some unforgettable treats!
Red velvet is experiencing a resurgence in popularity, moving beyond just cakes and cupcakes. These cookies tap into that trend, offering a fun and approachable way to enjoy this classic flavor profile. And with Valentine’s Day just around the corner, what could be more fitting than a batch of vibrant red cookies made with love?
Ingredients: The Key to Red Velvet Perfection
Let’s break down the ingredients that make these Red Velvet Cookies so special. Understanding the role of each ingredient is crucial for achieving the perfect texture and flavor.
- All-Purpose Flour: The foundation of our cookies. Be sure to measure accurately (spoon and level!) to avoid dry cookies. Bread flour can be substituted for a chewier texture, using the same amount by weight.
- Unsweetened Cocoa Powder: This provides the subtle chocolatey depth that’s characteristic of red velvet. Dutch-processed cocoa powder will give a darker color and milder flavor than natural cocoa powder.
- Baking Soda: Reacts with the acid in the buttermilk and vinegar to create lift and a light, airy texture.
- Salt: Enhances the flavors of all the other ingredients.
- Unsalted Butter: Adds richness and moisture. Make sure it’s softened to room temperature for optimal creaming. Salted butter can be used; just reduce the added salt by 1/4 teaspoon.
- Granulated Sugar: Sweetens the cookies and contributes to their crispy edges.
- Brown Sugar: Adds moisture and chewiness, thanks to its molasses content. Light or dark brown sugar will both work; dark brown sugar will impart a slightly more intense molasses flavor.
- Large Eggs: Bind the ingredients together and add richness.
- Vanilla Extract: Enhances the overall flavor profile. Use pure vanilla extract for the best results; avoid imitation vanilla flavoring.
- Buttermilk: The secret ingredient for that signature red velvet tang! The acid in buttermilk tenderizes the gluten in the flour, resulting in a softer cookie. If you don’t have buttermilk, you can make a quick substitute by adding 1 tablespoon of white vinegar or lemon juice to 1 cup of milk. Let it sit for 5 minutes to curdle.
- White Vinegar: Works in tandem with the baking soda to create lift and add a touch of tang.
- Red Food Coloring: Creates the iconic red velvet color. Gel food coloring is recommended for its concentrated color and minimal impact on the cookie’s consistency. Start with a small amount and add more until you reach your desired shade.
- White Chocolate Chips (optional): A delightful addition for extra sweetness and visual appeal. Other options include semi-sweet chocolate chips or even cream cheese chips.
Expert Tips for Perfect Red Velvet Cookies
Achieving cookie perfection takes more than just following a recipe. Here are some expert tips based on my own extensive baking experience to help you create the best Red Velvet Cookies possible.
- Chill the Dough: This is crucial! Chilling the dough for at least 30 minutes (or even longer) allows the gluten to relax, prevents the cookies from spreading too thin, and enhances the flavor. I often chill mine overnight for the best results.
- Don’t Overmix: Overmixing develops the gluten in the flour, resulting in tough cookies. Mix the wet and dry ingredients until just combined.
- Use a Cookie Scoop: This ensures that all your cookies are the same size, which means they’ll bake evenly.
- Bake on Parchment Paper or a Silicone Mat: This prevents the cookies from sticking to the baking sheet and makes for easy cleanup.
- Underbake Slightly: Cookies continue to bake on the baking sheet after you remove them from the oven. Underbaking them slightly will result in softer, chewier cookies.
- Let Cool Completely: Resist the urge to eat them straight from the oven! Letting the cookies cool completely on the baking sheet allows them to set properly.
- Experiment with Toppings: Get creative with your toppings! Try dusting the cookies with powdered sugar, drizzling them with white chocolate, or sprinkling them with red velvet cake crumbs.
FAQ: Your Red Velvet Cookie Questions Answered
Here are some frequently asked questions about making Red Velvet Cookies. I’ve gathered these questions based on common inquiries and my own experience troubleshooting baking issues.
Why are my cookies flat?
Flat cookies can be caused by several factors: too much butter, not enough flour, or not chilling the dough. Make sure you’re measuring your ingredients accurately, and be sure to chill the dough for at least 30 minutes before baking.
Can I make these cookies ahead of time?
Absolutely! The dough can be made ahead of time and stored in the refrigerator for up to 3 days. You can also freeze the dough for up to 2 months. Just thaw it in the refrigerator overnight before baking.
What can I use instead of buttermilk?
If you don’t have buttermilk, you can make a quick substitute by adding 1 tablespoon of white vinegar or lemon juice to 1 cup of milk. Let it sit for 5 minutes to curdle.
Can I use a different type of food coloring?
Gel food coloring is recommended for its concentrated color and minimal impact on the cookie’s consistency. Liquid food coloring can be used, but you may need to use more to achieve the desired color, which could affect the texture of the cookies.
How do I store the cookies?
Store the cookies in an airtight container at room temperature for up to 3 days. For longer storage, you can freeze them for up to 2 months. Thaw them at room temperature before serving.
Bake Up Some Red Velvet Magic!
These Red Velvet Cookies are more than just a dessert; they’re a delicious expression of love and a perfect way to celebrate any occasion. With their vibrant color, irresistible flavor, and soft, chewy texture, they’re guaranteed to be a crowd-pleaser. I encourage you to give this recipe a try and experience the joy of baking these delightful cookies for yourself.
Now it’s your turn! Bake up a batch of these Red Velvet Cookies and share your creations with me. Leave a comment below letting me know how they turned out, and don’t forget to tag me in your photos on social media. Happy baking!


