Oh, the humble Swiss Roll! Just hearing those words probably conjures up images of cozy afternoons, family gatherings, or a delightful treat enjoyed with a cup of coffee. It’s a true classic, a dessert that holds a special place in the hearts (and stomachs!) of comfort food lovers everywhere. And today, my friends, I’m beyond excited to share my definitive Classic Chocolate Swiss Roll Recipe with you.
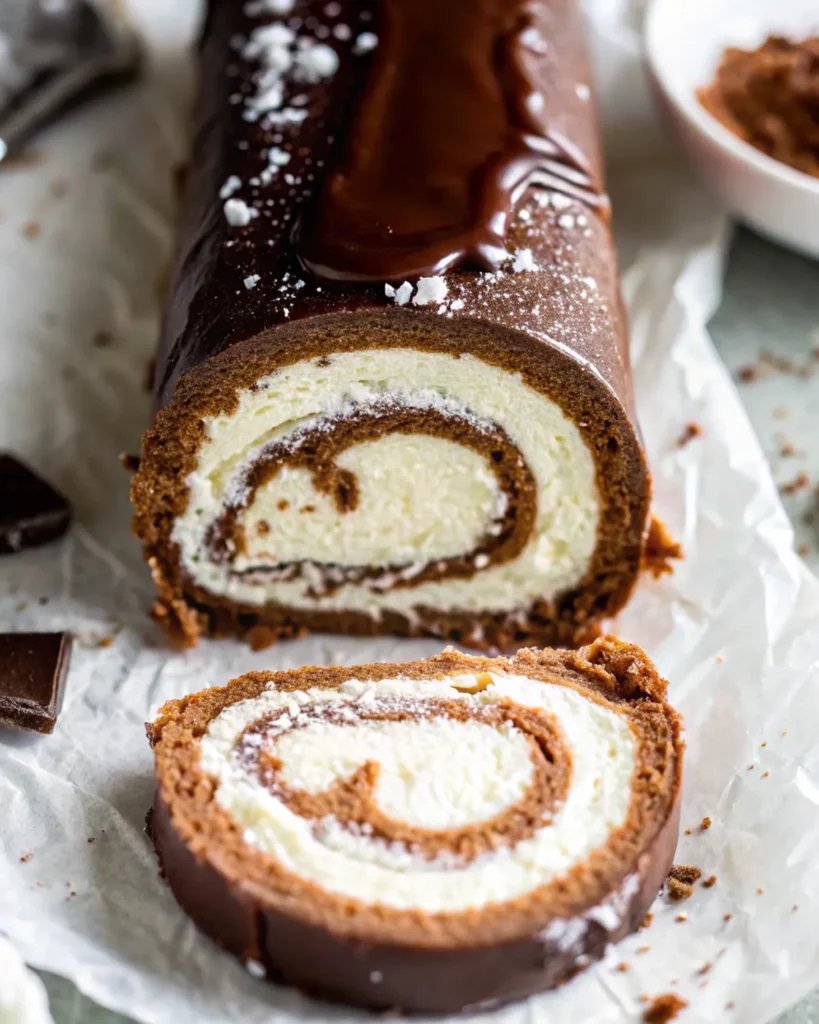
As someone who’s made countless Swiss rolls (and trust me, I’ve tested this very recipe over 9 times to get it just right!), I can confidently say this recipe delivers pure perfection. We’re talking about a rich, tender chocolate sponge cake, generously slathered with a pillowy, vanilla-infused cream filling, all wrapped up and enrobed in a glistening, silky chocolate ganache. It’s an absolute showstopper that’s far easier to achieve than you might think.
My journey to the perfect Swiss roll has been filled with a few learning curves – a cracked cake here, an overbaked disaster there – but through it all, I’ve refined the techniques and unlocked the secrets to a consistently gorgeous, crack-free, and utterly delicious homemade Swiss Roll. From my kitchen to yours, this is the definitive Swiss Roll recipe you’ll come back to again and again.
Why This Homemade Swiss Roll Will Become Your New Favorite
Why go through the effort of making a Swiss Roll from scratch when you could pick one up at the store? Because the difference, my friend, is night and day!
- Unbeatable Freshness & Flavor: There’s nothing quite like the taste of a freshly baked, homemade chocolate cake roll. The sponge is incredibly tender, the cream filling is light and airy (without that artificial taste of store-bought), and the ganache is pure, rich chocolate bliss.
- Impressive, Yet Approachable: While a Swiss roll looks incredibly elegant and sophisticated, this recipe breaks down the process into simple, manageable steps. You’ll be amazed at how easily you can create such an eye-catching dessert that will truly wow your family and guests.
- The Ultimate Comfort Food: This dessert taps into pure nostalgia. It’s comforting, satisfying, and brings a touch of old-fashioned charm to any occasion, from a Sunday dinner to a festive holiday gathering. It’s a dessert that feels like a warm hug.
- Customizable Fun: While this recipe is for a classic chocolate version, once you master the technique, the possibilities for variations are endless! (More on that later.)
- Sophie’s Seal of Approval: I’ve poured my heart and countless hours into perfecting this recipe. My experience and expertise mean you’re getting tried-and-true methods and tips that ensure success, even if you’re new to baking Swiss rolls.
What Exactly Is a Swiss Roll (and Why Is It So Great)?
Often referred to as a “jelly roll cake” in the US, a Swiss roll is a type of sponge cake that’s baked in a thin, flat rectangle, spread with a filling, and then rolled up into a spiral. Despite its name, the Swiss roll didn’t actually originate in Switzerland; its true origins are debated, often linked to Central Europe or even the Victorian era in England.
What makes it so great? It’s the magical combination of textures and flavors! You get the soft, yielding cake, the creamy filling that holds its shape, and a beautiful, spiraled presentation in every slice. Unlike layer cakes, which can sometimes be dense, a good Swiss roll cake is light, airy, and incredibly tender – the perfect vessel for its luscious fillings. It’s the kind of dessert that looks fancy but delivers on pure, unpretentious deliciousness.
Sophie’s Top Tips for Swiss Roll Success (Before You Start!)
Before we dive into the delicious details, let me share a few of my golden rules that will set you up for success. Trust me, these are born from years of baking (and occasional mishaps!), and they make all the difference:
- Room Temperature is Your Friend: For the cake batter, ensure your eggs are at room temperature. This isn’t just a suggestion; it’s crucial! Room temperature eggs emulsify better, creating a smoother, more stable batter that results in a tender, less crack-prone cake.
- Measure Accurately (A Scale Helps!): Baking is a science, and precision matters. While cup measurements are provided, I highly recommend using a kitchen scale for flour and sugar measurements (which I’ve also included in grams). This eliminates variability and ensures perfect ratios.
- Don’t Overmix: This is especially true after adding the dry ingredients to the wet, and crucially when folding in the egg whites. Overmixing develops gluten, which leads to a tough, dry cake – the enemy of a tender Swiss roll!
- Roll While Warm: This is the most important tip for preventing cracks! The cake needs to be rolled immediately after coming out of the oven, while it’s still warm and pliable. This ‘trains’ the cake to hold its rolled shape without breaking.
- Patience for Cooling: Once rolled with the towel, the cake needs to cool completely to room temperature before being unrolled and filled. This ensures it holds its shape perfectly and doesn’t tear when you spread the filling.
Ingredients You’ll Need
For a dessert this classic, quality ingredients shine through. Here’s what you’ll need to gather for your homemade chocolate Swiss Roll:
For the Chocolate Cake:
- Large Eggs (Room Temperature): As discussed, room temp is key! We’ll separate them to get that incredible light texture.
- Granulated Sugar: Sweetens the cake and helps tenderize it.
- Vegetable Oil: Adds moisture without imparting flavor, making the cake tender and flexible.
- Brewed Espresso or Strong Coffee: This is my secret weapon! It doesn’t make the cake taste like coffee, but it significantly deepens and enhances the chocolate flavor. Trust me on this one.
- Pure Vanilla Extract: Essential for that classic, comforting aroma and taste.
- All-Purpose Flour (Spoon-and-Leveled): The structure of our cake. Measuring correctly is vital to avoid a dense cake.
- Unsweetened Cocoa Powder: For that rich chocolate flavor and color. Use a good quality cocoa powder for the best results. You’ll also need extra for dusting the towel.
- Baking Powder: Our leavening agent, helping the cake rise and become airy.
- Kosher Salt: Balances the sweetness and brings out the chocolate flavor.
For the Fluffy Cream Filling:
- Heavy Cream (Cold): The star of our filling! Make sure it’s very cold for the best whipping results.
- Powdered Sugar: Sweetens and lightly stabilizes the cream.
- Pure Vanilla Extract: Enhances the cream’s flavor.
For the Silky Chocolate Ganache:
- Heavy Cream: Provides the luscious, smooth base for the ganache.
- Chocolate Chips: Good quality semi-sweet or dark chocolate chips work best for a rich, flavorful ganache. You can also chop up a chocolate bar.
Essential Equipment for a Perfect Roll
Having the right tools makes all the difference for a smooth baking experience:
- Kitchen Scale (Optional but Recommended): For precise ingredient measurements, especially flour and sugar.
- 11×17-inch Rimmed Baking Sheet or Jelly Roll Pan: Crucial for baking the thin, rectangular cake. Don’t try to use a smaller pan, or your cake will be too thick to roll.
- Parchment Paper: Prevents sticking and helps with lifting and rolling the cake.
- Hand Mixer (or Stand Mixer): Essential for beating egg yolks, whipping egg whites, and making the cream filling.
- Rubber Spatula: For gently folding ingredients and spreading batter.
- Large, Clean Kitchen Towel or Extra Parchment Paper: Used for the initial rolling of the warm cake. The texture of the towel helps grip the cake and prevents sticking.
- Wire Rack & Sheet Pan: For cooling the cake and catching excess ganache.
- Microwave-Safe Bowl: For making the ganache.
How to Make a Classic Chocolate Swiss Roll
Let’s get baking! Follow these detailed steps for a flawless Swiss Roll. Remember, step-by-step photos can be seen below the recipe card to guide you through each stage.
1. Making the Chocolate Sponge Cake: The Foundation of Your Roll
Prep Pan & Preheat Oven: Preheat your oven to 350°F (175°C). This is a fast bake, so you want your oven fully ready. Spray an 11×17-inch rimmed baking sheet (or jelly roll pan) generously with nonstick spray. Line it with parchment paper, making sure to leave some excess paper hanging over the long sides of the pan. These parchment “handles” will make lifting and transferring the hot cake so much easier.
Separate Eggs: Carefully separate the 4 large eggs into two separate, large mixing bowls. Place the whites in one, and the yolks in the other. This requires precision – even a tiny speck of yolk in the whites can prevent them from whipping up properly!
Combine Wet Ingredients (Yolks): In the bowl with the egg yolks, use your hand mixer to beat the granulated sugar, vegetable oil, brewed espresso (or strong coffee), and vanilla extract together. Beat on medium-high speed until the mixture becomes pale yellow and creamy, about 3-5 minutes. It should look light and airy.
Whisk Dry Ingredients: In a separate medium bowl, whisk together the all-purpose flour, cocoa powder, baking powder, and kosher salt. Whisking ensures these dry ingredients are evenly distributed and lump-free.
Gently Combine Wet & Dry: Add the whisked dry ingredients to the wet yolk mixture. Stir with a spatula until just combined. Do not overmix! Overmixing develops gluten, which will lead to a tough, dry cake that cracks when rolled.
Whip Egg Whites to Stiff Peaks: Clean your hand mixer beaters thoroughly (any residual fat will inhibit whipping!). In the bowl with the egg whites, beat them on high speed until stiff, glossy peaks form. This means when you lift the beaters, the whites stand straight up and hold their shape.
Fold in Egg Whites: This is a crucial step for a light, airy cake! Transfer about a third of the beaten egg whites into the chocolate batter and gently fold them in with your spatula to lighten the mixture. This makes it easier to incorporate the rest without deflating the whites. Then, add the remaining egg whites and gently fold them in until no streaks of white remain. The goal is to maintain as much air as possible for a tender cake.
Spread & Bake Cake: Gently and evenly spread the batter onto your prepared baking sheet using a spatula. Ensure it’s spread into an even layer to ensure even baking. Bake for 10-12 minutes, or until the cake springs back when lightly touched in the center. Again, do not overbake! An overbaked cake is a dry cake, and a dry cake cracks.
2. The Art of Rolling the Cake: Preventing Cracks
Prepare for Rolling: While the cake is baking, lay out a large, clean kitchen towel or a fresh piece of parchment paper on your counter. Liberally sprinkle the entire surface with unsweetened cocoa powder. This dusting prevents the cake from sticking to the towel and also adds a touch of extra chocolate flavor.
Quick Flip & Peel: As soon as the cake is out of the oven, let it rest for just one minute. Then, quickly and carefully invert the hot baking sheet directly onto the cocoa-dusted towel/parchment. Gently lift the baking sheet away, then carefully peel off the parchment paper that was lining the pan from the cake.
Roll It Up: Starting at one of the short ends of the cake, fold over any excess towel onto the cake. Then, using the towel as an aid, tightly roll the cake up along with the towel (or parchment) into a snug roll. The cake is hot and pliable now, so it will easily conform to the roll.
Cool Completely: Leave the cake rolled up with the towel and let it come to room temperature completely. This can take about 1 to 1.5 hours. This step ‘trains’ the cake to hold its shape, making it much less likely to crack when you unroll it later. Do not rush this step!
3. Whipping Up the Fluffy Cream Filling
Make the Frosting: While your cake is cooling, prepare the luscious cream filling. In a large mixing bowl, combine the cold heavy cream, powdered sugar, and vanilla extract. Using your hand mixer, beat on high speed until stiff peaks form. The cream should be thick and hold its shape. Be careful not to overbeat, or you’ll end up with butter!
4. Crafting the Silky Chocolate Ganache
Heat Cream: In a microwave-safe bowl, heat the ¾ cup heavy cream for about 45 seconds, or until it’s hot and steaming but not boiling.
Melt Chocolate: Add the chocolate chips to the hot cream. Let it sit undisturbed for 5 minutes. This allows the hot cream to melt the chocolate chips.
Stir Until Smooth: After 5 minutes, stir the mixture gently from the center outwards until the chocolate chips are completely melted and the ganache is smooth, glossy, and fully incorporated.
Thicken Slightly: Allow the ganache to sit for a few more minutes, stirring occasionally. You want it to thicken slightly to a pourable but not watery consistency – similar to warm honey. This ensures it coats the cake beautifully without running off too quickly.
5. Assembling Your Masterpiece & The Grand Finale!
Unroll & Fill: Once the cake has completely cooled (and not a moment before!), gently unroll it onto a clean surface. Evenly spread the prepared cream frosting over the entire surface of the cake. You can leave a small border at the far end if you wish, to prevent the filling from squishing out too much when re-rolling.
Re-Roll (Without the Towel): Carefully roll the cake back up tightly, this time without the towel, into a neat, uniform roll. Place the filled cake seam-side down on a wire rack set over a sheet pan. The sheet pan will catch any drips from the ganache.
Ganache & Chill: Pour the slightly thickened chocolate ganache evenly over the entire cake roll, ensuring it’s completely covered. You can use an offset spatula to gently spread it if needed, but try to avoid disturbing the cake too much. Transfer the cake to the refrigerator to chill for at least 30 minutes, or until the ganache is set. This chilling step is essential for the ganache to firm up and for the flavors to meld beautifully.
Slice and Serve: Once chilled, slice your beautiful Swiss roll using a sharp, warm knife. Enjoy your homemade masterpiece!
Pro-Tips for an Even Better Swiss Roll
Based on my extensive testing (remember, over 9 times!), here are some specific tips to elevate your Swiss Roll from great to absolutely exceptional:
- Spoon-and-Level Your Flour: Don’t scoop your flour directly with your measuring cup! This compacts it, leading to too much flour and a dry, dense cake. Instead, spoon the flour into your measuring cup until it’s overflowing, then use a straight edge (like a knife handle) to level it off. Even better, use a kitchen scale for gram measurements.
- The Power of Room Temperature: I can’t stress this enough! Not just the eggs, but if your oil or vanilla is very cold, it can shock the batter. Bring all cake ingredients to room temp for the best emulsion and smoothest batter.
- Vigilant Egg White Separation: Any fat – even a tiny drop of yolk – will prevent egg whites from whipping to stiff peaks. Separate them carefully, and if a speck of yolk falls in, discard that white and use a fresh one.
- Slow and Steady Rolling Wins the Race: Don’t yank or rush the initial roll with the towel. A gentle, steady pressure helps shape the cake evenly without tearing.
- Complete Cooling is Key: Resist the urge to unroll and fill your cake before it’s fully cooled. A warm cake will melt your filling and be much more prone to cracking or tearing when handled.
Storage and Make-Ahead Instructions
This Classic Chocolate Swiss Roll is fantastic for making ahead, which is perfect for entertaining!
- Storage: Store the finished, ganache-covered Swiss roll in an airtight container in the refrigerator for up to 3 days. The flavors actually develop beautifully overnight!
- Freezing: For longer storage, you can freeze the whole, finished Swiss roll (or individual slices) for up to 1 month. Wrap it tightly in plastic wrap, then an additional layer of aluminum foil to prevent freezer burn. Thaw overnight in the refrigerator before serving.
Swiss Roll Recipe Variations & Serving Suggestions
While this classic recipe is perfect as is, here are some ideas to customize your Swiss Roll:
- Different Fillings: Instead of vanilla cream, try a chocolate cream, a coffee-flavored cream, or even a raspberry jam with whipped cream.
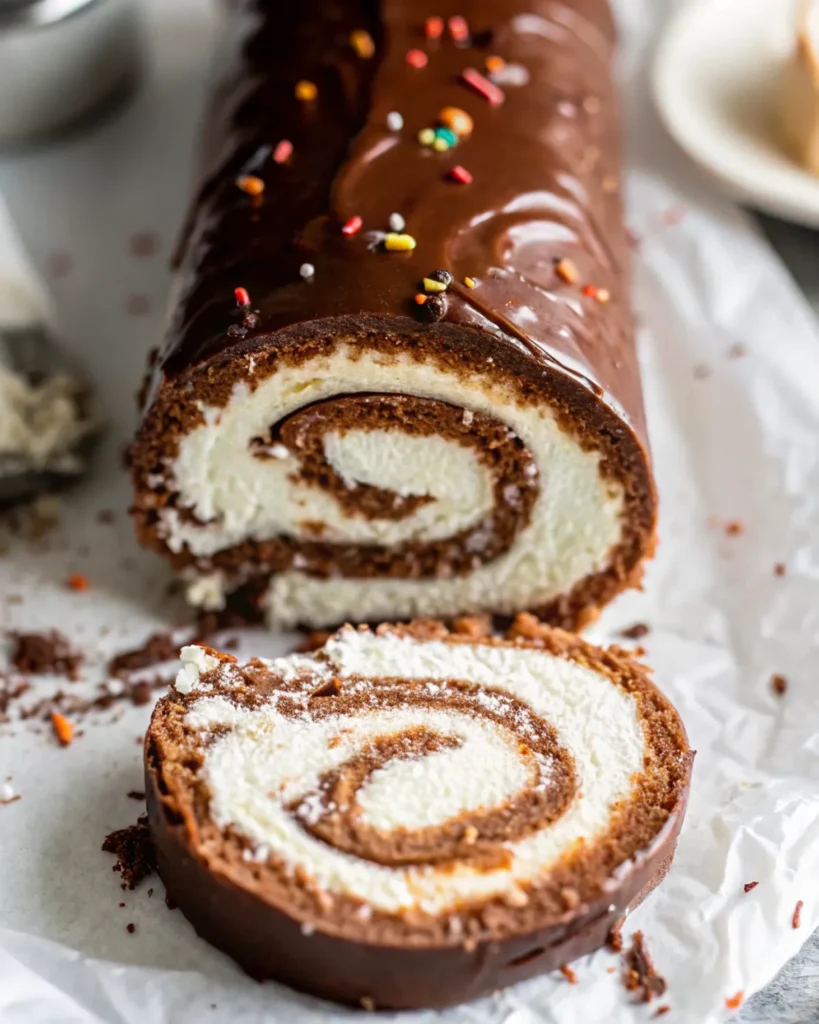
- Decorations: After the ganache sets, dust with a little extra cocoa powder, powdered sugar, chocolate shavings, or fresh berries (raspberries and strawberries pair wonderfully with chocolate!).
- Holiday Twist: For a festive touch, pipe edible holly leaves and berries on top or dust with a little edible glitter for New Year’s.
- Serving: Serve slices with a dollop of extra whipped cream, a scoop of vanilla bean ice cream, or simply as is with a hot cup of coffee or tea.
Frequently Asked Questions (FAQ)
Got questions? I’ve got answers! Here are some common queries about making Swiss Rolls:
Why did my Swiss Roll crack when I unrolled it?
Cracking is a common issue, and usually boils down to a few factors:
- Overbaked Cake: A dry cake is a stiff cake. Don’t overbake!
- Rolled Too Late/Cold: The cake must be rolled while still warm and pliable to ‘train’ it. Waiting too long makes it brittle.
- Not Enough Dusting: If your towel/parchment wasn’t sufficiently dusted with cocoa, the cake might stick and tear upon unrolling.
- Improper Folding: If the egg whites were deflated, the cake might be dense and less flexible.
Can I make this Classic Chocolate Swiss Roll ahead of time?
Absolutely! This Swiss Roll is a fantastic make-ahead dessert. You can store the finished, ganache-covered roll in an airtight container in the refrigerator for up to 3 days. For longer storage, you can freeze it for up to 1 month. Just be sure to wrap it well in plastic wrap and then foil to prevent freezer burn. Thaw overnight in the fridge.
Do I really need to use room temperature eggs for the cake?
Yes, it makes a significant difference! Room temperature eggs emulsify much better with the other ingredients, creating a smoother, more uniform batter. This leads to a finer crumb and a more tender, less prone-to-cracking cake. If you forget, quickly warm them by placing them in a bowl of warm (not hot!) water for 5-10 minutes.
What if I don’t have espresso or strong coffee?
While espresso or strong coffee deeply enhances the chocolate flavor without making the cake taste like coffee, you can substitute it with an equal amount of hot water. The cake will still be delicious, but the chocolate notes might not be as intense. You could also use decaffeinated coffee if caffeine is a concern.
How can I ensure my egg whites whip to stiff peaks?
The key is a perfectly clean, grease-free bowl and beaters, and ensuring absolutely no egg yolk gets into the whites. Even a tiny speck of fat can prevent them from whipping. Also, room temperature egg whites often whip to a greater volume than cold ones, so let them sit out for 20-30 minutes if you have time after separating.
More Irresistible Sweet Treats from SweetCraft Recipes
If you’re a fan of comforting, impressive desserts, then you’re in the right place! Here at SweetCraft Recipes, we’re all about creating those special moments through baking. If you loved mastering this Swiss Roll, you’ll definitely want to explore some of our other crowd-pleasing recipes:
- For the Cookie Lovers: Dive into our collection of decadent stuffed cookies, designed to be both a treat to make and eat!
- Our Stuffed Red Velvet Cookies Recipe is a vibrant and rich delight, perfect for those who adore the classic cake flavor in cookie form.
- Craving something unique and substantial? Our Pistachio NYC Cookies Recipe brings that famous bakery-style chewiness right to your kitchen.
- For an unexpected, gooey surprise, you absolutely must try our Creme Egg Stuffed Cookies Recipe – a true seasonal favorite!
- If you’re a fan of nutty, chocolatey goodness, the Peanut Butter Nutella Cookie Recipe is an irresistible combination.
- And for a pure indulgence, our White Chocolate Stuffed Cookies are perfectly chewy with a delightful creamy center.
These cookies, like our Swiss Roll, are crafted for home bakers looking for that extra touch of homemade magic.
Ready to Roll?
There you have it – my comprehensive guide to baking the perfect Classic Chocolate Swiss Roll. This recipe is a testament to the joy of homemade desserts, proving that elegant treats can be surprisingly simple to create. The rich chocolate cake, the fluffy cream, and the luxurious ganache all come together to create a truly unforgettable dessert.
So, gather your ingredients, follow my tips, and prepare to impress everyone (including yourself!) with this timeless classic. I can’t wait for you to try it! Happy baking, and don’t forget to share your Swiss Roll masterpieces with us.


