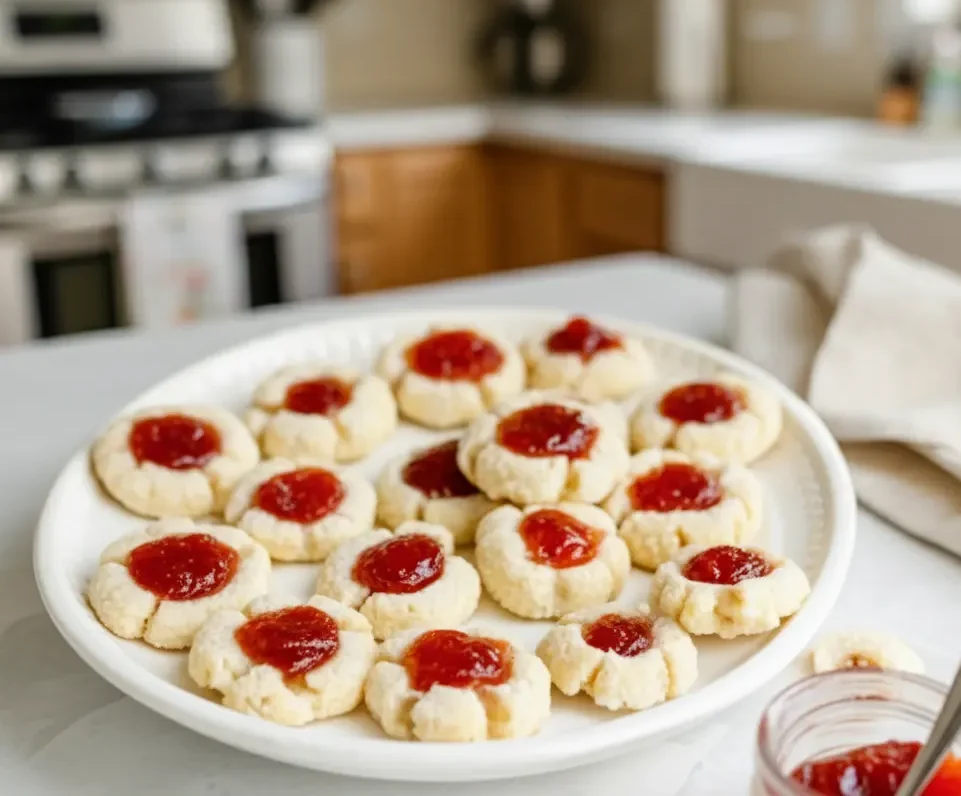
Step into a world of sweet nostalgia with the ultimate Jam Thumbprint Cookies recipe. These classic, buttery shortbread cookies, filled with a vibrant dollop of your favorite fruit jam, are more than just a dessert – they’re a hug in cookie form. Perfect for holiday platters, cookie exchanges, or simply a comforting treat with your afternoon tea, this recipe has been tested over nine times by me, Sophie, to ensure absolute perfection.
Why You’ll Fall in Love with This Jam Thumbprint Cookie Recipe
If you’re looking for a recipe that combines ease with irresistible flavor, you’ve found your match. My classic Jam Thumbprint Cookies are a testament to the power of simple ingredients creating extraordinary results. Here’s why this recipe will become a treasured favorite in your baking repertoire:
- Effortlessly Elegant: Despite their sophisticated appearance, these cookies are surprisingly simple to make. With minimal ingredients and straightforward steps, they’re perfect for both seasoned bakers and beginners.
- A Taste of Childhood: For many, thumbprint cookies evoke fond memories of holiday baking and family gatherings. This recipe captures that authentic, comforting flavor perfectly.
- Customizable Charm: The beauty of these cookies lies in their versatility. While I adore classic raspberry, you can fill them with any jam your heart desires – from apricot to strawberry, cherry to fig!
- Perfectly Portable: Their sturdy yet tender texture makes them ideal for cookie exchanges, potlucks, or gifting. They travel beautifully and are always a welcomed treat.
- Sophie’s Seal of Approval: I’ve meticulously tested this recipe over nine times, refining every detail to ensure your cookies come out perfectly baked, beautifully shaped, and utterly delicious. My goal is to equip you with all the knowledge to succeed!
These cookies truly embody the essence of a comfort-food favorite. They offer a simple, honest pleasure that’s often missing in today’s fast-paced world.
The Simple, Wholesome Ingredients You’ll Need
One of the great joys of baking these Jam Thumbprint Cookies is how few ingredients you need. Each component plays a crucial role in creating that signature tender crumb and delightful flavor.
Here’s a breakdown of the essentials:
- Butter (Very Soft, but Not Melted): This is the heart of our shortbread-style cookie. Using very soft butter is paramount. It allows for easy creaming with the sugar and ensures a tender, melt-in-your-mouth texture without overworking the dough. If your butter is too cold, your dough will be crumbly and hard to work with. If it’s melted, your cookies will spread excessively. Think “room temperature, easily indentable” but not greasy.
- Granulated Sugar: Just enough to sweeten the dough without making it overly sweet, letting the jam shine. It also contributes to the cookie’s delicate crispness.
- Salt: A tiny pinch of salt enhances all the other flavors, balancing the sweetness and making the butter taste even butterier. Don’t skip it!
- Vanilla Extract: The unsung hero of many desserts, vanilla adds a warm, aromatic depth that complements both the butter and the fruit jam. Use a good quality pure vanilla extract for the best flavor.
- All-Purpose Flour: The structural base of our cookie. We use just enough to create a tender, moldable dough. Measuring flour correctly is key – spoon it into your measuring cup and level it off with a straight edge (the “spoon and level” method) to avoid dense or dry cookies.
- Your Favorite Jam: This is where the fun begins! While I often reach for raspberry or apricot, feel free to use any jam, preserve, or even fruit curd you love. Just ensure it’s not overly runny, especially if you plan to bake it into the cookie (though for this recipe, we add it after baking for vibrant color and fresh flavor).
That’s it! Simple, high-quality ingredients are the secret to these irresistibly delicious cookies.
Sophie’s Top Tips for Perfect Jam Thumbprint Cookies Every Time
Baking should be fun, not frustrating! Based on my extensive testing, these expert tips will help you achieve thumbprint cookie perfection without a hitch:
- Butter Temperature is Crucial: I cannot stress this enough. Your butter needs to be very soft – almost yielding, but not at all melted or greasy. If it’s too cold, your dough will be crumbly. Too warm, and your cookies will spread. Take it out of the fridge at least 30-60 minutes before you start.
- Don’t Overwork the Dough: Once you add the flour, mix until just combined and a crumbly dough forms. Overmixing develops gluten, leading to tougher cookies. A light touch and the warmth of your hands (as described in step 2) will bring it together beautifully.
- Perfecting the Indentation: Use your thumb or, for a more uniform look, the back of a rounded 1/2 teaspoon measuring spoon. Press firmly but gently, creating a well without going all the way through the cookie. If the edges crack, gently smooth them with your fingers.
- Add Jam AFTER Baking (Mostly): My preferred method, and the one in this recipe, is to add the jam after the cookies have baked for about 10 minutes and cooled slightly. This prevents the jam from bubbling over, burning, or drying out, ensuring a vibrant, fresh fruit flavor and color. If the indentation has puffed up, gently re-press it with the back of a spoon before adding the jam.
- Cool Completely: While tempting, resist eating them warm right out of the oven! Let them cool completely on a wire rack. This allows the cookie to fully set and the jam to firm up, giving you the perfect texture and preventing them from falling apart.
- Accurate Flour Measurement: Always spoon your flour into the measuring cup and level it off with a straight edge (like the back of a knife). Scooping directly from the bag can compact the flour, leading to too much flour and dry, crumbly cookies.
Follow these simple guidelines, and you’ll be baking bakery-quality Jam Thumbprint Cookies with confidence.
Step-by-Step Instructions: How to Make Jam Thumbprint Cookies
Making these classic Jam Thumbprint Cookies is a delightful process. Follow these steps carefully for the best results.
Preparation:
- Preheat Oven & Prep Pans: Preheat your oven to 350°F (175°C). Line two baking sheets with parchment paper or silicone baking mats. This prevents sticking and ensures even baking. Set aside.
Making the Dough:
- Combine Wet & Dry: In a large mixing bowl, add your very soft butter, granulated sugar, salt, vanilla extract, and all-purpose flour.
- Form the Dough: Stir everything together until a crumbly dough forms. You might notice it’s a bit loose at first. Toward the end of stirring, I often find it helpful to use the warmth of my hands (gently kneading within the bowl) to help the dough come together into a cohesive, soft ball. Avoid overworking it.
Shaping the Cookies:
- Scoop & Roll: Using a small cookie scoop (approximately 2 teaspoon size is perfect for uniform cookies), divide the dough into even mounds. Roll each mound gently between your palms to create a smooth, round cookie ball.
- Create Indentations: Place the rolled cookie balls onto your prepared baking sheets, spacing them about 1.5-2 inches apart. Using your thumb or the back of a rounded 1/2 teaspoon measuring spoon, press an indentation into the center of each cookie. Be careful not to press all the way through to the baking sheet. If the edges crack, gently smooth them with your fingers.
Baking & Filling:
- Bake: Transfer the baking sheets to the preheated oven. Bake for 8-10 minutes. The cookies should be puffed slightly, and the bottoms barely golden brown, while the tops remain pale. Do not overbake!
- Cool & Fill: Remove from the oven and let the cookies cool on the baking sheets for about 10 minutes. While still warm, scoop about 1 teaspoon of your favorite jam into the center indentation of each cookie. If the indentations have puffed up during baking, gently re-press them with the back of a spoon before adding the jam.
- Final Cooling: Carefully transfer the cookies to a wire rack to cool completely. This allows the jam to set and the cookies to firm up for the best texture and handling.
Once completely cooled, your beautiful Jam Thumbprint Cookies are ready to be enjoyed!
Nutritional Information
Each small (1 cookie) serving of these Classic Jam Thumbprint Cookies provides:
- Calories: 84 kcal
- Carbohydrates: 11g
- Protein: 1g
- Fat: 4g
- Saturated Fat: 1g
- Polyunsaturated Fat: 1g
- Monounsaturated Fat: 2g
- Sodium: 59mg
- Potassium: 14mg
- Fiber: 1g
- Sugar: 6g
- Vitamin A: 169IU
- Vitamin C: 1mg
- Calcium: 4mg
- Iron: 1mg
Note: Nutritional values are estimates and can vary based on specific ingredient brands and preparation methods.
Common Questions About Jam Thumbprint Cookies
Even with a straightforward recipe, questions can pop up! Here are some frequently asked questions about Jam Thumbprint Cookies to help you troubleshoot and customize.
What kind of jam is best for thumbprint cookies?
The best jam is one you truly love! Seedless jams or preserves tend to work wonderfully as they create a smooth, clean finish. Raspberry, strawberry, apricot, and cherry are classic and always popular choices. For a more sophisticated or gourmet touch, don’t hesitate to try fig jam, peach preserves, or even a high-quality lemon or passion fruit curd. Just ensure your jam isn’t overly thin or watery, as this could lead to it running more easily, even when added post-bake.
Can I freeze Jam Thumbprint Cookies?
Absolutely! These cookies are great for making ahead.
- Freezing Baked Cookies: Bake and cool the cookies completely (without the jam, for best results). Once cooled, place them in an airtight freezer-safe container, separating layers with parchment paper. Freeze for up to 2-3 months. Thaw at room temperature and then fill with jam before serving. If you’ve already filled them, the jam might become a little softer upon thawing but will still be delicious.
- Freezing Dough Balls: This is my favorite method for fresh-baked cookies on demand! Roll the dough into balls, make the indentations, and then place them on a baking sheet lined with parchment paper. Freeze until solid (about 1-2 hours), then transfer the frozen dough balls to a freezer-safe bag or container. They can be stored for up to 3 months. When ready to bake, place frozen dough balls on a prepared baking sheet and bake for a few extra minutes (usually 12-15 minutes total). Let them cool, then fill with jam.
Why are my thumbprint cookies spreading too much or losing their shape?
This is a common issue! Here are the likely culprits and how to fix them:
- Butter Temperature: The most frequent offender. If your butter is too warm (borderline melted or greasy), the cookies will spread. Ensure it’s very soft but still cool to the touch.
- Overmixing the Dough: Too much mixing after adding flour can develop gluten, making the cookies tougher and more prone to spreading. Mix just until combined.
- Oven Temperature: An oven that isn’t preheated properly or runs too cool can cause cookies to spread before they set. Use an oven thermometer to verify accuracy.
- Not Enough Flour: While this recipe is precise, sometimes environmental factors (humidity, altitude) can affect flour absorption. Ensure you’re measuring your flour accurately using the spoon-and-level method.
- Warm Kitchen: If your kitchen is very warm, the dough can soften quickly. A quick chill of the formed dough balls for 20-30 minutes in the refrigerator before baking can work wonders to help them hold their shape.
Can I make these cookies gluten-free or vegan?
While this specific recipe is crafted for traditional ingredients, you can certainly experiment with alternatives.
- Gluten-Free: Use a high-quality 1:1 gluten-free baking flour blend that contains xanthan gum. The texture might be slightly different, perhaps a bit more delicate, but many GF blends perform beautifully in shortbread-style cookies.
- Vegan: Substitute the butter with a good quality, stick-style plant-based butter (like Miyoko’s Kitchen or Earth Balance baking sticks). Ensure your chosen jam is also vegan (most are, but always double-check labels). Again, the texture might vary slightly, but a delicious vegan version is absolutely achievable. I always recommend a small test batch when making such substitutions.
Variations & Customizations: Get Creative with Your Jam Thumbprint Cookies
The classic Jam Thumbprint Cookie is perfect as is, but that doesn’t mean you can’t get creative! Here are some ideas to make them uniquely yours:
- Jam Flavors Galore: Don’t limit yourself to one jam! Make a batch with assorted flavors for a beautiful and varied platter. Try apricot, blackberry, cranberry (especially for holidays!), lemon curd, or even chocolate-hazelnut spread for a richer twist.
- Nutty Edges: Before baking, after rolling the dough balls, gently roll the outside edges of the dough in finely chopped nuts like pecans, walnuts, or almonds. This adds a lovely texture and nutty flavor that pairs wonderfully with the buttery cookie and fruity jam.
- Citrus Zest Infusion: Add 1-2 teaspoons of finely grated lemon or orange zest to the cookie dough along with the vanilla extract. This brightens the flavor of the cookie and complements most fruit jams beautifully.
- Spiced Dough: For a holiday twist, add a pinch of cinnamon, nutmeg, or cardamom to your flour mixture. These warm spices enhance the cozy, comforting feel of the cookies.
- Glaze Drizzle: Once the cookies are completely cooled and the jam is set, you can drizzle a simple powdered sugar glaze over the top for an extra touch of sweetness and decoration. Whisk 1 cup powdered sugar with 1-2 tablespoons milk (or lemon juice for a tangy kick) until smooth.
- Mini Chocolate Chips: Fold 1/4 cup mini chocolate chips into the dough for a subtle chocolatey hint. This works especially well with raspberry or cherry jam.
Storing Your Delicious Jam Thumbprint Cookies
Proper storage ensures your Jam Thumbprint Cookies stay fresh and delightful for as long as possible.
- At Room Temperature: Once completely cooled, store the cookies in an airtight container at room temperature for up to 5-7 days. To prevent them from sticking together, you can place a piece of parchment paper between layers.
- In the Refrigerator: If you live in a very warm or humid climate, or if your jam is particularly fresh and less processed, you might prefer to store them in an airtight container in the refrigerator for up to 1-2 weeks. Bring them to room temperature before serving for the best flavor and texture.
- Freezing (as discussed above): Baked cookies (unfilled or filled) can be frozen for 2-3 months. Dough balls can also be frozen for later baking.
Serving Suggestions
Jam Thumbprint Cookies are versatile and shine in many settings:
- With Tea or Coffee: Their delicate size and rich flavor make them the perfect accompaniment to a warm cup of tea, coffee, or hot chocolate.
- Dessert Platters: Arrange them beautifully on a dessert platter alongside other holiday cookies or small bites.
- Gifts: Package them in pretty boxes or bags for homemade gifts that are always appreciated.
- Brunch Spread: They add a lovely sweet touch to a breakfast or brunch buffet.
- Family Gatherings: A staple for any family gathering, bringing a smile to every face.
More Sweet Craft Cookie Recipes You’ll Love!
If you’re anything like me, one amazing cookie recipe just makes you crave more! At Sweet Craft Recipes, we’re passionate about all things sweet. If you enjoyed creating these Jam Thumbprint Cookies, you’ll definitely want to explore some of our other trending and beloved cookie recipes:
- For the Indulgent Soul: Dive into our incredibly rich and decadent Stuffed Red Velvet Cookies Recipe. They’re a showstopper!
- A Taste of the Big Apple: Experience the viral sensation with our giant, chewy, and utterly delicious Pistachio NYC Cookies Recipe.
- Seasonal Sweetness: For a truly unique and festive treat, don’t miss our delightful Creme Egg Stuffed Cookies Recipe.
- Classic Combo, New Heights: If you love the pairing of nutty and chocolatey, our Peanut Butter Nutella Cookie Recipe is a must-try.
- Pure White Chocolate Bliss: Indulge in the smooth, creamy sweetness of our White Chocolate Stuffed Cookies.
Each of these recipes brings its own unique charm and flavor profile, ensuring there’s a perfect cookie for every craving and occasion. Happy baking!
The Sweet Conclusion
Baking Jam Thumbprint Cookies is more than just following a recipe; it’s an experience. It’s about creating something beautiful and delicious with your own hands, sharing a taste of comfort and nostalgia with those you love. My hope is that this detailed guide, filled with Sophie’s personal tips and insights from countless tests, empowers you to bake the best batch of these classic cookies you’ve ever made.
From the buttery, tender shortbread base to the vibrant pop of fruity jam, every bite is a reminder of simpler, sweeter times. So gather your ingredients, preheat your oven, and prepare to fill your home with the irresistible aroma of freshly baked cookies. Enjoy every moment, and savor every bite!
Happy Baking from Sweet Craft Recipes!


