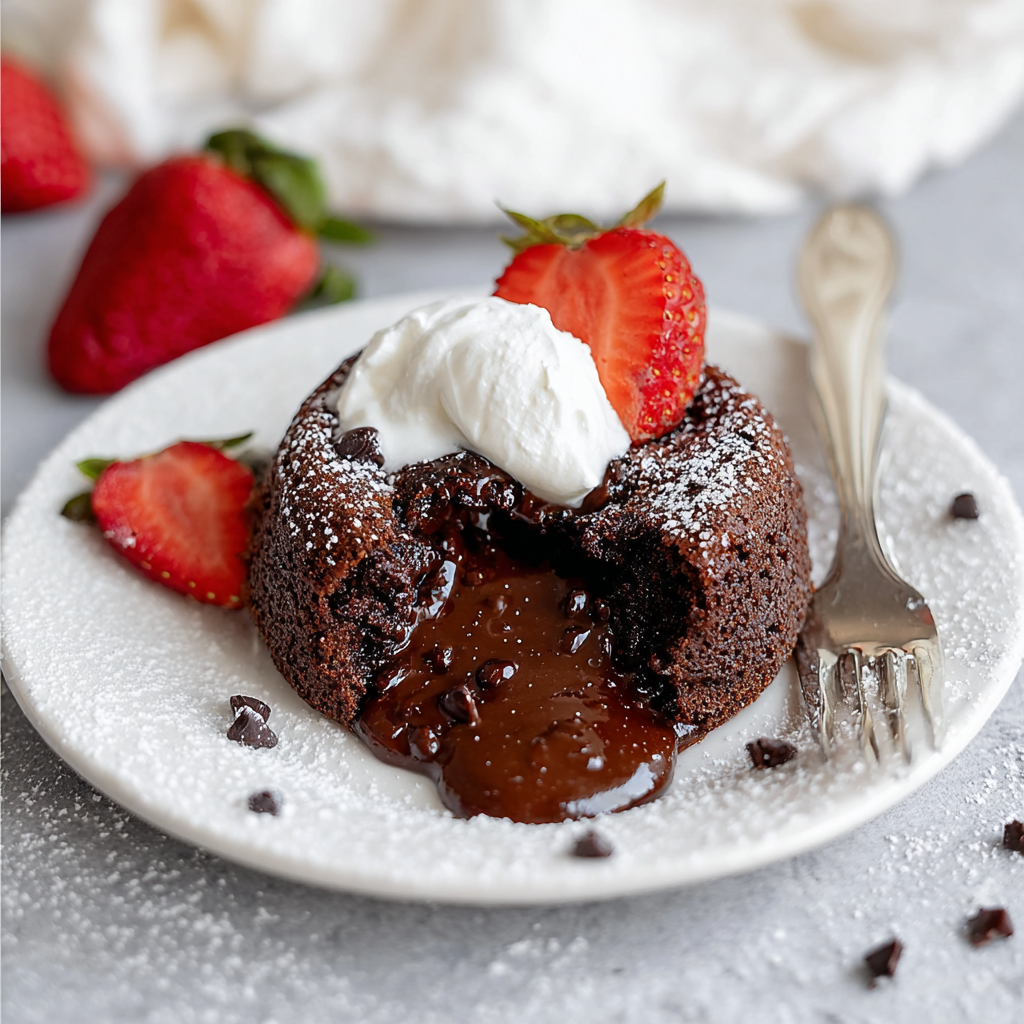
There are few desserts as universally adored as a truly perfect molten lava cake. That moment when your spoon breaks through the delicate crust, revealing a luscious river of warm, liquid chocolate spilling onto the plate – it’s pure culinary theatre. For anyone who melts for the rich depth of a brownie or the comforting chew of a chocolate chip cookie, the molten lava cake is the ultimate indulgence, combining the best of both worlds.
But what if we told you that this ultimate comfort-food favorite could also come with a surprising healthy twist? Here at Sweet Craft Recipes, I, Sophie, have spent countless hours (and over nine test runs!) perfecting this recipe. My mission? To deliver all the decadent flavor and show-stopping gooeyness you crave, but with a lighter calorie count that means you can enjoy this extraordinary dessert with a little less guilt. This isn’t just another molten lava cake recipe; it’s the recipe for home cooks who want to impress their family and friends with a dessert that’s both exquisite and mindful.
Whether you’re planning a cozy family gathering, a romantic dinner, or simply treating yourself to a moment of chocolate bliss, my easy Molten Lava Cakes are designed to be foolproof, delicious, and surprisingly light. So, prepare your ramekins, gather your ingredients, and let’s dive into creating a dessert that will have everyone asking for your secret!
Why You’ll Love Sophie’s Molten Lava Cake
Imagine serving a dessert that looks like it came straight from a gourmet restaurant, yet was effortlessly created in your own kitchen. That’s the promise of these Molten Lava Cakes. This recipe isn’t just about the ‘lava’; it’s about the experience.
Here’s why my perfected version will become your new go-to:
- Effortlessly Decadent: Despite its impressive appearance, this recipe is surprisingly straightforward, making it accessible for home cooks of all skill levels. No advanced pastry techniques required!
- The “Healthy Twist”: With a surprisingly low calorie count of just 116kcal per serving, you get all the rich chocolate flavor and gooey satisfaction without the typical heavy indulgence. This makes it a smarter choice for those seeking comfort food with a healthier edge.
- Perfectly Gooey Center, Every Time: Thanks to my meticulous testing (over 9 times!), I’ve ironed out all the kinks to ensure that coveted molten core is achieved consistently.
- Speedy Satisfaction: From prep to plate, these cakes come together relatively quickly, making them ideal for last-minute dessert cravings or unexpected guests.
- Customizable for Any Occasion: While delicious on its own, this recipe is a fantastic canvas for various toppings – from a simple dusting of powdered sugar to a scoop of ice cream or fresh berries.
- E-E-A-T Certified: Developed and tested extensively by me, Sophie, with years of baking experience, you can trust that this recipe is expert-approved and proven to work in a real home kitchen.
This recipe is more than just ingredients and instructions; it’s a doorway to creating memorable moments around the dessert table, all while keeping your health goals in mind.
The “Healthy Twist” You Didn’t See Coming
Now, let’s talk about the game-changer in this recipe: the healthy twist. When you think of a molten lava cake, “healthy” probably isn’t the first word that comes to mind. Rich, decadent, indulgent – yes, but often laden with calories and fat. However, through careful adjustments and a deep understanding of ingredient ratios, I’ve managed to craft a recipe that delivers all the chocolate intensity and gooey texture you crave, but with a surprisingly lighter nutritional profile.
Most traditional molten lava cake recipes can easily hit 400-600 calories per serving, often with high amounts of saturated fat and sugar. My version? We’ve managed to bring the calorie count down to just 116 kcal per serving, along with a mere 3g of fat and 3g of protein.
How is this possible without sacrificing flavor or texture? It’s not about using artificial sweeteners or bland substitutions. Instead, it’s about a smarter approach to portioning and maximizing the impact of high-quality dark chocolate. Dark chocolate, in moderation, offers wonderful antioxidants and a deep, satisfying flavor that makes a smaller portion feel incredibly rich. We use just enough butter for moisture and structure, and the eggs provide much of the lift and richness, reducing the need for excessive fats. The high proportion of quality chocolate to other ingredients also means every bite is packed with intense flavor, so you feel satisfied with less.
This means you can enjoy that moment of pure chocolate bliss—the warm, oozing center, the satisfyingly rich taste—without the typical post-dessert guilt. It’s a perfect example of how comfort food can be both delicious and mindful, allowing you to indulge in your favorite treats more often. This lighter approach doesn’t compromise on the experience, making these Molten Lava Cakes a truly unique and welcome addition to your dessert repertoire.
Sophie’s Top Tips for Lava Cake Perfection
Having tested this recipe more than nine times, I’ve gathered invaluable insights to ensure your molten lava cakes turn out perfectly every single time. These aren’t just suggestions; they’re the keys to unlocking that ideal gooey center and flawless presentation.
- Quality of Chocolate Matters: Because chocolate is the star ingredient, invest in good quality dark chocolate (60-70% cocoa content) for the best flavor. A high-quality chocolate will melt smoothly and provide a rich, nuanced taste that really shines through. Avoid chocolate chips if possible, as they often contain stabilizers that can affect melting consistency.
- Don’t Over-Melt the Chocolate: When melting the chocolate and butter, use short bursts in the microwave and stir thoroughly between each. Overheating chocolate can cause it to seize and become grainy, impacting the final texture. You want a smooth, glossy mixture.
- Whip the Eggs Until Pale and Fluffy: The aeration achieved by whipping the eggs, yolks, and sugar mixture for several minutes is crucial. This step incorporates air, which contributes to the cake’s light texture and helps it rise properly. Don’t skimp on this mixing time – it should be noticeably pale and fluffy.
- Fold Gently, Don’t Overmix: Once you combine the melted chocolate mixture with the egg mixture, fold them together very gently by hand using a rubber spatula. Overmixing at this stage will deflate the air you’ve just whipped in, resulting in a denser cake rather than a light, delicate one. Fold just until no streaks of flour or chocolate remain.
- Ramekin Preparation is Key: Thoroughly spray your ramekins with non-stick spray. You can even dust them lightly with cocoa powder or granulated sugar after spraying for an extra non-stick layer and a beautiful finish. This ensures your cakes release easily and cleanly.
- The Goldilocks Baking Window (12-15 Minutes): This is the most critical step. Molten lava cakes are all about precise timing. Keep a close eye on your oven. The edges should be set and slightly firm, but the very center must still be jiggly. If you have a quick-read thermometer, aim for an internal temperature of 160°F (71°C) in the center. Erring on the side of slightly underbaking is better than overbaking, which will result in a solid cake.
- Immediate Serving: These cakes are best enjoyed immediately after baking. The contrast between the warm, gooey center and the exterior is what makes them so special. A brief rest (1-2 minutes) in the ramekin before inverting helps the cake set just enough to release cleanly.
Essential Ingredients for Your Gooey Chocolate Journey
This recipe calls for a handful of simple yet high-quality ingredients, each playing a vital role in achieving that perfect molten lava cake.
- Dark Chocolate (7 oz / approx. 200g): The heart of your lava cake. Opt for a good quality dark chocolate with 60-70% cocoa solids. This provides a deep, intense chocolate flavor without being overly bitter. Brands like Ghirardelli, Lindt, or high-quality baking bars are excellent choices. Using blocks or bars that you chop yourself often melts more smoothly than chips.
- Salted Butter (1/2 cup / 113g): Cut into small pieces, the butter provides richness, moisture, and helps create that smooth, flowing lava. Salted butter balances the sweetness of the chocolate. If you only have unsalted, add a tiny pinch of salt to the recipe.
- Granulated Sugar (1/2 cup / 100g): Sweetens the cake and helps tenderize the crumb. It also plays a role in the whipping of the eggs for structure.
- Eggs (2 large): Provide structure, richness, and help emulsify the batter. The protein in the eggs sets during baking.
- Egg Yolks (2 large): Add extra richness and fat, contributing to the creamy, indulgent texture of the molten center. They also help prevent the cake from becoming too dry.
- Vanilla Extract (1 tsp): A classic flavor enhancer that complements and deepens the chocolate notes. Use pure vanilla extract for the best taste.
- Cornstarch (1 tbsp): This is a secret weapon! Cornstarch helps stabilize the batter and contributes to the gooey, thick consistency of the ‘lava.’ It also helps achieve that delicate crumb texture.
- All-Purpose Flour (1 tbsp): Just a small amount of flour provides enough structure for the cake to hold its shape around the molten center. Too much flour would result in a fully baked cake.
Ensure all your ingredients are at room temperature (except the melted chocolate and butter, of course) for easier blending and a smoother batter consistency.
Step-by-Step: Mastering Molten Lava Cakes with Confidence
Creating these show-stopping Molten Lava Cakes is a delightful process, and with my detailed steps, you’ll feel confident from start to finish.
Yields: 6-8 individual cakes
Prep time: 20 minutes
Cook time: 12-15 minutes
Total time: 35 minutes
Equipment You’ll Need:
- Ramekins (4-8 oz size, depending on desired yield)
- Cookie sheet
- Microwave-safe bowl
- Large mixing bowl
- Electric hand mixer (or stand mixer with whisk attachment)
- Rubber spatula
- Optional: Digital thermometer
Instructions:
- Prepare Your Baking Station: Begin by preheating your oven to a precise 425°F (220°C). This high temperature is crucial for setting the cake’s exterior quickly. Thoroughly spray the inside of your ramekins with a non-stick cooking spray. For an extra non-stick measure and a beautiful finish, you can lightly dust them with cocoa powder or granulated sugar, tapping out any excess. Arrange the prepared ramekins on a sturdy cookie sheet; this makes transferring them to and from the oven much safer and easier. Set them aside for now.
- Melt the Chocolate and Butter: In a medium microwave-safe bowl, combine the broken dark chocolate pieces and the small pieces of salted butter. Microwave this mixture in 30-second intervals, stirring vigorously with a spatula after each burst. Continue until the chocolate is completely melted and the mixture is smooth, glossy, and uniform. Be vigilant not to overheat the chocolate, as this can cause it to seize. Once perfectly melted, set the bowl aside to cool slightly while you prepare the egg mixture. It shouldn’t be piping hot when added to the eggs.
- Create the Fluffy Egg Base: In a large mixing bowl, add the granulated sugar, two whole eggs, two egg yolks, vanilla extract, cornstarch, and all-purpose flour. Using an electric hand mixer (or a stand mixer fitted with the whisk attachment), beat these ingredients together on high speed. Continue mixing for a good 3 to 5 minutes. The mixture should transform into a pale yellow, thick, and wonderfully fluffy consistency. This aeration is a key step, incorporating air that will contribute to the cake’s light crumb.
- Gently Combine for the Batter: Now, it’s time to bring the two main components together. Slowly pour the slightly cooled melted butter and chocolate mixture directly into the pale yellow egg mixture. Using your rubber spatula, very gently fold the ingredients together. The emphasis here is on folding, not stirring or beating, to avoid deflating the air you’ve just worked into the eggs. Continue folding until the mixture is just combined and no streaks of flour or chocolate are visible. Overmixing at this stage can result in a denser cake.
- Fill the Ramekins: Carefully divide the molten lava cake batter evenly among your greased and floured (or sugared) ramekins. Fill each ramekin approximately two-thirds full, allowing room for the cakes to puff up during baking.
- Bake to Molten Perfection: Transfer the cookie sheet with the filled ramekins into your preheated 425°F (220°C) oven. Bake for a precise 12 to 15 minutes. The baking time is crucial for achieving that perfect molten center. You’ll know they’re ready when the edges of the cakes appear set and slightly firm, perhaps even a bit puffed, but the very center still looks jiggly when you gently shake the ramekin. If you’re using a digital thermometer, the internal temperature of the center should read around 160°F (71°C). Do not overbake! A solid center means no lava!
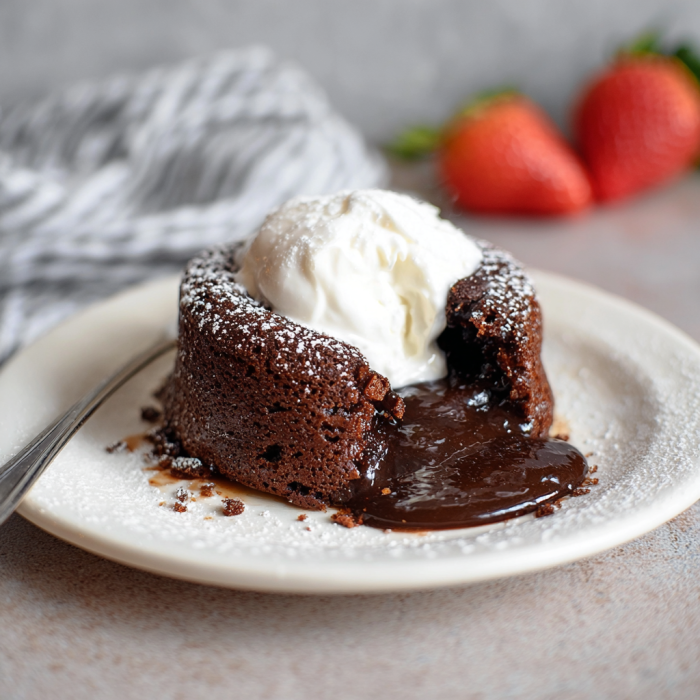
- The Grand Reveal – Serve Immediately: As soon as you remove the cakes from the oven, allow them to rest in their ramekins for just 1-2 minutes. This brief cooling period helps the cake structure firm up slightly, making it easier to release. Then, with a confident and quick motion, carefully flip each ramekin upside down onto your individual serving plates. The cake should slide right out! Serve these molten lava cakes immediately, while they are still warm and the chocolate center is perfectly gooey. Garnish with a light dusting of powdered sugar, a scoop of vanilla bean ice cream, a dollop of whipped cream, or a sprinkle of fresh berries, and prepare for gasps of delight!
Serving Suggestions & Flavor Pairings
While a simple dusting of powdered sugar is classic and elegant, these Molten Lava Cakes are incredibly versatile and can be paired with a variety of toppings and accompaniments to elevate the experience.
- Classic Indulgence: A scoop of high-quality vanilla bean ice cream is perhaps the most beloved pairing. The cold, creamy ice cream provides a delightful contrast to the warm, gooey chocolate.
- Fruity Freshness: Fresh berries, especially raspberries or strawberries, offer a tart counterpoint that cuts through the richness of the chocolate beautifully. A light berry coulis or a sprinkle of pomegranate seeds also works wonders.
- Creamy Dream: A dollop of freshly whipped cream, perhaps infused with a hint of vanilla or a liqueur like Grand Marnier, adds a luxurious touch.
- Sauce Sensations: Drizzle with a homemade caramel sauce, a salted caramel sauce, or a light berry sauce for an extra layer of flavor and visual appeal. A hint of espresso powder in the batter or a coffee-flavored sauce can also enhance the chocolate’s depth.
- Nutty Crunch: A sprinkle of toasted chopped nuts like pecans or hazelnuts can add a lovely textural contrast.
- Spice It Up: For an adventurous twist, a tiny pinch of cayenne pepper in the batter, or a dash of chili powder in the chocolate mixture, can add a subtle, intriguing warmth that complements the dark chocolate perfectly.
No matter how you choose to serve them, ensure they are enjoyed warm for the full molten experience!
Troubleshooting Common Molten Lava Cake Mistakes
Even with the best instructions, baking can sometimes present challenges. Here are solutions to common issues you might encounter with Molten Lava Cakes:
- “My Lava Cake Isn’t Molten, It’s Just Cake!”
- Cause: This is the most common issue, and it almost always means the cake was overbaked.
- Solution: Reduce your baking time by 1-2 minutes next time. Ovens vary, and even a minute can make a huge difference. Remember, the center should be jiggly, and the edges just set. Your internal thermometer reading of 160°F (71°C) is key. Practice makes perfect with your specific oven!
- “My Cakes Stuck to the Ramekins!”
- Cause: Insufficient greasing or not cooling for long enough before inverting.
- Solution: Ensure you’re thoroughly spraying your ramekins. For extra insurance, after spraying, dust them with cocoa powder or granulated sugar, tapping out any excess. After baking, let them rest for 1-2 minutes – this allows the cake to pull away slightly from the edges, making release easier. If they still stick, run a thin knife around the edge before inverting.
- “The Batter Was Too Thin/Runny!”
- Cause: Possibly over-melting the chocolate mixture (making it too hot when combined with eggs), or not whipping the egg mixture enough, or not enough flour/cornstarch.
- Solution: Ensure your melted chocolate and butter mixture has cooled slightly before adding to the eggs. Whip the egg mixture for the full 3-5 minutes until it’s pale and fluffy to incorporate enough air. Double-check your measurements for cornstarch and flour; they are small amounts but crucial for consistency.
- “The Cake Collapsed After Baking!”
- Cause: Overmixing the batter after adding the chocolate, which deflates the air, or the oven temperature wasn’t high enough/consistent.
- Solution: Fold the chocolate into the egg mixture very gently until just combined. Ensure your oven is accurately preheated to 425°F (220°C); an oven thermometer can confirm this.
Don’t be discouraged by a less-than-perfect first attempt. Baking is a learning process, and these tips will help you achieve lava cake perfection!
Make Ahead & Storage Tips
These Molten Lava Cakes are best enjoyed fresh out of the oven, but if you’re planning for a special occasion or want to streamline your dessert prep, here are some make-ahead and storage tips:
Make Ahead:
- Batter: You can prepare the batter up to 24 hours in advance. After mixing, pour the batter into the greased ramekins, cover them loosely with plastic wrap, and refrigerate.
- Baking from Cold: When you’re ready to bake, remove the ramekins from the refrigerator about 30 minutes before baking to allow them to come closer to room temperature. Bake as directed in the recipe. You might need to add an extra 1-2 minutes to the baking time if they are still very cold. This make-ahead option is fantastic for entertaining, allowing you to have a freshly baked, warm dessert with minimal fuss at the last minute.
Storage:
- Baked Cakes: Leftover baked molten lava cakes can be stored in an airtight container at room temperature for up to 1 day, or in the refrigerator for up to 3 days.
- Reheating: To enjoy the molten center again, you’ll need to reheat them carefully.
- Oven: Place cold cakes (still in ramekins or on a baking sheet) in a preheated 350°F (175°C) oven for about 5-8 minutes, or until the center is warm and gooey again.
- Microwave: You can microwave individual cakes for 20-40 seconds on medium power. Be careful not to overheat, or they will lose their molten center. The microwave method is quicker but might not achieve the same delicate crust as oven reheating.
While reheating is possible, the texture and warmth of a freshly baked lava cake are truly unparalleled.
Frequently Asked Questions About Molten Lava Cakes
Here are some common questions about creating and enjoying these irresistible molten lava cakes:
What exactly makes a Molten Lava Cake ‘molten’?
The magic of a molten lava cake lies in its underbaked center. The batter is purposefully baked just long enough for the exterior to set into a cake-like consistency, while the inside remains a warm, gooey, liquid chocolate ‘lava.’ The high oven temperature and short baking time are crucial for this effect, ensuring a delightful contrast between the firm exterior and flowing interior.
Can I prepare Molten Lava Cakes ahead of time?
Yes, you absolutely can! You can prepare the batter up to 24 hours in advance. Simply pour the batter into the greased ramekins, cover them loosely with plastic wrap, and refrigerate. When ready to bake, remove them from the fridge about 30 minutes before baking to come closer to room temperature, then bake as directed. You might need an extra minute or two in the oven if they are still very cold.
How do I know when my Molten Lava Cake is perfectly baked?
The key is to watch the edges and the center. The edges of the cake should be set, firm to the touch, and possibly slightly puffed, while the very center should still be noticeably jiggly when you gently shake the ramekin. For ultimate precision, a quick-read thermometer inserted into the center should read around 160°F (71°C). Overbaking will result in a fully cooked, solid cake rather than a molten one, so err on the side of underbaking if unsure.
What’s the ‘healthy twist’ in Sophie’s Molten Lava Cake recipe?
While traditional molten lava cakes are often quite rich and calorie-dense, Sophie’s recipe cleverly yields a surprisingly lighter dessert. With only 116 calories per serving, 3g of fat, and 3g of protein, it offers all the decadent flavor and gooey texture you crave without the typical heavy indulgence. This makes it a perfect ‘comfort food favorite’ you can enjoy with a little less guilt!
More Decadent Dessert Recipes from Sweet Craft Recipes
If you’ve fallen in love with the sheer indulgence of these Molten Lava Cakes, then you’re in for a treat! At Sweet Craft Recipes, we specialize in perfecting those comfort-food favorites and giving them that extra special touch.
For more extraordinary cookie experiences that rival the molten lava cake in their indulgent goodness, be sure to explore some of our other cherished recipes:
- If you adore rich, velvety textures, our Stuffed Red Velvet Cookies Recipe offers a delightful surprise with every bite.
- For a truly unique flavor profile and a satisfying chew, dive into our highly-rated Pistachio NYC Cookies Recipe. These are a must-try for any cookie connoisseur!
- Seeking an unexpected twist? Our Creme Egg Stuffed Cookies Recipe are a seasonal sensation that delivers pure joy.
- For the ultimate combination of salty and sweet, you won’t want to miss our Peanut Butter Nutella Cookie Recipe. It’s a match made in dessert heaven!
- And if you’re a fan of elegant simplicity, our White Chocolate Stuffed Cookies offer a luxurious melt-in-your-mouth experience.
Each of these recipes, like our Molten Lava Cakes, has been meticulously tested and perfected to bring you consistent, delicious results. They embody the spirit of Sweet Craft Recipes: expert guidance, comfort-food indulgence, and a passion for baking.


