As the days grow shorter and the festive season approaches, there’s nothing quite like the comforting aroma of freshly baked cookies filling your home. And if you’re searching for that perfect holiday cookie — one that practically dissolves on your tongue with a burst of cool peppermint and buttery goodness — then you’ve found it. These Peppermint Meltaways are more than just a recipe; they’re a little bite of winter magic, a festive embrace that conjures up cozy memories and creates new ones.
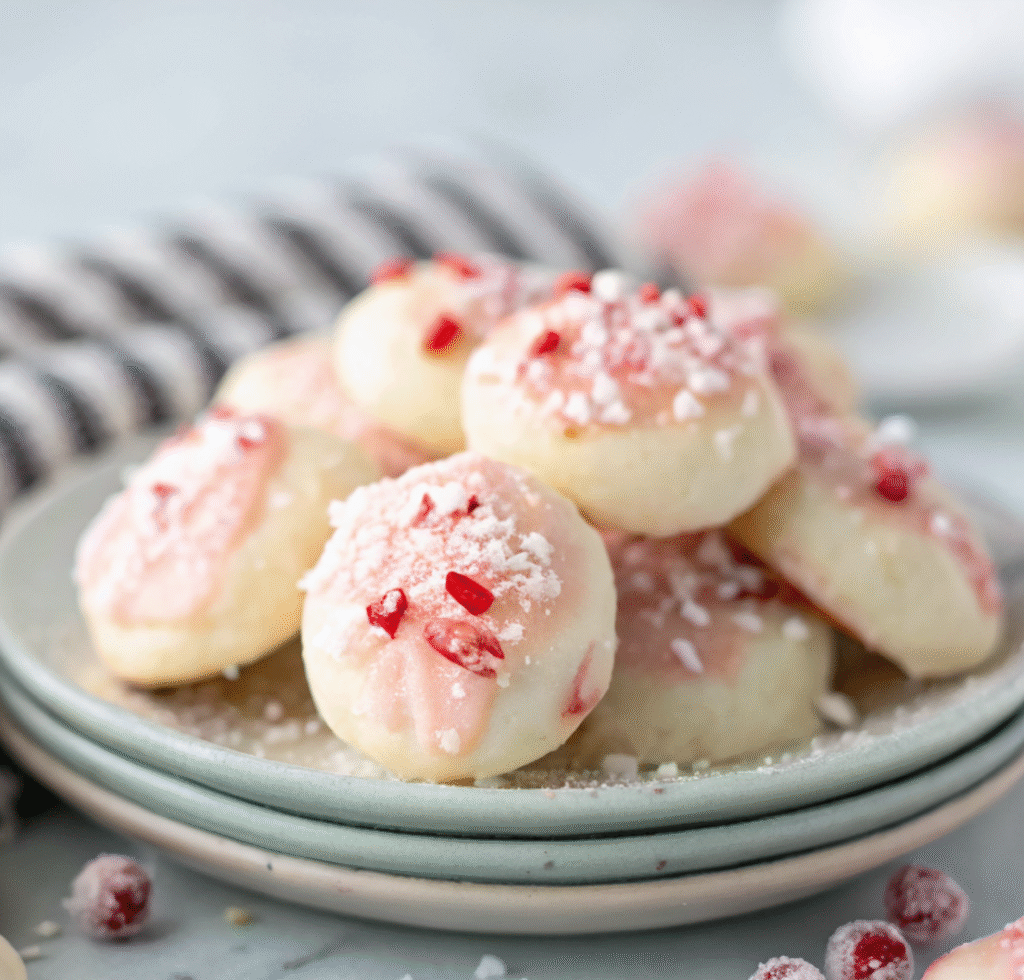
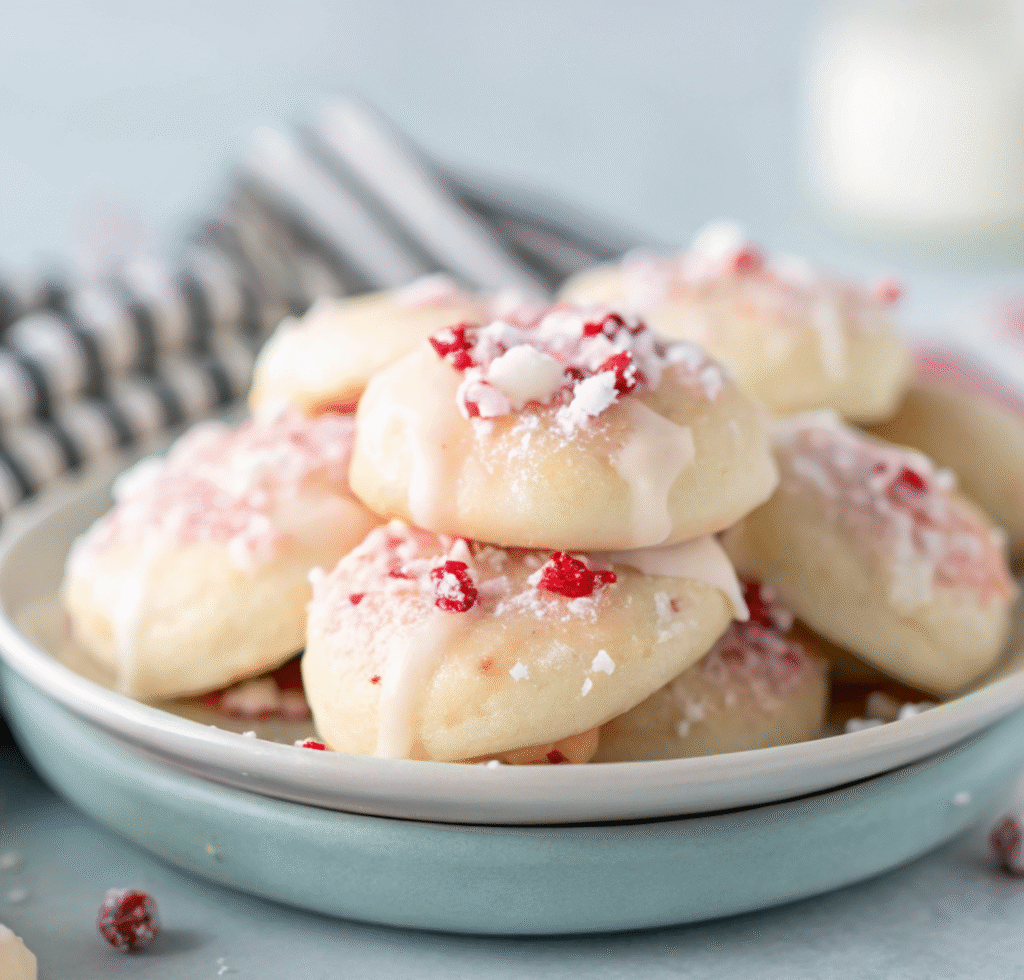
Here at Sweet Craft Recipes, we believe in the power of a truly exceptional cookie, and these easy Peppermint Meltaways cookies embody everything we love about holiday baking. Imagine: a tender, delicate butter cookie, infused with the invigorating essence of peppermint, then topped with a creamy, vibrant pink (or red!) peppermint icing and a sprinkle of crushed candy cane. It’s a symphony of flavor and texture, a comforting classic with a delightful festive flair.
Whether you’re planning a grand holiday feast, looking for the ideal treat for a cookie exchange, or simply want to brighten a gloomy winter afternoon, these melt-in-your-mouth Peppermint Meltaways are guaranteed to bring smiles. They’re an American cuisine favorite that feels both nostalgic and exciting, perfect for family gatherings and creating those cherished moments around the table.
Why You’ll Fall in Love with This Peppermint Meltaways Recipe
What sets these Peppermint Meltaways apart, making them a standout on any cookie platter? It’s their uniquely delicate texture, combined with that irresistible peppermint kick.
- Truly Melt-in-Your-Mouth: Thanks to a clever combination of ingredients and precise baking times, these cookies achieve an unparalleled tenderness. They don’t just melt; they dissolve into a cloud of buttery sweetness.
- Festively Flavorful: The balance of peppermint bakery emulsion (a secret weapon!) and crushed peppermints delivers a bright, refreshing flavor without being overpowering. It’s the quintessential taste of the holidays.
- Surprisingly Easy to Make: Don’t let their elegant appearance fool you. This easy cookie recipe is straightforward, making it accessible for home cooks of all skill levels. You’ll be amazed at the professional results you can achieve.
- Perfect for Any Occasion: While they shine during the holiday season as Christmas cookies or festive holiday treats, their comforting appeal makes them a wonderful addition to any celebration, from birthdays to simple family desserts.
- Stunning Presentation: The vibrant icing and sparkling crushed peppermints make these cookies visually appealing, turning them into edible works of art that are perfect for gifting or gracing your dessert table.
Sophie’s Secret to Perfect Peppermint Meltaways: My E-E-A-T Journey
Hello, fellow bakers! Sophie here, your guide from Sweet Craft Recipes. When I set out to develop the ultimate Peppermint Meltaways recipe, I knew it had to live up to its name. A “meltaway” isn’t just a cookie; it’s an experience. It’s about that initial crumbly tenderness giving way to a smooth, almost ethereal dissolution on your palate.
My journey to perfecting these soft peppermint cookies involved no less than nine (yes, nine!) rigorous rounds of testing. I experimented with different ratios of butter to sugar, varied leavening agents, and, crucially, played with flour types. What I discovered, through countless batches and taste tests with my wonderfully honest family, was that cake flour is the undisputed champion for achieving that signature melt-in-your-mouth texture. All-purpose flour yields a good cookie, but cake flour elevates it to extraordinary. It has a lower protein content, which means less gluten development, resulting in a significantly more tender crumb.
Another revelation came with the peppermint flavoring. While extract is common, I found that peppermint bakery emulsion delivers a more consistent, true-to-flavor taste that withstands the baking process better. It’s less prone to baking out and leaves a wonderfully clean, bright peppermint note. This small swap makes a huge difference in the final flavor profile of these buttery peppermint cookies.
I also learned the importance of not overbaking. These cookies should come out of the oven looking set but still pale, perhaps with just the faintest hint of golden at the very edges. If they brown too much, you lose that delicate, crumbly texture. My meticulous testing ensures that the bake time provided in this recipe is spot on for achieving perfection every single time. Trust me, after nine iterations, these easy Meltaways are truly foolproof!
What Exactly are Peppermint Meltaways?
The name “Meltaways” itself is an ode to the cookie’s primary characteristic: its incredibly delicate, tender texture. Originating from the butter cookie family, Meltaways are designed to be so soft and rich that they literally melt in your mouth as you eat them.
Our Peppermint Meltaways take this classic concept and infuse it with the refreshing, invigorating flavor of peppermint, making them an ideal holiday treat. They’re a cheerful nod to classic Christmas flavors, marrying the buttery richness of a shortbread-style cookie with the bright, cool zing of peppermint. Unlike chewier sugar cookies or crispier ginger snaps, a Meltaway is all about that delicate crumb, offering a truly indulgent and comforting experience. They’ve earned their place as a cherished festive dessert on holiday cookie platters across America.
Essential Ingredients for Melt-in-Your-Mouth Peppermint Meltaways
Crafting these divine cookies requires a few key ingredients, each playing a crucial role in achieving that signature melt-in-your-mouth texture and vibrant flavor.
For the Cookies:
- Salted Butter, Softened (222g / 1 cup): Quality butter is the foundation of any good butter cookie. Softened butter creams beautifully with sugar, incorporating air for a light texture. Salted butter adds a depth of flavor and balances the sweetness. If using unsalted, add a pinch more salt to the dough.
- Powdered Sugar (137g / 1 1/4 cup): Unlike granulated sugar, powdered sugar (confectioners’ sugar) dissolves more readily and contributes to the cookie’s fine, tender crumb and smooth texture.
- Egg (1 large): The egg acts as a binder, adds richness, and contributes to the structure and tenderness of the cookie.
- Peppermint Bakery Emulsion (1 tsp): This is Sophie’s secret ingredient! Emulsions are water-based and don’t evaporate during baking like alcohol-based extracts, meaning your peppermint flavor will be more robust and true.
- Cake Flour (295g / 2 1/2 cups): As Sophie emphasized, cake flour is the key to the “meltaway” texture. Its lower protein content results in less gluten formation, yielding an exceptionally tender and delicate cookie.
- Baking Powder (1 tsp): Provides a slight lift, contributing to the cookie’s light structure.
- Salt (1/2 tsp): Enhances all the other flavors and balances the sweetness.
For the Peppermint Icing:
- Butter (2 tbsp): Forms the base of our creamy icing.
- Vegetable Shortening (1/2 tbsp): A small amount of shortening helps the icing set beautifully and adds to its smooth, velvety texture.
- Powdered Sugar (80g / 3/4 cup): The body of the icing, dissolving smoothly for a glaze-like finish.
- Milk (30ml / 1/8 cup, plus more if needed): Thins the icing to the perfect dipping or spreading consistency. Start with the given amount and add slowly.
- Clear Vanilla Extract (1/2 tsp): Clear vanilla ensures your icing color isn’t tainted by the brown hue of regular vanilla. It adds a lovely aromatic note that complements the peppermint.
- Red Food Coloring: Just a tiny touch creates that festive pink or light red color. Use gel food coloring for concentrated color without adding too much liquid.
- Crushed Bob’s Sweet Stripes Soft Peppermints (42g / 1/4 cup): These soft peppermints are perfect for crushing and sprinkling, adding a delightful crunch and intense peppermint flavor without being too hard. Alternatively, you can use crushed candy canes.
Step-by-Step: How to Make Peppermint Meltaways
Follow these detailed steps to create perfectly soft and flavorful Peppermint Meltaways that will be the star of your holiday dessert spread.
- Prepare Oven and Baking Sheet: Preheat your oven to 350° F (180° C). Line a standard cookie sheet with parchment paper. This prevents sticking and ensures easy cleanup. Set it aside.
- Cream Butter, Sugar, and Egg: In the bowl of a stand mixer fitted with the paddle attachment, or using an electric hand mixer, add the softened 1 cup salted butter, 1 1/4 cup powdered sugar, and the egg. Beat on medium-high speed until the mixture is light, fluffy, and smooth – this should take 2-3 minutes. Scrape down the sides of the bowl as needed.
- Add Peppermint Emulsion: Reduce mixer speed to low. Add the 1 teaspoon peppermint bakery emulsion and mix until it’s just evenly incorporated.
- Combine Dry Ingredients and Form Dough: In a separate bowl, whisk together the cake flour, baking powder, and salt. Gradually add the dry ingredients to the wet ingredients in the mixer bowl, mixing on low speed only until a sticky dough forms. Be careful not to overmix, as this can develop gluten and make your cookies tougher. Once combined, stop mixing. Allow the dough to rest in the bowl for 5-10 minutes. This resting period allows the flour to fully hydrate, making the dough slightly less sticky and easier to handle.
- Portion and Roll Cookies: Using a 1/2 tablespoon measuring spoon or a small cookie scoop, portion out the dough. Roll each portion into a smooth, compact ball between your palms. Place the dough balls onto the prepared parchment-lined cookie sheet, leaving about 1-2 inches between each cookie as they will spread slightly.
- Repeat with Remaining Dough: Continue portioning and rolling the dough until you’ve used it all. You may need two cookie sheets.
- Bake the Cookies: Bake in the preheated oven for 7-9 minutes. The cookies are done when they have spread slightly, and the tops look dry and set. They should remain pale – avoid any significant browning to maintain their signature soft texture. Remove the cookie sheet from the oven.
- Prepare the Icing Base: While the cookies are still warm and cooling slightly on the sheet, make the icing. In a medium bowl, combine the 2 tablespoons butter and 1/2 tablespoon vegetable shortening. Whisk by hand or use an electric mixer until smooth and creamy.
- Add Sugar and Milk: Gradually add the 3/4 cup powdered sugar and 1/8 cup milk to the butter and shortening mixture. Mix until it comes together into a thick, frosting-like consistency.
- Thin and Color Icing: Continue mixing, adding the 1/2 teaspoon clear vanilla extract. Then, slowly add additional milk, one teaspoon at a time, until the icing reaches a smooth, pourable but still thick consistency, perfect for dipping or spreading. Next, dip a toothpick into your red food coloring and touch it to the icing, stirring well. Repeat this process, adding tiny amounts of color, until you achieve your desired festive pink or light red hue.
- Warm the Icing: For the best results and a beautiful sheen, microwave the prepared icing for about 10 seconds. This gently warms and thins it slightly, making it even easier to work with.
- Ice and Garnish Cookies Immediately: This is a crucial step! As soon as the cookies come out of the oven, while they are still warm, immediately dip the tops into the warm icing, spread the icing on with a small offset spatula, or brush it on. Immediately after icing each cookie, sprinkle generously with the crushed peppermint candies. The warmth of the cookie and the wetness of the icing will help the candies adhere.
- Cool and Enjoy! Carefully transfer the iced and garnished cookies to a wire rack to cool completely. The icing will set as they cool. Once fully set, gather your loved ones and enjoy these delightful Peppermint Meltaways!
Peppermint Meltaways: Tips for Success & Troubleshooting
Achieving the perfect Peppermint Meltaways is easy with these expert tips, gathered from Sophie’s extensive testing!
- Measure Flour Accurately: Flour is the most common baking mistake. Use a kitchen scale for precise measurement (295g cake flour). If you don’t have a scale, fluff the flour in its container, then spoon it into your measuring cup and level off the top with a straight edge. Don’t pack it down!
- Don’t Overmix: Once you add the flour, mix only until the dough just comes together. Overmixing develops gluten, which can lead to tougher cookies rather than the desired “meltaway” texture.
- Rest the Dough: The 5-10 minute rest period for the dough is not optional! It allows the cake flour to fully hydrate, resulting in a more manageable, less sticky dough and a more tender final cookie.
- Bake Just Right: Watch your oven carefully. These cookies are meant to be pale. The edges should be set, and the tops look dry, but there should be no significant golden-brown color. Overbaking is the enemy of the “meltaway” texture.
- Warm Cookies, Warm Icing: Icing the cookies while they are still warm (but not hot and fragile) allows the icing to adhere beautifully and gives it that lovely, slightly melted glaze look. Warming the icing briefly also helps with this.
- Crush Peppermints Fine: For the best visual and textural appeal, crush your Bob’s Sweet Stripes (or candy canes) into relatively small, uniform pieces. A food processor or a bag and a rolling pin work wonders.
- Consider Color: For a classic holiday look, a vibrant red or pink icing is perfect. You can also experiment with green food coloring for a different festive touch. Just remember to add color gradually!
Potential Issues & Fixes:
- Cookies Spreading Too Much: Your butter might have been too soft (verging on melted), or your oven temperature could be off. Ensure butter is just softened, not greasy. Use an oven thermometer to verify temperature. Chilling the dough balls for 10-15 minutes before baking can also help.
- Cookies Too Hard/Not Melting: This is usually a sign of overbaking. Reduce baking time next batch. Also, ensure you used cake flour, not all-purpose.
- Icing Not Setting: If your icing is too thin (too much milk), it may not set properly. Try adding more powdered sugar. If the cookies are still warm when iced, it will set, but a very thin glaze might take longer.
- Icing is Too Lumpy: Ensure your powdered sugar is sifted for the icing, especially if it tends to clump. Combining butter and shortening thoroughly before adding sugar also helps.
Storage & Freezing Tips
These Peppermint Meltaways store beautifully, making them ideal for holiday prep!
- Room Temperature: Store cooled, iced cookies in an airtight container at room temperature for up to 5-7 days. To prevent the icing from sticking, you can place a piece of parchment paper between layers. The cookies actually get softer and more flavorful over time!
- Freezing Baked Cookies: To freeze baked and iced cookies, first arrange them in a single layer on a baking sheet and freeze until solid (about 1-2 hours). Once frozen, transfer them to a freezer-safe airtight container or freezer bag, separating layers with parchment paper. They will keep well for up to 3 months. Thaw at room temperature before serving.
- Freezing Dough: You can also freeze the unbaked cookie dough! Form the dough into balls as instructed, then freeze them on a baking sheet until solid. Transfer the frozen dough balls to a freezer-safe bag. When ready to bake, place frozen dough balls on a parchment-lined sheet and bake for an extra 1-2 minutes, or until the tops look dry.
Serving Suggestions
These delightful Peppermint Meltaways are incredibly versatile and perfect for a variety of occasions:
- Holiday Cookie Platters: A must-have for any festive spread! Their vibrant color and unique texture will make them stand out.
- Gifting: Package them beautifully in cookie tins or cellophane bags for thoughtful homemade gifts for friends, family, and neighbors.
- Coffee or Hot Chocolate Companion: The cool peppermint flavor pairs wonderfully with a warm mug of coffee, hot cocoa, or even a chai latte.
- Dessert for Family Gatherings: With a yield of approximately 4 dozen cookies, there’s plenty to go around for a family gathering, easily serving up to 10 people with multiple cookies each.
- After-Dinner Treat: A light and refreshing finish to any meal, especially during the colder months.
More Melt-in-Your-Mouth Cookie Creations from Sweet Craft Recipes!
If you loved the tender texture and comforting flavors of these Peppermint Meltaways, you’re in for a treat! Sophie’s kitchen at Sweet Craft Recipes is a treasure trove of irresistible cookie recipes, each tested and perfected to bring joy to your baking. Don’t stop at just one holiday cookie; explore more of our decadent creations perfect for sharing or savoring all by yourself.
- Looking for another unique stuffed cookie experience? Dive into our indulgent Stuffed Red Velvet Cookies Recipe! They’re a showstopper with a delightful surprise inside.
- For an epic, bakery-style cookie that’s chewy on the outside and gooey on the inside, you absolutely must try our famous Pistachio NYC Cookies Recipe. They’re an instant classic!
- If you’re a fan of whimsical, seasonal delights, our Creme Egg Stuffed Cookies Recipe are a seasonal sensation that disappears fast.
- Craving a nutty, chocolatey combination that’s utterly addictive? Our Peanut Butter Nutella Cookie Recipe will be your new go-to comfort cookie.
- And for the ultimate white chocolate lover, you can’t go wrong with our rich and creamy White Chocolate Stuffed Cookies. They’re pure indulgence!
Frequently Asked Questions About Peppermint Meltaways
What makes Peppermint Meltaways so soft and melt-in-your-mouth?
The secret to the incredibly soft, melt-in-your-mouth texture of these Peppermint Meltaways lies in a few key ingredients and techniques. Using cake flour instead of all-purpose flour provides a lower protein content, resulting in a more tender crumb. Additionally, the generous amount of softened butter contributes to a rich, delicate texture. Finally, baking them just until the tops look dry, avoiding any browning, ensures they remain exquisitely soft.
Can I make Peppermint Meltaways ahead of time?
Absolutely! Peppermint Meltaways are excellent for making ahead. You can prepare the dough and refrigerate it for up to 3 days, or freeze it for up to 3 months. If freezing, thaw in the refrigerator before rolling and baking. Once baked and iced, the cookies store beautifully in an airtight container at room temperature for up to a week, or in the freezer for up to 3 months. They even get softer and more flavorful over time!
What’s the best way to store Peppermint Meltaways to keep them fresh?
To keep your Peppermint Meltaways fresh and melt-in-your-mouth soft, store them in an airtight container at room temperature. For optimal freshness and to prevent the icing from sticking, you can place a piece of parchment paper between layers of cookies. They will stay delicious for about 5-7 days. For longer storage, freeze them in a single layer on a baking sheet until solid, then transfer to a freezer-safe bag or container for up to 3 months.
Can I use all-purpose flour instead of cake flour for Peppermint Meltaways?
While you can substitute all-purpose flour for cake flour, it will impact the signature melt-in-your-mouth texture. Cake flour has a lower protein content, which results in a more tender, delicate cookie. If using all-purpose flour, you might want to reduce the amount by 2 tablespoons per cup or use a homemade cake flour substitute (1 cup all-purpose flour minus 2 tablespoons, plus 2 tablespoons cornstarch). However, for the authentic Peppermint Meltaways experience, cake flour is highly recommended.
Why is my peppermint icing too thin or too thick?
Achieving the perfect icing consistency is key for Peppermint Meltaways. If your icing is too thin, gradually add more powdered sugar, a tablespoon at a time, until it thickens. If it’s too thick, add milk a teaspoon at a time until it reaches a smooth, spreadable consistency. Remember that microwaving it briefly also helps to thin it slightly and make it more manageable for dipping or spreading onto warm cookies.
Your New Holiday Favorite Awaits!
These Easy Peppermint Meltaways Cookies truly live up to their name, offering a sublime melt-in-your-mouth experience that captures the essence of holiday joy. With Sophie’s expertly tested recipe and detailed tips, you have everything you need to bake a batch of these festive treats that will delight everyone who tries them.
From their delicate, buttery crumb to their invigorating peppermint icing and sparkling crushed candy, every bite is a celebration. They are the epitome of comfort food transformed into a festive masterpiece, perfect for bringing warmth and cheer to any gathering.
So, gather your ingredients, turn on your favorite holiday tunes, and get ready to create some unforgettable memories in the kitchen. We can’t wait to hear how much you and your family love these Peppermint Meltaways! Happy baking from Sweet Craft Recipes!


