There’s something magical about pulling a pan of golden, jammy strawberry crumb bars from the oven. The buttery aroma fills your kitchen, the ruby-red jam bubbles through the crumbly topping, and you know you’ve created something special.
I’m Sofie, and I’ve tested this strawberry crumb bars recipe over nine times to get it absolutely perfect. What started as a quest to recreate my favorite bakery treat turned into an obsession with finding the ideal balance between buttery shortbread, sweet-tart jam, and that irresistible crumb topping. The secret? Freeze-dried strawberries in the crumb add an intense burst of natural strawberry flavor that elevates these bars from good to unforgettable.
These strawberry crumb bars are my go-to dessert for family gatherings, potlucks, and whenever I need to feed a crowd of 10 or more. They’re easier than pie, more impressive than cookies, and disappear faster than brownies. Plus, they can be prepped ahead and stored in the fridge for up to 5 days, making them perfect for busy home cooks who love serving homemade desserts without last-minute stress.
Why This Strawberry Crumb Bars Recipe Works
After testing this recipe nine times, I discovered the elements that make these bars absolutely foolproof. The shortbread base uses powdered sugar instead of granulated, creating a tender, melt-in-your-mouth texture that holds up beautifully under the jammy filling.
The game-changer is the freeze-dried strawberries in the crumb topping. I tried versions with fresh strawberries (too wet), regular dried strawberries (too chewy), and no strawberries at all (too boring). Freeze-dried strawberries add concentrated strawberry flavor and a beautiful pink color without adding moisture that would make the topping soggy.
The technique of partially melting the butter for the crumb creates those perfect clumps everyone loves. I learned this the hard way after making crumb toppings that were either too uniform and sandy or completely melted into the jam. The partial melt gives you variety: some larger clumps for texture and smaller crumbles that get beautifully golden.
Covering the bars with foil during baking was attempt number five’s breakthrough. Without it, the crumb topping browns too quickly before the jam has time to bubble and set. The foil creates the perfect environment for even baking, and removing it for the final 10 minutes gives you that golden, crispy top layer.
What Makes These Bars Perfect for Every Occasion
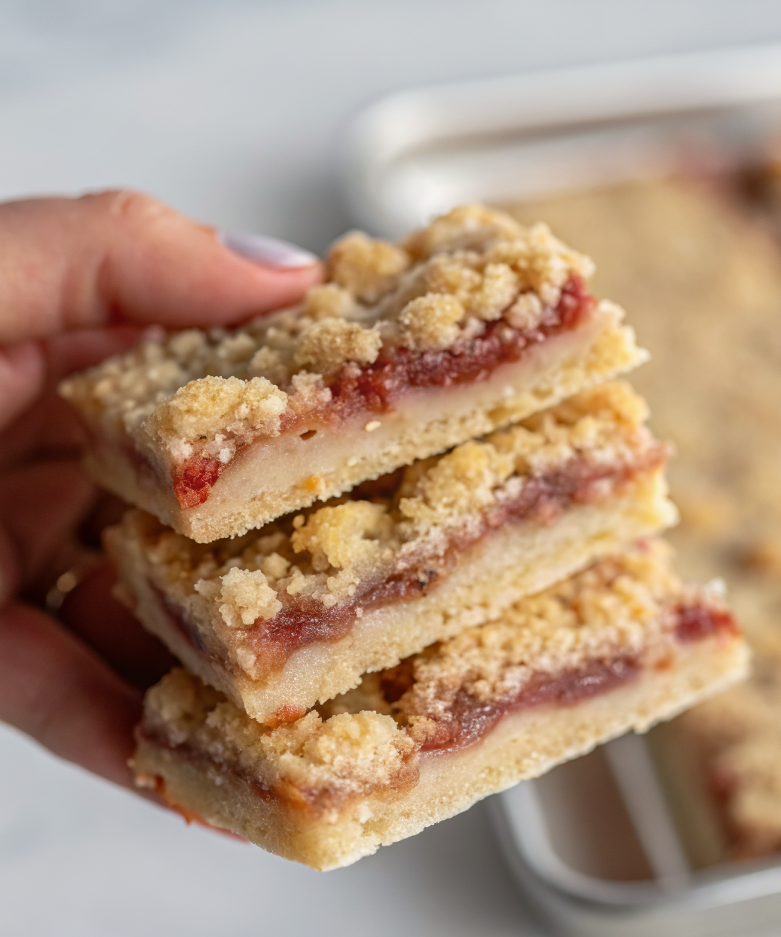
These strawberry crumb bars check every box for comfort-food desserts. They have the nostalgic appeal of homemade cookies and brownies but feel more special and bakery-worthy. The three-layer structure makes them visually impressive when you slice into them, revealing the buttery base, vibrant jam center, and textured crumb top.
They’re incredibly versatile for different gatherings. Cut them into 16 squares for casual family dinners, or slice them into smaller rectangles for elegant dessert platters at parties. They travel well, hold their shape beautifully, and taste even better the next day after the flavors have melded together in the fridge.
The make-ahead friendly nature of this recipe is perfect for busy home cooks. You can prep the shortbread base and crumb topping the day before, store them separately in the fridge, and assemble and bake on the day you need them. Or bake them completely and store them in an airtight container for up to 5 days.
Essential Ingredients for Strawberry Crumb Bars
The quality of your ingredients directly impacts the final result. Here’s what you need and why each component matters.
Shortbread Base Ingredients
Unsalted butter (10 tablespoons/141g): Room temperature butter is crucial. I made the mistake of using cold butter in test two, and it never fully incorporated, leaving hard butter chunks in the base. Let it sit on your counter for 30-45 minutes until it’s soft enough to leave a fingerprint.
Powdered sugar (5 tablespoons/38g): This creates a more tender, delicate texture than granulated sugar. The cornstarch in powdered sugar also helps prevent the shortbread from spreading too much during baking.
All-purpose flour (1 1/4 cup/150g): I use standard all-purpose flour. Cake flour would be too delicate, and bread flour would make the base too tough.
Salt (1/4 teaspoon): Never skip the salt! It balances the sweetness and enhances all the other flavors.
Crumb Topping Ingredients
Unsalted butter (4 tablespoons/57g): This needs to be partially melted, which I’ll explain in detail in the instructions. Room temperature butter won’t create the right clumps.
Freeze-dried strawberries (5 large pieces/5g): These are typically found in the dried fruit section or near the granola at grocery stores. Brands like Trader Joe’s, Target’s Good & Gather, and various organic brands all work perfectly.
Granulated sugar (1/3 cup/64g): Granulated sugar in the crumb creates better texture than powdered sugar, giving you crispy bits that contrast beautifully with the soft jam.
All-purpose flour (3/4 cup/90g): This binds the crumb together and helps it hold its shape during baking.
Filling Ingredients
Strawberry jam (3/4 cup/240g): Use a good quality jam, but it doesn’t need to be fancy preserves. I’ve tested this with both store-brand and artisan jams, and the difference is minimal once baked. The jam should be spreadable at room temperature.
Step-by-Step Instructions for Perfect Strawberry Crumb Bars
Making the Shortbread Base
Start by mixing your 10 tablespoons (141g) of room temperature unsalted butter with the powdered sugar in a large bowl. Use a wooden spoon or spatula and work them together until the mixture is completely smooth with no remaining streaks of butter visible. This takes about 2-3 minutes of vigorous mixing.
Add your flour and salt to the butter mixture. Now here’s where it looks wrong before it looks right: the mixture will be extremely dry and crumbly at first. Keep mixing! After about 3-4 minutes of continued mixing and pressing the dough together with your spoon, it will suddenly start forming a cohesive dough. You can use a stand mixer with a paddle attachment if you prefer, but I’ve found a bowl and spoon gives you better control.
Line your 9×9 inch baking pan with parchment paper. I like to leave an overhang on two sides so I can easily lift the bars out after baking. This isn’t required but makes cutting and serving much cleaner.
Transfer your shortbread dough to the prepared pan. Use your hands to press it down evenly across the bottom. Then grab a flat tool like a measuring cup or the bottom of a glass to smooth and compress the surface. You want it evenly thick across the entire pan with no thin spots that might burn.
Place the pan uncovered into the fridge to chill for up to an hour. This step is important because it prevents the shortbread from puffing up too much during its initial bake and creates a sturdier base for the jam.
Preparing the Crumb Topping
While your base chills, make the crumb topping. Start by partially melting your 4 tablespoons (57g) of butter. I do this in the microwave in 10-second intervals. After 20-30 seconds total, about half of my butter is melted and the other half is very soft. Set this aside to cool slightly.
Crush your freeze-dried strawberries into a powder. I use a plastic bag and a rolling pin or the bottom of a heavy pan. You can also use a food processor, but pulse carefully as these crush quickly. You want a fine powder with maybe a few small chunks for texture.
In a separate bowl, combine your crushed freeze-dried strawberries, granulated sugar, flour, and pinch of salt. Mix these dry ingredients together first so the strawberry powder distributes evenly.
Pour your partially melted butter into the dry ingredients. Use a spatula or spoon to mix until clumps begin to form. You’ll notice some larger clumps forming alongside smaller, sandier crumbs. This variation is exactly what you want! The larger clumps stay on top and get crispy, while the smaller crumbs fill in gaps and create texture.
Place your crumb topping into the fridge to chill while you move to the next step. This keeps the butter from melting too quickly during assembly.
Assembling and Baking Your Bars
Preheat your oven to 350°F (175°C). This temperature is perfect for baking the shortbread without darkening it too quickly.
Once your oven is preheated, take your pan with the chilled shortbread base and bake it for 20 minutes or until it’s lightly golden across the top. You’re not fully baking it at this stage, just setting it so it can support the jam without getting soggy.
While the base bakes, measure out your 3/4 cup (240g) of strawberry jam and stir it well in a bowl. This makes it more spreadable and easier to work with. If your jam is particularly thick, you can warm it in the microwave for 10-15 seconds.
When your shortbread base comes out of the oven, work quickly but carefully. Scoop the jam onto the hot base and use the back of a spoon or an offset spatula to spread it evenly across the surface. Move slowly and gently; the jam will become more spreadable as you work with it. Don’t worry if it’s not perfect—the crumb topping will cover any imperfections.
Take your chilled crumb topping from the fridge. Carefully distribute it over the jam layer. I like to press some of the larger clumps together in my hands before gently placing them on the jam. This creates those bakery-style large crumb pieces. Distribute the smaller crumbs to fill in any gaps.
Cover your bars loosely with aluminum foil, leaving openings on two sides for steam to escape. This covering is crucial for preventing over-browning while allowing the jam to bubble and set properly.
Place the pan back into the oven for 30 minutes. After 20 minutes, remove the foil covering for the last 10 minutes of baking. Your bars are done when the jam is bubbling around the edges and through some of the crumbs. Watch carefully during these final minutes to prevent the crumb topping from getting too dark. If you’re worried about browning, you can always re-cover with foil.
Cooling and Storing
This is the hardest part: waiting! Allow your bars to cool in the pan for at least one hour, but preferably two hours. The jam needs this time to set properly. If you try to cut them too early, the jam will be liquid and the bars will fall apart.
For the cleanest cuts, refrigerate the completely cooled bars for another 2 hours or overnight. The jam firms up beautifully when chilled, making slicing much easier. Use a sharp knife and wipe it clean between cuts for professional-looking bars.
These strawberry crumb bars stay fresh in an airtight container in the fridge for at least 5 days. The flavors actually improve after a day or two as everything melds together. You can also freeze them by wrapping individual bars in plastic wrap, placing them in an airtight container, and freezing for up to 3 months.
Expert Tips from Nine Rounds of Testing
Don’t skimp on the chilling time. My third attempt skipped the initial base chill, and the shortbread puffed up during the first bake, creating an uneven surface for the jam.
Partially melting the butter for the crumb is non-negotiable. Fully melted butter makes the topping disappear into the jam. Room temperature butter doesn’t create proper clumps. The partial melt is the sweet spot.
Use a light hand when spreading the jam. If you press too hard, you’ll disturb the partially baked shortbread base. Let the jam do most of the work.
The foil covering prevents disaster. Without it, your crumb topping will be dark brown or even burned before the center is done. Trust the process and keep it covered for most of the baking time.
Let them fully cool before cutting. I know it’s tempting, but warm bars will be messy and fall apart. Patience pays off with clean, beautiful squares.
Store them in the fridge, not on the counter. Room temperature storage can make the shortbread base soft and the jam too loose. The fridge keeps everything at the perfect texture.
Variations and Customization Ideas
While this recipe is perfect as written, here are some variations I’ve experimented with successfully.
Different jam flavors: Raspberry, blackberry, or mixed berry jam all work beautifully. Apricot creates a more sophisticated flavor profile. Just make sure whatever jam you choose is thick enough to stay in place.
Add lemon zest: Grate 1 teaspoon of lemon zest into the shortbread base for a bright, citrusy note that complements the strawberries perfectly.
Almond extract: Add 1/4 teaspoon of almond extract to the shortbread for a subtle nutty flavor that pairs wonderfully with strawberries.
Glaze topping: Drizzle cooled bars with a simple powdered sugar and milk glaze for an extra sweet touch perfect for special occasions.
Fresh strawberry addition: Dice 1/2 cup of fresh strawberries and mix them into your jam before spreading for extra fruit chunks and texture.
Frequently Asked Questions About Strawberry Crumb Bars
Can I use salted butter instead of unsalted? You can, but I recommend reducing or omitting the added salt in the recipe. Unsalted butter gives you better control over the final saltiness, which is especially important in sweet baked goods.
Why do I need to partially bake the shortbread base first? Partially baking the base sets it so it can support the heavy jam layer without getting soggy. If you add the jam to unbaked dough, the moisture seeps in and creates a gummy, undercooked bottom layer.
Can I make these bars gluten-free? Yes! I’ve successfully tested this recipe with a 1:1 gluten-free baking flour blend. The texture is slightly more delicate, so handle the bars gently when cutting. Make sure your blend contains xanthan gum for the best structure.
What if I don’t have freeze-dried strawberries? The freeze-dried strawberries add amazing flavor, but you can omit them if necessary. Your crumb topping will be plain but still delicious. Don’t substitute fresh or regular dried strawberries as they’ll add too much moisture.
How do I know when the bars are done baking? Look for bubbling jam around the edges and through some gaps in the crumb. The crumb should be light golden brown. If you insert a toothpick through the center, it should come out with thick jam but no liquid.
Can I double this recipe? Absolutely! Use a 9×13 inch pan and increase the baking time slightly. Start checking at 35 minutes for the final bake (after adding the jam and crumb).
Why are my bars falling apart when I cut them? This usually means they weren’t cooled long enough. The jam needs time to set properly. Try refrigerating them for 2 hours before cutting, and make sure you’re using a sharp, clean knife.
Serving Suggestions and Pairings
These strawberry crumb bars are incredibly versatile for different serving occasions. For casual family gatherings, cut them into 16 generous squares and serve them on a simple platter. They’re perfect finger food that requires no plates or forks.
For more formal events, cut them into smaller rectangles or even triangular shapes for visual interest. Dust them lightly with powdered sugar just before serving for an elegant bakery-style presentation.
They pair beautifully with vanilla ice cream or fresh whipped cream for a more substantial dessert. The cold, creamy element contrasts wonderfully with the jammy, buttery bars.
For brunch gatherings, serve them alongside coffee and tea. They’re sweet enough to satisfy dessert cravings but not so heavy that they feel out of place at a morning meal.
Kids absolutely love these bars, making them perfect for school events, birthday parties, or after-school snacks. The recognizable strawberry flavor appeals to even picky eaters.
The Perfect Make-Ahead Dessert
One of my favorite things about this recipe is how well it works with a make-ahead schedule. You can prepare the shortbread base and crumb topping up to two days in advance, store them separately in the fridge, and assemble and bake when needed.
For the ultimate convenience, bake the bars completely, let them cool, cut them, and store them in the fridge. They actually taste better on day two and three as the flavors develop and meld together. This makes them perfect for holiday meal planning when oven space and time are precious.
They also freeze exceptionally well. I often make a double batch, cut them, and freeze half for future gatherings. Thaw them in the fridge overnight or at room temperature for about an hour before serving.
Why These Bars Will Become Your Go-To Dessert
After making these strawberry crumb bars nine times, I can confidently say they’ve earned their place as my most-requested dessert. They hit that perfect sweet spot between impressive and approachable, complicated-looking and actually easy to make.
The three distinct layers create visual appeal that makes them look bakery-bought, but the simple ingredient list and straightforward technique mean they’re accessible for home cooks of all skill levels. There’s no temperamental dough, no rolling pins required, and no fancy equipment needed.
They satisfy the comfort-food craving that draws us to cookies and brownies but feel more special and share-worthy. Every time I bring these to a gathering, people ask for the recipe, convinced they must be difficult to make. The truth? They’re one of the easiest desserts in my repertoire.
The real magic happens when you slice into them and reveal those three beautiful layers: the tender, buttery shortbread, the vibrant ruby jam, and that perfectly textured crumb topping with its mix of golden clumps and crispy bits. That first bite delivers everything you want in a dessert: buttery richness, sweet-tart fruit, and satisfying texture.
Make a batch this weekend, and I promise these strawberry crumb bars will become your new favorite way to feed a crowd, celebrate an occasion, or simply treat yourself to something delicious. After nine rounds of testing and countless happy taste testers, I can guarantee they’re absolutely worth the minimal effort and short ingredient list.
Store them in your fridge, freeze some for later, or watch them disappear within hours of setting out the platter. However you enjoy them, these strawberry crumb bars represent everything I love about home baking: simple ingredients transformed into something truly special through technique, care, and just a little bit of kitchen magic.


